TARDIS Key - Non Canon

EKF5

Active Member
Several threads have been devoted to providing a definitive catalog of keys to the TARDIS. After reading them and going back to some of them an extra time or two I decided that I needed to have a TARDIS key. I like the fan keys much more than the standard keys and thought I'd make one.

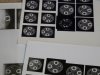
I looked at the great reference photos in the threads and decided that I don't like the Rassilon seal as much as I like the new Time Lord seal so I decided to make a fan key with the Time Lord Seal (drawn by Peter McKinstry) in place of Rassilon's. This is the coaster with the seal on it made by Rubbertoe Replicas. That's the design that will go in place of the seal of Rassilon.

Time Lord Seal Coaster.jpg


I'm far enough along with this that it's a project instead of a wish and over the next day or two I'll post some pictures of my design, approach, and progress.
 
When I started the project I had a major problem, my lack of skills. I wanted to make the key in brass. I built models as a kid (plastic and 1 balsa) and painted miniature figures for role-playing later, but I've never done anything with brass. The closest I've come to working with metal on a project like this was cutting the downspout with the Dremel to add a rain barrel for my wife.
To make life a bit harder I picked a deadline before I tested my skills. I want the key to be ready next week on Thursday for the World Science Fiction convention, in London. I plan to wear it on a chain so folks can see it.
I did some research into how I could put the design on the key and came up with three likely ones. I could engrave it freehand (you should all laugh with me here), trace the engraving with a pantograph, or etch it. Here's my first fail.
Pantograph fail.jpg
I tried the pantograph and learned a few things. The first was I should actually start in the middle like the directions say if I want a circle to be a circle. The second was that the wood I was using as a middle stage for stepping down the size from my sample (the coaster) to something close to the key wouldn't hold the pattern without tearing out. I am absolutely sure that if I practiced more I could solve this, but I wasn't satisfied with my tracing skills so I decided to investigate etching instead.
A bit of web searching turns up more than enough ways to do this. The least expensive was to print a mask onto inkjet photo paper using a laser printer and then iron it onto the metal. I created and printed a set of masks like a contact sheet to make sure I got some good samples.
I tried to transfer one but got a terrible transfer so then I looked for a different etching approach.
 

Attachments

  • Laser printer masks.jpg
    Laser printer masks.jpg
    255.7 KB · Views: 93
After my tests of my limited skills and the approaches to etching I decided to buy a full photoresist etching kit. The splurge meant that I'd have everything I needed when it was time to make the key and I'd only have to learn to use the included tools (i.e. not have to learn what wasn't clear to me in someone's on-line instructions).

So the next step was to create the design. Paul Musselman (PaulMmn) helped a lot without even knowing it. On another thread he posted a breakout of the layers of the key which gave me an idea of how to draw it. Below is what I came up with.
The design.jpg
 
Starting with that design I refined it a bit. I did the drawing in paint.net and used a resolution of 1200 dpi for the picture so I'd get smooth lines in the printout. I have a really jaggy image from my first attempt when I forgot to raise the resolution enough. The black areas are where the etching is planned.
Final design.jpg


After I finished the design, I sized it to print at 2 13/16" long, cut out both pieces and taped them together as a mockup. Here that is on brass.Mockup on Brass.jpg

I thought the mockup looked good so I went to print on the master. That required making a transparency that could be used to add the image to the photoresist.

Positives for exposure.jpg
 
Last edited:
Getting the photoresist onto the brass requires a number of steps in dim light (a 100 watt bulb is enough to expose the resist). Clean the brass. Then polish the brass really smooth(the kit comes with a 3200 grit pad). Then when the brass is smooth enough that water will sheet on it instead of bead, adhere the photoresist by laying it smoothly and rubbing out all the bubbles. Then you put the brass between some protective sheets and run it through a laminator to fully adhere the photoresist to the brass. The first time didn't come out so well so I had to scrape it off and try again.
Scraping bad lamination.jpg

The next time worked much better. I got the photoresist on, put it together with the master and exposed it to noonday sun. I brought it inside and developed it in the Sodium Hydroxide solution provided with the kit (very caustic - goggles, gloves, apron, lots of care) and ended up with the image ready to etch.

Front ready for etch.jpgBack ready for etch.jpg
 
Cool project. I have designed my own TARDIS key as well. I 3D modeled mine in SolidWorks and had it 3D printed in stainless steel. It came out really well. I look forward to seeing your finished key!!
 
The kit I bought came with a chemical etching solution. During my research I saw a lot of information about electrolytic etching. I decided to try that first to avoid the noxious chemicals, the contact risks, and the disposal headaches. Following some directions I found on a few posts on other project sites I prepared a salt water solution (distilled H2O plus Kosher salt - no iodine). I made a hanger for the brass and I made a huge cathode out of a couple of bolts wound with copper wire. For a power source I used an inexpensive car battery charger. While no one suggested there would be any problems doing this indoors, it still seemed like a good thing to keep outside.
Prepping the etch tank.jpg

Once I had everything in the tank I hooked up the power on 6 volts and the cathode began to bubble.

Just started the etch.jpg

After it was going for a while Macbeth came to mind. Hmm. This was only about 10 minutes of etching and you can see a lot of brass has moved into solution. My wife noticed and pointed out to me the green layer at the bottom. I don't know enough chemistry (and have long forgotten almost all I learned back in Chem 101 & 102) to know if the brass was being broken apart into copper and zinc with the copper oxidizing green or if brass also can oxidize green. Either way the layers looked cool while the pot boiled. Anyone who knows the answer, please post.
Etching away.jpg
 
After running the etch for about 20 minutes I cut the power and checked the progress. I didn't think it was deep enough. I ended up putting it in for about 45 minutes a side.

Is that deep enough.jpg

This is what they looked like when I stopped etching. I had thoughts about leaving them in a bit longer but you can see that the photoresist had started to breakdown in places. The black on the photo of the back is nail polish that I added earlier to patch some holes that were forming in the mask. One unexpected outcome was that the nail polish wouldn't come off with acetone after being in the etch tank. There was a fair amount of heat generated and I'm guessing the polish cooked a bit and hardened. It came off easily with gentle scraping. The rest of the mask required going back into the Sodium Hydroxide solution.

Quitting time front.jpgQuitting time back.jpg
This is what it looked like after I got all the mask off. Yesterday and today I've been working on cutting the key free from the rest of the brass. So far cutting it cleanly has been harder than the rest of the project to this point, mostly due to my lack of practice with using the tools this way.

The Back.jpgThe Front.jpg
 
Before I did the cuts on the project piece I did some practice on some extra brass. I glued a paper template to the brass to give me something to work against. The practice helped me decide what I would and wouldn't try with which tool. After that bit of testing I jumped in on the real piece. Because of the testing I started by drilling out the hole. If I hadn't done the test I would have completely glossed over how little material I'd have had to hold the key down after cutting it out.

Cutting test.jpgCutting.jpg

I did most of the cutting with a Dremel. The Rockwell's foot was scratching the brass even with tape on the underside. I got close to the lines but left myself plenty of margin. I switched to a grinding wheel and then to a sanding wheel to finish the cuts. After consulting with my wife I left the outer line visible. After consulting with my skills, I left a bit more than that. I had originally planned to either etch or grind the fans to create the separate depths. By this point I didn't feel comfortable in making that happen with any quality so I decided to engrave the fan with texture to create a better visual separation.

First cut.jpgCleaned up with engraving.jpg

Once I had finished the prep as far as I was willing to go I gave the piece a brief polish and then painted the Time Lord seal to make it pop. Below is the finished TARDIS Key.

Finished front.jpgFinished back.jpg

All in all I feel pretty good about the piece. It's not quite what I had planned. However, since every technique I used was a first attempt I think it was a success. I may try it again to see if I really learned what I think I learned.

Thanks for reading. If you have any questions or suggestions feel free to contact me.
 
At the Worldcon I got a modest amount of very positive feedback on the key. Someone put a TARDIS (note the Tom Baker scarf visible through the window) in the common area so I couldn't resist posing for a picture. I thought about photoshopping the keyhole to make it more appropriate but . . .

At the TARDIS.jpg

During the con there was a quick build of a TARDIS. The team went from plans to a TARDIS in 3 days.

If any of you were there, I'm sorry I missed you.
 
This thread is more than 9 years old.

Your message may be considered spam for the following reasons:

  1. This thread hasn't been active in some time. A new post in this thread might not contribute constructively to this discussion after so long.
If you wish to reply despite these issues, check the box below before replying.
Be aware that malicious compliance may result in more severe penalties.
Back
Top