4' (AKA 5 foot) Falcon build

Whether anybody sees it or not, it's the key to a successful build.
I was just reading you post on my phone as I walked the dog around the neighborhood this evening and saw this, had to take a screenshot and share...

I thought it summed it up pretty well.

IMG_7104s.png
 
I love it when a manufacture screws up the job you've given them, then they try to tell you to change your designs to accommodate their screw up.

I sent my mandible CAD drawings to a local plastic shop for laser cutting. Instead of 1 each of the port and starboard I sent them, I received 2 ports. The guy doing the cutting said he couldn't tell the difference so I should just flip one set for the starboard.

I don't know, the lack of attention to detail for manufacturing places today is astonishing. It's only 3mm acrylic, I may end up just buying my own laser cutter off of Amazon and doing the work myself.
 
Last edited:
I love it when a manufacture screws up the job you've given them, then they try to tell you to change your designs to accommodate their screw up.

I sent my mandible CAD drawings to a local plastic shop for laser cutting. Instead of 1 each of the port and starboard I sent them, I received 2 ports. The guy doing the cutting said he couldn't tell the difference so I should just flip one set for the starboard.

I don't know, the lack of attention to detail for manufacturing places today is astonishing. It's only 3mm acrylic, I may end up just buying my own laser cutter off of Amazon and doing the work myself.
True that; you'll have to shop around to find the right people with the right machine/skills to pull it off. The problem with this (it has happened to me a few times in the past) is that it might get costly to have wrong pieces/details that you'll have to pay for in the end:(:mad:
 
No, I don't pay for work that wasn't done correctly. Cutting the mandibles was only a $100 job, so not the end of the world, but I still didn't pay for it. And now I know not to use them again. I may end up just buying my own cutter. I'm sure I can find other things to use it for once it's in the shop.
 
I was finally able to purchase a couple of meters of Koolshade. More than I need for the Falcon, but I know I'll use it for other things. But man, buying that stuff is like pulling teeth. Smartlouvre really doesn't seem to want to sell it. When I contacted them I asked for a quote on 2m^2 of material they wouldn't even send me a price. They kept asking me how many panels I wanted, and if I could send them drawings so they could advise on installation, and what environments it will be used in, and a bunch of other things that had nothing to do with my original request. I kept saying "No, I just want to purchase 2 meters square of the material. How much is that?" After two weeks :oops: of back and forth I finally got a salesman that would give me an invoice for what I wanted. But they don't take any form of payment other than wire transfer, so that was another pain in the arse.

I should have purchased the whole roll and become the North American distribution to modellers. At least I accept paypal.
 
Last edited:
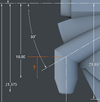
This dimension shown in red, from the base of the cone to the point at which the tunnel angles 60 degrees, is that a known dimension? I am basing my hull build off of these the blueprints, but as I'm missing the starboard view, I don't think I have all the dimensions. Still, this should be shown on the plane view but I don't see enough information there to determine it from other lengths.

If I measure the Bandai kit, I get a calculated length of 5.61" from the base of the cone, but that doesn't line up with these drawings.

thanks

1699549954800.png
1699549954800.png
 
Last edited:
Yes I know about the tube diameter, I've already corrected it on the drawing. Regardless, these are the only drawings that seem to be publicly available. Or at least, the most recent ones I could find on this site. If you're aware of where I can find the more up to date / more accurate editions of these drawings, please let me know. thanks
 
Last edited:
Yeah, as alluring as they are, far as I'm aware, there are no updates to these drawings. Both Andre's and Joshua's thread has a lot exposition on how they came to be. And Joshua's blog.

jcoffman99's ID thread has an up-scaled Bandai PG decal placement drawing that is an excellent reference for overall geometry.
That said some have found the location of panel lines (armor plating) to be out in some places, so fair warning on that too.

Sean's and Stuart's build threads also give many clues.

Hence, combination of photos and the PG model and donor kit parts will ultimately get you there.

Loving your start of build BTW!
 
Last edited:
The first two of four interior hull ribs have been printed. 0.4mm layer height and a 0.6mm nozzle. They wouldn't hold up to someone standing on them, but once in the rest of the frame, and given the small amount of weight being distributed, they should work perfectly well. I would like to get better adhesion between layers though.

3D Printing, either FDM or resin, has really improved and revolutionized the hobby, but it's a long way from being ready for general public consumption. They are soooooo finicky, with so many settings that need tweaking to get a successful print. A difference of 0.1 to 0.2 can be the difference between a good print and 15 hours (and $30 worth of filament) wasted.

IMG_3769.jpg


Also, as I'm getting more of my donor kits arriving, I'm realizing I need to resist the temptation to just build them as per instructions. I'm not one for racing cars, but some of these big car kits are really cool. And that big Hummel would be great. I may just cast the parts I need, not use any of the kit plastics, then just build the model.
 
Last edited:
My take on the gun platform plating. I'm not sure it's 100% correct, maybe 98%. My references are pretty limited at this point, so most of this comes from digitally tracing over the Bandai parts, with some referencing the few suitable online images I can find.

The illustrator files are here: (gun_platform_plates.zip) if someone wants to take a crack at improving them. They're designed to be used on my digital cutter, but they will work for manual cutting as well.

gun_platform_plates.png
 
Given that everything else seems to be mostly documented, I'm wondering if anyone knows the size/brand of the muffin fans that were used under the engineering deck?

You can sort of see them in a few images, but nothing really clear (they're hidden by the koolshade).
 
I've finally received my order of KoolShade. I had to purchase a minimum quantity so I have lots (I mean, really, a lot) of it now. It's not exactly the same as the stuff ILM used as the pitch is about 16 or 17 vanes per inch while the ILM stuff I believe was 24 per inch. I'm not really sure how noticeable the difference is though as I don't have any of the 70s era stuff to do a direct compare.

IMG_3774.jpg
 
There's a post in this thread that covers some of the trials and tribulations of buying this stuff, but I had to buy 2m^2 and the total cost (after shipping and duties) was a bit shy of $900 CAD.

I have so much here that I may end up just selling squares of it to individuals that don't want to go through all that hassle and expense. I'm not sure how much interest there is for that given it's not the vintage product.
 
An update on the interior frame structure. I've adjusted a few things here and there. Replaced the single rear rib with two that will hold the fan mounting plate. I need to get dimensions for the fans before I can model those and place them. I've also broken this down into printable chunks. It's funny how no 3D Printer seems to ever be big enough. Everything you see will go under the domes (and engineering deck), so once covered, you won't see it again. I wouldn't want to stand on this, but it will hold the model weight just perfectly fine.


1700704560615.png
 
Back
Top