Jonnyboy0121
New Member
Hi all,
I've been working on a suit of custom sized 3d printable First Order Stormtrooper armor. I derived the model from ripped game model file posted here on the RPF.
I've been doing a lot of work on the geometry to get it smooth and printable, and also breaking it apart to fit in my 3d printer's build volume. Here is the original post:
http://www.therpf.com/showthread.php?t=242693

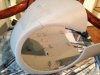
What do you think of the fit?")


The 3d printing, bondoing and sanding of the printed pieces is pretty straight forward for me. I have a couple of questions about specifically molding the 3d printed armor.
I printed the pieces fairly thin (1/4 inch) to save material and for it to print quicker - but should I have made it thicker so I could slush cast it thicker?

I'm thinking maybe if I just modeled in a return edge or lip all along the armor edges I would still save on material but have more of a lip for my mold. So something like this:

So to sum it up, if I want the armor to be a certain thickness when cast, do I need to make sure my printed armor is that thick as well?
Has anyone tried casting the back yoke in one piece? From what I understand, the Anovos suits separates into two parts with an adjoining strip of plastic. Then you bondo and sand down the seam. I heard this causes a lot of cracks. I was wondering if I could kind of slush cast the back piece in one go, sort of overlapping the plastic as it's curing. Something like below, where each different color represents a new batch of plastic I work in and then let mostly dry before moving onto the next section.

And finally, I have seen other prop makers use 3d prints for vacuu-forming. How do you derive a forming buck from a 3d print? I've considered vacuuforming pieces but I assume any ABS printed parts would deform in a vaccuform table as well.
I appreciate any advice!
I've been working on a suit of custom sized 3d printable First Order Stormtrooper armor. I derived the model from ripped game model file posted here on the RPF.
I've been doing a lot of work on the geometry to get it smooth and printable, and also breaking it apart to fit in my 3d printer's build volume. Here is the original post:
http://www.therpf.com/showthread.php?t=242693
What do you think of the fit?
The 3d printing, bondoing and sanding of the printed pieces is pretty straight forward for me. I have a couple of questions about specifically molding the 3d printed armor.
I printed the pieces fairly thin (1/4 inch) to save material and for it to print quicker - but should I have made it thicker so I could slush cast it thicker?
I'm thinking maybe if I just modeled in a return edge or lip all along the armor edges I would still save on material but have more of a lip for my mold. So something like this:
So to sum it up, if I want the armor to be a certain thickness when cast, do I need to make sure my printed armor is that thick as well?
Has anyone tried casting the back yoke in one piece? From what I understand, the Anovos suits separates into two parts with an adjoining strip of plastic. Then you bondo and sand down the seam. I heard this causes a lot of cracks. I was wondering if I could kind of slush cast the back piece in one go, sort of overlapping the plastic as it's curing. Something like below, where each different color represents a new batch of plastic I work in and then let mostly dry before moving onto the next section.
And finally, I have seen other prop makers use 3d prints for vacuu-forming. How do you derive a forming buck from a 3d print? I've considered vacuuforming pieces but I assume any ABS printed parts would deform in a vaccuform table as well.
I appreciate any advice!