NickyD
New Member
Ok, I’m a little late to the Borderlands party. I just finished playing through Borderlands 2, hoping to pick up the Pre-Sequel soon. It’s super addictive and so much fun. Especially when you and your roommate set up two side-by-side TVs and two Playstations so you can each play full-screen over the network. 
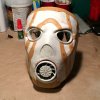
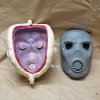
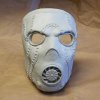
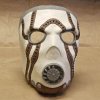
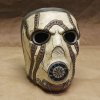
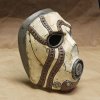
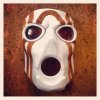
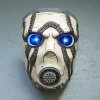
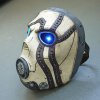
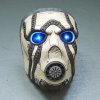
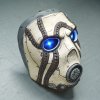
Seeing so many incredible Borderlands props and costumes around has inspired me to try creating something of my own. This will be my first prop project (in a long, long time, anyways). I’ll be making a Psycho Bandit mask. A bunch of people have done fantastic jobs building these masks, so I’ll have some great examples to look at. I’m curious to try out some of the materials folks are using these days, so I’ll be incorporating some Worbla and Apoxie Sculpt. I’m not sure if it will end up being sturdy enough to actually wear and not worry about breaking, so I will probably create a mold for doing some plastic casting.
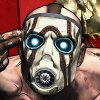
I’m already a few steps into the process. Here’s what I’ve done so far…
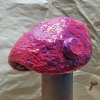
I started with the Pepakura paper model. I’m going for something that’s as close to game-accurate as I can get, and I figured the Pep model would give me a good starting point for the shape. The Pep model seemed to fit me just right, so no resizing was necessary. I assembled the entire model, then painted on a thin layer of fiberglass resin to give it some stiffness so it would hold its shape. Then I used an exacto to remove the eyes and mouth fan (which I’ll be recreating later). By the way, that fiberglass resin… strong stuff. Don’t use it indoors unless you want to fill your house with noxious gas.
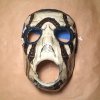
I then coated the inside of the mask with a layer of rondo. I used equal parts Bondo and fiberglass resin to make my rondo. Just a single coat seemed plenty strong, at least enough for me to work on the mask without fear of collapsing it.
To get rid of the polygonal look of the Pepakura model, I used plain old Bondo to smooth the outer surface. One layer of Bondo sanded smooth got me about half the way there.
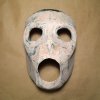
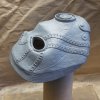
After a second layer of Bondo and some sanding, I could still see some of the larger polygonal features of the Pepakura model. I didn’t want to start losing detail with too many layers of Bondo, though, so I left it at two layers. I also didn’t bother sanding out all the pits and imperfections in the Bondo because I was planning to coat the whole thing with Apoxie Sculpt for texturing and details like the nose and the eyebrows.
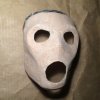
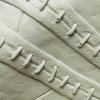
At this point I realized I could see most of the printing details on the Pepakura model if I held the mask up to a bright light source. Perfect! Instead of having to free-hand the stitching details later (and worrying about getting it all in the correct place), I could use the original Pep artwork as a guide. So I traced all the details onto the Bondo surface, and would make sure to work them into the additional layers as I went.
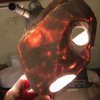
The outer edge of the mask doesn’t have any Bondo on it, just the initial resin coat. I could have used Bondo and sculpted it like the rest the mask, but I’m planning to use a different material here.
I then started to add the Apoxie Sculpt. This stuff is awesome to work with. It sands easily and holds the tiniest details. Mostly I used it just as a thin layer to give the slightly lumpy texture I wanted, but I also used it to build up the eye details, including the angry eyebrows and the ridges around the eye sockets. As I layered over the guide lines I had drawn on the Bondo, I recreated the lines in the Apoxie Sculpt using a sculpting tool.
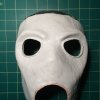
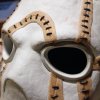
I wasn’t happy with my first attempt at the eyebrows, so I ended up partially sanding them down and resculpting them. They pointed out the wrong way, and the mask ended up looking too wide at the eyes. I’m much happier with my second attempt. You can see where I filed away the material all the way down to the rondo in a few places. Not a big deal. I didn't break through the rondo, but I came close. After reshaping the eyebrows, I ended up with some really smooth spots around the eyes, so I'll need to figure out a way to add some texture back in later.
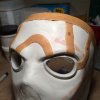
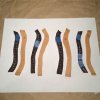
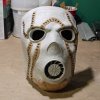
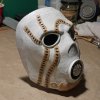
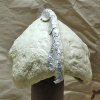
For the “laces” (i.e. the dark strips on the mask), I’m using Worbla. At first I was worried about not having enough time to work with the Worbla before it cooled, but I realized I can reheat it directly on the mask without affecting the Apoxie Sculpt. I was also worried the Worbla wouldn’t stick that well, but after a few times heating and pressing, I don’t think it’s going anywhere. I also used some Worbla to build up the thickness of the outer edge of the mask.
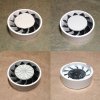
Next on my list: sculpting the nose detail and creating the fan piece for the mouth.
Seeing so many incredible Borderlands props and costumes around has inspired me to try creating something of my own. This will be my first prop project (in a long, long time, anyways). I’ll be making a Psycho Bandit mask. A bunch of people have done fantastic jobs building these masks, so I’ll have some great examples to look at. I’m curious to try out some of the materials folks are using these days, so I’ll be incorporating some Worbla and Apoxie Sculpt. I’m not sure if it will end up being sturdy enough to actually wear and not worry about breaking, so I will probably create a mold for doing some plastic casting.

I’m already a few steps into the process. Here’s what I’ve done so far…
I started with the Pepakura paper model. I’m going for something that’s as close to game-accurate as I can get, and I figured the Pep model would give me a good starting point for the shape. The Pep model seemed to fit me just right, so no resizing was necessary. I assembled the entire model, then painted on a thin layer of fiberglass resin to give it some stiffness so it would hold its shape. Then I used an exacto to remove the eyes and mouth fan (which I’ll be recreating later). By the way, that fiberglass resin… strong stuff. Don’t use it indoors unless you want to fill your house with noxious gas.

I then coated the inside of the mask with a layer of rondo. I used equal parts Bondo and fiberglass resin to make my rondo. Just a single coat seemed plenty strong, at least enough for me to work on the mask without fear of collapsing it.
To get rid of the polygonal look of the Pepakura model, I used plain old Bondo to smooth the outer surface. One layer of Bondo sanded smooth got me about half the way there.

After a second layer of Bondo and some sanding, I could still see some of the larger polygonal features of the Pepakura model. I didn’t want to start losing detail with too many layers of Bondo, though, so I left it at two layers. I also didn’t bother sanding out all the pits and imperfections in the Bondo because I was planning to coat the whole thing with Apoxie Sculpt for texturing and details like the nose and the eyebrows.

At this point I realized I could see most of the printing details on the Pepakura model if I held the mask up to a bright light source. Perfect! Instead of having to free-hand the stitching details later (and worrying about getting it all in the correct place), I could use the original Pep artwork as a guide. So I traced all the details onto the Bondo surface, and would make sure to work them into the additional layers as I went.

The outer edge of the mask doesn’t have any Bondo on it, just the initial resin coat. I could have used Bondo and sculpted it like the rest the mask, but I’m planning to use a different material here.
I then started to add the Apoxie Sculpt. This stuff is awesome to work with. It sands easily and holds the tiniest details. Mostly I used it just as a thin layer to give the slightly lumpy texture I wanted, but I also used it to build up the eye details, including the angry eyebrows and the ridges around the eye sockets. As I layered over the guide lines I had drawn on the Bondo, I recreated the lines in the Apoxie Sculpt using a sculpting tool.

I wasn’t happy with my first attempt at the eyebrows, so I ended up partially sanding them down and resculpting them. They pointed out the wrong way, and the mask ended up looking too wide at the eyes. I’m much happier with my second attempt. You can see where I filed away the material all the way down to the rondo in a few places. Not a big deal. I didn't break through the rondo, but I came close. After reshaping the eyebrows, I ended up with some really smooth spots around the eyes, so I'll need to figure out a way to add some texture back in later.

For the “laces” (i.e. the dark strips on the mask), I’m using Worbla. At first I was worried about not having enough time to work with the Worbla before it cooled, but I realized I can reheat it directly on the mask without affecting the Apoxie Sculpt. I was also worried the Worbla wouldn’t stick that well, but after a few times heating and pressing, I don’t think it’s going anywhere. I also used some Worbla to build up the thickness of the outer edge of the mask.
Next on my list: sculpting the nose detail and creating the fan piece for the mouth.

