arborealkey
Active Member
EDIT: here is the current version of this build, photo by the epic ArtsDream (www.facebook.com/ArtsDream.Photo)

Hello everyone !
I originally didn't plan on starting a thread about this armor, but since I took more progress pictures than expected I finally decided to gather all of them in one place (it's a side project for a convention).
After making my glass armor, I'm finally building my favorite set from Skyrim ! Here is said armor (courtesy of Vrogy, here on the RPF)
I'm making a...slightly different version. I'm going for a more "chiseled" look rather than having roughly cut pieces. I'm not saying it looks better, I just like to add my personal touch. This is (once again), a foam build. I've seen people make this armor out of resin, but I cannot afford it.
NOTE: I use hot glue (I know it's often frowned upon) on foam for multiple reasons... If I screw up and put hot glue were it shouldn't be, I just heat it up with the heat gun and rub it off with my fingers.
This is one of the simplest armors in the game, in terms of shape. The whole thing it's basically layered plates. The only part in need of an "actual" pattern was the helm, and that's what I started with. Most of the time, my patterns are just a modified version of the ones I drafted for older builds. Thus, I used the pattern I made for one of my eldar builds from Warhammer 40K (that's definitely not related to Skyrim...). I altered it a bit (mostly by changing the orientation of the pieces), and that's how I got the top part of my helm. The neck piece was just drawn on paper and cut out of EVA foam.
Here is a terrible picture with my face in it...
The base of the helm was done. I then added the Stalhrim parts. It's EVA foam as well, textured with a rotary tool (using one of the cylindrical sanding drums).

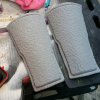
(That's a leg plate, not the helmet, but it's the only picture I have with the texture in progress...)
The next part were the horns (my very first horns, how exciting...). I made a base out of EVA again, two layers of 12mm puzzle floor mat glued together and roughly sanded to make the edges round. I then added layers of 2mm EVA.

The details were made with a woodburning tool (those who followed my previous and current builds know how deeply I love this thing...).

Last but not least, the scales...Those were made out of 2mm EVA as well. The IG model has 19 scales per row, but since I screwed my measurements, I could only fit 17.

I added some rivets/googly eyes, and the helm was (almost) done (some parts still need adjustment).
View attachment deathbrand_helm.jpg
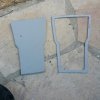
The rest of pieces all use the same technique. A 10mm foam base, textured with the rotary tool, and 5mm foam edges.

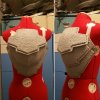
So far I made the front part of the chest and the leg plates.


Hello everyone !
I originally didn't plan on starting a thread about this armor, but since I took more progress pictures than expected I finally decided to gather all of them in one place (it's a side project for a convention).
After making my glass armor, I'm finally building my favorite set from Skyrim ! Here is said armor (courtesy of Vrogy, here on the RPF)
I'm making a...slightly different version. I'm going for a more "chiseled" look rather than having roughly cut pieces. I'm not saying it looks better, I just like to add my personal touch. This is (once again), a foam build. I've seen people make this armor out of resin, but I cannot afford it.
NOTE: I use hot glue (I know it's often frowned upon) on foam for multiple reasons... If I screw up and put hot glue were it shouldn't be, I just heat it up with the heat gun and rub it off with my fingers.
This is one of the simplest armors in the game, in terms of shape. The whole thing it's basically layered plates. The only part in need of an "actual" pattern was the helm, and that's what I started with. Most of the time, my patterns are just a modified version of the ones I drafted for older builds. Thus, I used the pattern I made for one of my eldar builds from Warhammer 40K (that's definitely not related to Skyrim...). I altered it a bit (mostly by changing the orientation of the pieces), and that's how I got the top part of my helm. The neck piece was just drawn on paper and cut out of EVA foam.
Here is a terrible picture with my face in it...
The base of the helm was done. I then added the Stalhrim parts. It's EVA foam as well, textured with a rotary tool (using one of the cylindrical sanding drums).

(That's a leg plate, not the helmet, but it's the only picture I have with the texture in progress...)
The next part were the horns (my very first horns, how exciting...). I made a base out of EVA again, two layers of 12mm puzzle floor mat glued together and roughly sanded to make the edges round. I then added layers of 2mm EVA.

The details were made with a woodburning tool (those who followed my previous and current builds know how deeply I love this thing...).

Last but not least, the scales...Those were made out of 2mm EVA as well. The IG model has 19 scales per row, but since I screwed my measurements, I could only fit 17.

I added some rivets/googly eyes, and the helm was (almost) done (some parts still need adjustment).
View attachment deathbrand_helm.jpg
The rest of pieces all use the same technique. A 10mm foam base, textured with the rotary tool, and 5mm foam edges.

So far I made the front part of the chest and the leg plates.


Attachments
Last edited:


