You are using an out of date browser. It may not display this or other websites correctly.
You should upgrade or use an alternative browser.
You should upgrade or use an alternative browser.
Elysium Max Exoskeleton
- Thread starter guitarpirate
- Start date
-
- Tags
- elysium
01binary
Active Member
I successfully cast the chest plates this fall (see two posts ago), but after many casting attempts on hip bones this winter, I finally ran out of slurry. I can't order more because it would arrive frozen, resulting in permanent chemical damage.
Issues included areas that cooled too fast, porous surface, and pieces of the mold breaking off prematurely:

So, I am switching back to box casting. Here's the breakdown of the parts I have left to cast:
Shell casting with SuspendaSlurry

The prototyping session:


The parts I uploaded to RSM RapidQuote:


Issues included areas that cooled too fast, porous surface, and pieces of the mold breaking off prematurely:
So, I am switching back to box casting. Here's the breakdown of the parts I have left to cast:
Shell casting with SuspendaSlurry
- Hip Left
- Hip Right
- Chest Base
- Shin Snockplate Left
- Shin Shockplate Right
- Hip Bottom Connector
- Spine Top
- Spine Bottom
- Spine Middle Left
- Spine Middle Right
- Foot Upper Shock Plate (2)
- Foot Shock Plate (2)
The prototyping session:
The parts I uploaded to RSM RapidQuote:

01binary
Active Member
Last week I finished two more molds for shin shockplates. The only other "required" part left is the chest plate, one of the biggest and coolest-looking parts of the exoskeleton. There are a bunch of optional parts I would like to cast as a stretch goal, notably the tiny details placed on the hands, the vacuum tube holders with light-up tubes, and some tech gribble for the face to complete the cyber ninja look.
Fig 1: Preparing to pour the second part of both two-part molds

Fig. 2: Finished making the first part of a two-part mold with 3D-printed model suspended in clay

Fig 3: Resulting two-part molds I will use for casting wax positives
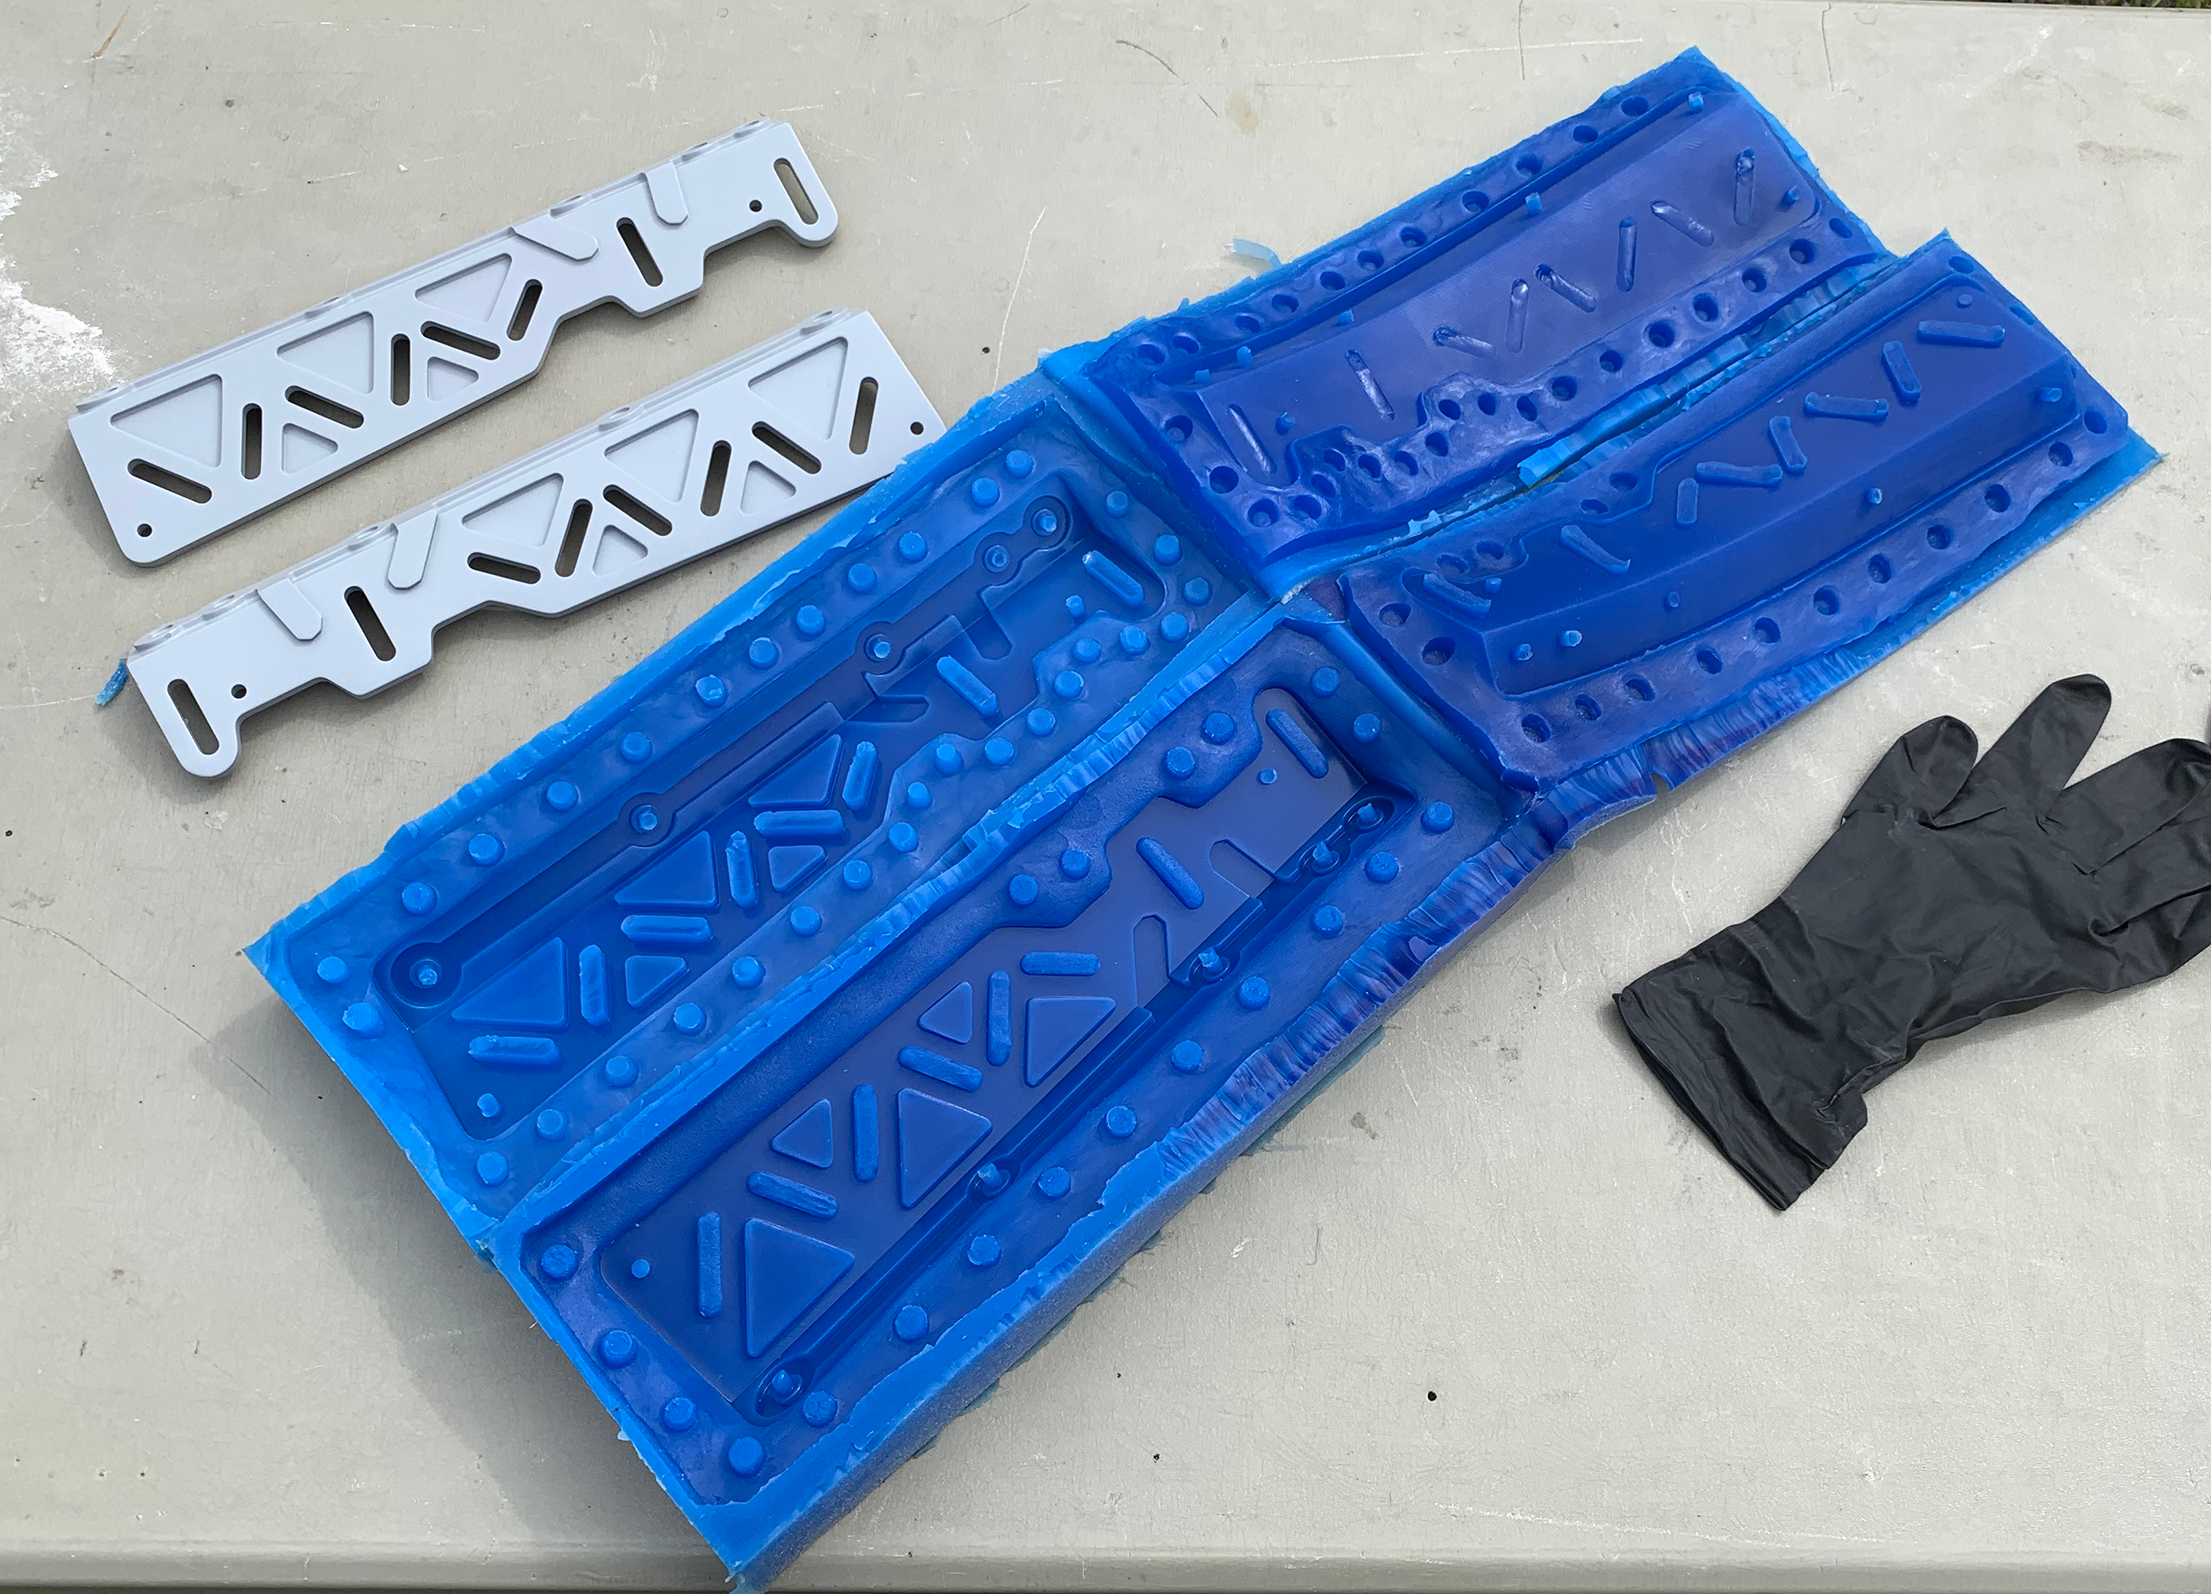
Fig. 4: Resulting wax positives that will be shell-cast by adding 10 layers of ceramic shell and melting the wax out before pouring metal

Fig 1: Preparing to pour the second part of both two-part molds
Fig. 2: Finished making the first part of a two-part mold with 3D-printed model suspended in clay
Fig 3: Resulting two-part molds I will use for casting wax positives
Fig. 4: Resulting wax positives that will be shell-cast by adding 10 layers of ceramic shell and melting the wax out before pouring metal
01binary
Active Member
In the past 3 weeks I cast the remaining parts for the spine as well as shock plates/armor that will be attached to boots:


Just before that I cast two extra parts I was missing before, a shoulder connector with some extreme detail and an unsightly hip connector. One of the parts here is repeated above.

My sheet metal order of bent spine connectors and arm bracelets came in:


I decided I might as well make those in 2mm stainless steel after prototyping with paper and cardboard, since the cost of getting them done in a sheet metal shop was going to be high either way:

Just before that I cast two extra parts I was missing before, a shoulder connector with some extreme detail and an unsightly hip connector. One of the parts here is repeated above.
My sheet metal order of bent spine connectors and arm bracelets came in:
I decided I might as well make those in 2mm stainless steel after prototyping with paper and cardboard, since the cost of getting them done in a sheet metal shop was going to be high either way:
01binary
Active Member
Thank you dornigt! I'm continuing on with casting the chest & shin plates:
The original wax models:

Wax models dipped to build ceramic shell layers:

Baking the chest plate:

Baking shin plates (behind the chest plate)

Baked shells:

First attempt:

Second attempt:

Parts from both attempts together:

The original wax models:
Wax models dipped to build ceramic shell layers:
Baking the chest plate:
Baking shin plates (behind the chest plate)
Baked shells:
First attempt:
Second attempt:
Parts from both attempts together:
01binary
Active Member
I finished casting all the required parts mid-July and moved onto re-drilling & threading holes, filling imperfections with metal filler & modeling primer, polishing, and using a rotary tool to clean up small details. Can't believe how much work that really is - after a full day of drilling & filing I feel like I've been kicked around by bunch of people. There is no real clean up effort on the machined parts so it should go faster from here. I hope painting doesn't take months or I will miss the wasteland weekend deadline!


Lastly, I did a work-in-progress presentation on this project to a group of high school students at Pacific Northwest College of Arts:
3D Printing to Metal Casting: Making of Elysium Exoskeleton Prop

Lastly, I did a work-in-progress presentation on this project to a group of high school students at Pacific Northwest College of Arts:
3D Printing to Metal Casting: Making of Elysium Exoskeleton Prop
01binary
Active Member
Assembly this week, hoping to be done by EOD Thursday. It feels real, with pleasant weight, the coolness of metal, and the musical dings the pieces make when they touch each other, instead of dry clanking of plastic. The paint isn't perfect, but generally this is coming out as exactly as I envisioned.


Similar threads
- Replies
- 5
- Views
- 1,053