Filling/sanding 3D prints?

Sluis Van Shipyards

Legendary Member
RPF PREMIUM MEMBER
I've never done anything with 3D prints, though I have followed some conversations. I've seen two recommendations for filling/sanding. One says to sand it as smooth as possible, then use filler, and sand smooth. The other said the finished 3D model surface is the surface, so you should slather putty on it and then sand it smooth. What's the correct way to go about it?

I just printed out a 1/48 Moldy Crow on my nephew's Bambu A1 to see how well (or bad) it would print a model. I was shocked how well it came out. The model is about 90% there, just needs some fixes (engine position, wing position), panel lines scribed, and details added/corrected. I might actually have a finished model this year! :lol:
 
  • Like
Reactions: JPH
Technically, it is more correct to leave the plastic un-sanded, and then begin filling and sanding. But it's often nice to get a big leg up on the process by pre-sanding, as the difference will not be noticeable.

Also, PLA plastic tends to flatten and get gummy, rather than sand smooth.
 
For PLA, what I usually do is sand everything with a coarse grit sandpaper and take down most of the texture and high spots using a palm sander. I then brush photopolymer resin over the model and sand with a less coarse grit. This fills in all the low spots and texture. I go over with a light coating of photopolymer resin again and use a progressively finer sandpaper. Then filler primer, to see any imperfections.

I usually print out larger items at a higher layer height of 0.2 or 0.35, so it does take a bit more sanding than something printed at 0.1mm.

If you use a palm sander, the PLA fills up the sandpaper quickly and creates a lot of heat which starts melting the PLA. Sanding by hand takes a lot longer but you don't tend to generate enough heat to melt anything.

TazMan2000
 
Depending on the size of the print, I usually dust it with several light coats of filler/primer (that stuff stinks like cancer, so I'd definitely have a respirator for that), waiting for each coat to flash before I spray on another. If it needs sanding to smooth out any bad sections, I'll do that and then spray some more on, usually a little thicker. That last coat I let cure for a day or two, then I do my best to sand it smooth. That often means sanding most of it off before I'm happy. When I'm satisfied with it, if there are any patches of bare plastic I'll prime it again, ready for the top coat.

Before priming, if the surface has some bad patches then I clip them off with cutters or a knife, then fill that area with some 3M Red Glazing Putty, let that cure for a while (depending on the thickness), and sand that flat before using the filler/primer.

This can take a few days to get done, and the number of coats of paint depends on the printer setting, of course. I just sort-of play with it until I'm happy.

Edit: I forgot to mention, I work with PLA and PLA+. Definitely use a mask when sanding that stuff, too.
 
As others have noted, I'll use coarse sanding blocks to get rid of any major defects, but I've found it to be a waste of time to try and sand 3D resin. On hand prop-sized projects or studio scale models, I'll use Evercoat auto filler, thinned with Plastik Honey and applied by hand, to fill depressions. The stuff dries very fast, and can be sanded in minutes. It will usually take one thorough coat of filler, plus a couple of touch-up passes, to get the surface where I want it prior to priming. Then I'll just start hitting the surface with rattle-can filler-primer until all traces of unwanted surface texturing have been eliminated (sanding in between coats as needed). Depending on the size of the project at hand, the process I've described here can be completed in one day. The trick is using a quality auto primer mixed with Plastik Honey. It really speeds up the work. And, yes, use a good mask when working with toxic solvents, primers, etc.
 
As others have noted, I'll use coarse sanding blocks to get rid of any major defects, but I've found it to be a waste of time to try and sand 3D resin.

We should be very careful in terminology here. "Resin", as in the output of SLA "Resin" printers, sands very, very easily, and needs no filling at all to go smooth.

I believe the context of this discussion is PLA filament in FDM printers, which does not take well to sanding and requires the filling/sanding steps described above.

Thanks,
Bill
Many thanks for the correction, Bill. I know next to nothing about 3D printing, but I do know the filament you refer to is a bear to work with.
 
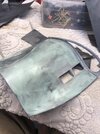
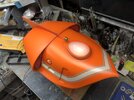
This is probably the most challenging 3D filling/priming job I've tackled due to the difficulty inherent in rendering seams invisible on a smooth surface. The WiP shot of the hull part slathered in filler illustrates my process somewhat. This is one of those cases in which using the correct product (i.e. quality auto filler) can make a potentially grueling job a lot less painful and time-consuming.
 

Attachments

  • IMG_4232.jpeg
    IMG_4232.jpeg
    894.3 KB · Views: 43
  • IMG_4242.jpeg
    IMG_4242.jpeg
    821.3 KB · Views: 43
  • IMG_6803.jpeg
    IMG_6803.jpeg
    624.6 KB · Views: 46
  • Like
Reactions: JPH
Thanks for the suggestions! I guess that I will either figure it out or it's going to p*ss me off so bad I'll just go back to scratchbuilding it. :lol:
 
I've never done anything with 3D prints, though I have followed some conversations. I've seen two recommendations for filling/sanding. One says to sand it as smooth as possible, then use filler, and sand smooth. The other said the finished 3D model surface is the surface, so you should slather putty on it and then sand it smooth. What's the correct way to go about it?

I just printed out a 1/48 Moldy Crow on my nephew's Bambu A1 to see how well (or bad) it would print a model. I was shocked how well it came out. The model is about 90% there, just needs some fixes (engine position, wing position), panel lines scribed, and details added/corrected. I might actually have a finished model this year! :lol:
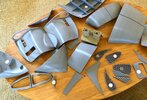
Depending on how bad the print lines are, I would lightly fill with freeform air or contour putty --thin layers.

Just enough to get rid of print lines. Etch the panel lines to preserve them.

Then lightly coat with XTC 3D. You can add pigment to XTC 3D.

If you are printingnwith PLA, maybe play with the settings, because PLA usually prints pretty smooth.

If PetG, then I expect print lines.
 
XTC is kind of expensive and I'm cheap so I buy UV resin from Amazon. The kind people craft jewelry with. I usually brush or sponge on a coat and stick it outside if its nice or cure it under a UV lamp. At that point I lightly sand and add the last coat, then on to primer/paint etc. I just finished a Wolfman Cane with this method.
Screenshot 2024-10-08 at 9.32.06 PM.png
 
The sanding of PLA prints can get tedious. But 3D printing can be a much quicker way to getting something built in some cases...particularly with larger and more complex models. When you design something yourself in CAD software, you can modify your creation and change size of parts easily. You can mirror parts so that the left is proportional to the right. It's definitely a new way of building and it can expand your skills to create something you would of never thought you could make and most likely in a fraction of the time it would have taken you to make the part yourself the old fashioned way.

TazMan2000
 
I've found a lot of good info on this channel.

One thing she doesn't do, however, is to sand down the seam edges as those can have a slight outward curl and needs to be removed at an inward angle to create a channel for the filler to fill and level with the outer surface, or you'll never remove the seamline, as it will keep showing no matter how much you fill and sand.

 
Last edited:
I've found a lot of good info on this channel.

One thing she doesn't do, however, is to sand down the seam edges as those can have a slight outward curl and needs to be removed at an inward angle to create a channel for the filler to fill and level with the outer surface, or you'll never remove the seamline, as it will keep showing no matter how much you fill and sand.


I just watched a video she did where she made a lifesize battledroid.

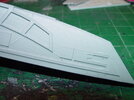
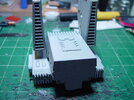
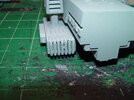
These prints have pretty fine lines, so I don't think it will be too hard. I forgot what my nephew had set the print layers at though. This model had the engine/fins in the wrong position and the pieces they're attached to might be totally replaced (game had rounded nacelles I think?). Not sure how to salvage the rounded "fins" on those (last pic) other than to replace with styrene. The nose section also has some detail the game didn't have so that will get chiseled off. Oh and no panel lines, so I will attempt to scribe those. I think I need to make the walls thicker next time though for that reason. Overall better than I thought though.

DSC06707.JPG DSC06708.JPG
DSC06709.JPG
 
I've got a bunch of screen shots. It doesn't look like it would take much work to fix this one though. The basic shape and size are spot on, just needs some help. It said it was to scale with the SW Legions game, which they say is 1/48, but if the Crow is 16.63m, this model is a little over 1/47. So close enough for me.
 
Back
Top