C8X
New Member
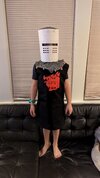
We made a few simplifications for time and to keep it practical for a 7 year old, but I had fun building this. It was nice to discover how many people younger than me still know the source material. We did a photoshoot in a nearby park and had some good banter with passers-by.

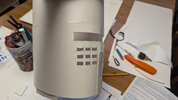
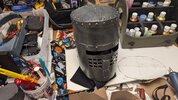
Initially I started with much lower expectations and tried to shape the helmet out of bristol board after cutting out the face. I forget his name but there's a French guy that does great cardboard props and we did his Mandalorian armor a few years ago so I tried some similar techniques for the convex top of the helmet.
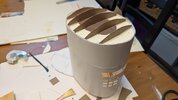
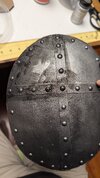
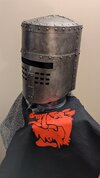
I found a thin layer of foam clay provides a strong but flexible and sandable surface for round smooth parts. I can never get all the divots out so I fill them with Bondo glazing putty and just keep filling and sanding until I get a clean shape. More bristol board & upholstery tacks stand in for the metal banding and rivets. I cut the pins way back on the tacks so nothing sharp pokes into the helmet.
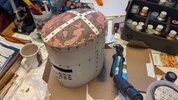
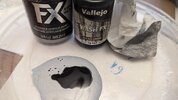
Basic automotive black primer made up the base coat and PlaidFX "armor metal" mixed darker with Vallejo wash was used for the helmet metal. The FX paint is pretty thin and look a bunch of coats. I used a damp paper towel to get a mottled look instead of brush strokes. I tried to use the same wash to weather the helmet but the basecoats weren't cured and it didn't really settle in the grooves nicely. I think an oil-based weathering/stain would do better.
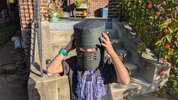
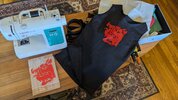
The tunic (tabard?) was hand made from black canvas and I just winged it and measured it off him while he was trying to watch TV. I grabbed the boar's head off of some online reference and had it made into a heat transfer.
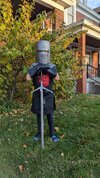
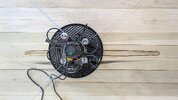
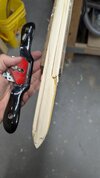
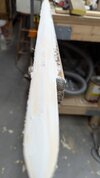
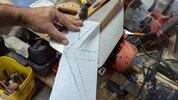
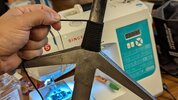
The sword was interesting, I started with a bit of an overkill process to test out my new Maslow 4 CNC router (Maslow). I used some movie still s and a few public 3D models to design a CAD layout and turned that into some CAM instructions. The cut was not entirely successful, one half of the sword cutout failed and cut through in the wrong spots, and the other half didn't finish cutting but all those errors are on me and just a learning curve. It still helped immensely to get the outline right. I patched the mistakes and then shaped the blade with hand tools.
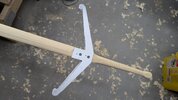
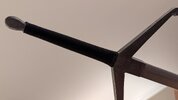
Cutting out the guard was a pain, I laminated some styrene sheets to thickness and tried to cut them out on a scroll saw but the cut was melting back together behind the blade and it was all bit frustrating and funny but I was able to get the basic shape done. I wasn't able to get the full detail I had planned. I also left off the loops, due to time and fragility (a 7yo with a wooden sword is going to do wooden sword stuff). Then more black primer, bondo putty, and lots of sanding.
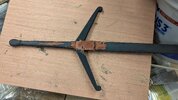
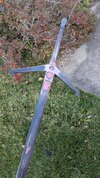
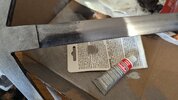
The PlaidFX armor paint was a letdown here, it was taking too long to build up coats and was leaving too many brush strokes so I went and got some Rub & Buff. I'm glad I did, it added the perfect finish and it was probably an ideal combo (2-3 coats of PlaidFX and a light coating of Rub & Buff pewter). Some paracord wrap for the hilt finished off the sword in enough detail for our purposes.
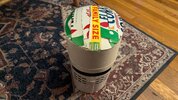
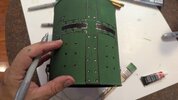
A few hours before trick-or-treating started I realized I had a chance to make a thematic candy bucket, so I grabbed a clean paint can, painted it green and then added some quick details with sharpie & kids paints to make the Green Knight's helmet. I didn't remember this until our recent rewatches but we are introduced to the Black Knight while he is in the midst of battle with the Green Knight and ends the battle when he throws his sword through the eye slot.
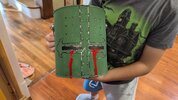
"I'm invincible!!"

Initially I started with much lower expectations and tried to shape the helmet out of bristol board after cutting out the face. I forget his name but there's a French guy that does great cardboard props and we did his Mandalorian armor a few years ago so I tried some similar techniques for the convex top of the helmet.
I found a thin layer of foam clay provides a strong but flexible and sandable surface for round smooth parts. I can never get all the divots out so I fill them with Bondo glazing putty and just keep filling and sanding until I get a clean shape. More bristol board & upholstery tacks stand in for the metal banding and rivets. I cut the pins way back on the tacks so nothing sharp pokes into the helmet.


Basic automotive black primer made up the base coat and PlaidFX "armor metal" mixed darker with Vallejo wash was used for the helmet metal. The FX paint is pretty thin and look a bunch of coats. I used a damp paper towel to get a mottled look instead of brush strokes. I tried to use the same wash to weather the helmet but the basecoats weren't cured and it didn't really settle in the grooves nicely. I think an oil-based weathering/stain would do better.


The tunic (tabard?) was hand made from black canvas and I just winged it and measured it off him while he was trying to watch TV. I grabbed the boar's head off of some online reference and had it made into a heat transfer.


The sword was interesting, I started with a bit of an overkill process to test out my new Maslow 4 CNC router (Maslow). I used some movie still s and a few public 3D models to design a CAD layout and turned that into some CAM instructions. The cut was not entirely successful, one half of the sword cutout failed and cut through in the wrong spots, and the other half didn't finish cutting but all those errors are on me and just a learning curve. It still helped immensely to get the outline right. I patched the mistakes and then shaped the blade with hand tools.
Cutting out the guard was a pain, I laminated some styrene sheets to thickness and tried to cut them out on a scroll saw but the cut was melting back together behind the blade and it was all bit frustrating and funny but I was able to get the basic shape done. I wasn't able to get the full detail I had planned. I also left off the loops, due to time and fragility (a 7yo with a wooden sword is going to do wooden sword stuff). Then more black primer, bondo putty, and lots of sanding.


The PlaidFX armor paint was a letdown here, it was taking too long to build up coats and was leaving too many brush strokes so I went and got some Rub & Buff. I'm glad I did, it added the perfect finish and it was probably an ideal combo (2-3 coats of PlaidFX and a light coating of Rub & Buff pewter). Some paracord wrap for the hilt finished off the sword in enough detail for our purposes.


A few hours before trick-or-treating started I realized I had a chance to make a thematic candy bucket, so I grabbed a clean paint can, painted it green and then added some quick details with sharpie & kids paints to make the Green Knight's helmet. I didn't remember this until our recent rewatches but we are introduced to the Black Knight while he is in the midst of battle with the Green Knight and ends the battle when he throws his sword through the eye slot.


"I'm invincible!!"
