Spartan 127
New Member
In Advance. . . I apologize for any "double" or "multi-posting". I am new to the RPF and do not know what the limitations are for pics and text in a single post are. I originally started this project back in late April, and though it has been posted on another site, I wanted to share the info that I have to date with the members of this forum, as well. I will be trying to use the fewest posts as possible to do this. I am not intentionally trying to bump my thread or "up" my post numbers for anything special or for ranking. That being said, Mods, please edit my posts if necessary, and Thanks to all for allowing me to be on the site.
_________________________________________
A little back round as to why I started this. . . . .
Back at the beginning of the year, my son came to me and originally wanted to be Iron Man for Halloween this year. He showed me a video on YouTube that had a guy in a pepakura costume, that I have to admit. . . LOOKED AWESOME. I figured that I'd look into it for him to see if it was something that I could do. I didn't know anything about Pepakura or what to do. I found videos on YouTube by the "hero Tutorials" and figured what the heck. I'll give it a shot.
After putting together an Iron Man helmet out of pepakura just to see if I could do it, my son changed his mind and told me that he wanted to be a "HALO guy". :facepalm I thought that this was a little odd, because 1) We've never played HALO (don't even own a XBOX) and 2) I didn't have anything at the house for reference that I knew of. Me being me. . . I told him I'd do it. Yep. SUCKER!!!! Like Daffy Duck in Looney Toons when the Donkey appears. . . . LOL. Anyway, that is how I got started with all this. I've still yet to play HALO and all I've had to go on for this are the pep files 3D pics and scattered reference that I have found through hours upon hours of research for screen shots. I am by no means an expert in the things I've attempted with this, but I've definitely learned a lot along the way, and hope to put all that knowledge into a personal build that should be done next year. All that being said, let me start posting some pics. Please be patient. . . . I have a lot of photos to go through.
Here's the starting stages. Duct tape dummy and all. My first pics were really fuzzy sometimes, because of a poor camera and I apologize for this. I'm also going to try to save space with thumbnails. If y'all prefer the bigger pics, please let me know. Like I said. . . I'm still new here.


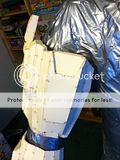


And what my son looked like in that stuff at the time. . .


That's what I started out with. Earlier this year, my wife went to Germany (I met her there in the Army and brought her back. . . LOL) to visit her family and took our son with her. I took some time off while they were gone to do some of this. Here's after a couple weeks of vacation and non-stop pepping. LOL!


There's actually a story as to why the overall on top is missing a forearm. It fell off while I was moving the dummy and I didn't realize it. I found out where it was when I stepped on it and thought I'd have to redo it. Fortunately enough, I didn't have to. The crunched pieced popped right out and was ready for hardening.
I hardened the costume with Smooth Cast 321 and Fiberglass. The method took me a bit to get used to on how to mix the stuff so I wasn't wasting it, but I finally got it down to a science and knew when it was time to stop. In hind sight, I should have rondo glassed it instead, but I was new and learning. Here's what everything looked like after it was hardened and trimmed up.


I had an issue with the helmet once it was hardened. It no longer went over my son's head. It didn't have any flex whatsoever, and I didn't want to cut out the bottom, because it would've gotten rid of the overall look. Here's the process of what I did.

I cut off the back!!!!!! LOL. Then, I replaced it with foam that I cut out based on the original pep files. In retrospect, I should've done some heat forming to it to make it look better than it does. Here's what it looked like after I got the foam in.


Those are actually the first go at it. I felt like I had to redo it, because it didn't look like it was fitting right to me. Here's what the second go at it looked like after the helmet was painted.


And other pics of the paint on the helmet.


Here's an overall of what everything looked like a couple months ago during a test fit.


And this was him being happy thinking I put the camera down. . . . LOL!

And yes. . . that's an Angry Birds Pig sticking out beneath. He's already got the nick name of the Angry Birds Spartan and also the barefoot Spartan on the 405th. The barefoot thing is coming from some other pics and because I haven't made the boots yet. . . . LOL.
When I was at this point I finally got a visor in for the helmet and did that.

The pic looks good, but the visor is actually quite transparent. Here's how I got it in there.


I cut a ton of the visor off and just JB Welded some "Chicago Screws" in. One on the top and one on the bottom. That's all it needed to hold it in place on this one. After I got the visor in, I learned why you should wait to paint it until AFTER the visor is in place. I used magic sculpt to fill in all the gaps on the outside and then had to touch up everything gingerly to not mess everything else up that I had painted. The pics above are of the finished product. I don't think that I actually took pics of the WIP with the magic sculpt. Sorry
Here is my first go at the arms seals and stuff for the undersuit.


I quickly found that the whole separate vest thing worked, but didn't if you understand that. I've reworked the whole thing and added in even more details for it over the course of the last month or so. I'll get to that one in a minute. . . I can't find it on photobucket right now. I decided to go all out and add in some lights. Here's those pics and how he got the barefoot Spartan nickname.


Here's how I wired it all up.
This is the front of the Torso (Chest)

And the Back of the Torso

On the back of the torso, I used rondo to reinforce those rungs or whatever they're called under the arms, because my son wanted to play in it so much they started tearing a little. . . . LOL.
Here's the inside of the biceps and how they were wired.


The thighs were wired with the same type of circuit.

And this is that circuit when not in the parts.


OK. Now on to that new undersuit. As a base that he has on in the pics above, he is wearing a pair of black baseball pants and a knockoff under armor shirt. It may even be Nike, but I can't remember at this point. I did away with the vest and made a hybrid so-to-speak and it's velcroed in place and removable from the torso so I can change out lighting and batteries if necessary. The first few pics are an explanation of how I put it together.


This is what it looks like all together.


It was asked before, "how is the mobility?". The mobility for him because of the foam is not an issue. What is the problem is that I made the biceps and forearms for him to have room to grow and that is what is causing him to not be able to reach his head. . . . LOL. He can only bend his arms in about a 90 degree angle because of the hard parts. Not because of the foam.
On the knees, they weren't scaled right with the rest of the file. I decided to go with what I learned was a default knee instead of the FJ Para Knees for his costume. To save weight and for more mobility, I made those and his hand plates out of foam flooring.
The hands. . . .

And their development


The knees. . . .

And their development


And what they look like on my son.


When doing all the test fits and everything, I've learned that my son grew bigger around and a little taller in his legs. I've decided to not redo the shins. At first they were fine, but now they're not. I don't feel like messing with them again at this point. I have had to modify some things though like the torso to add more length in the middle and the thighs to add some size to the opening. What I did was cut them, and then I used rondo and fiberglass cloth to put it all back together.
This is where I cut the torso on both sides.

And where I cut the thighs

And what they look like now that they've been fixed.


I had to add the size to the torso especially, because I wanted to make some undersuit details there for the abs. I used drawer catches on the bottom part of the torso to hold it together. In retrospect. . . . not the smartest idea, but it works. This is what I'm talking about using there.


Again, with all the test fitting, I also found that my son couldn't even sit with the cod piece being hard. So, I redid the whole cod out of foam. Here's what it came out looking like from start to finish.


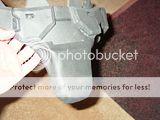


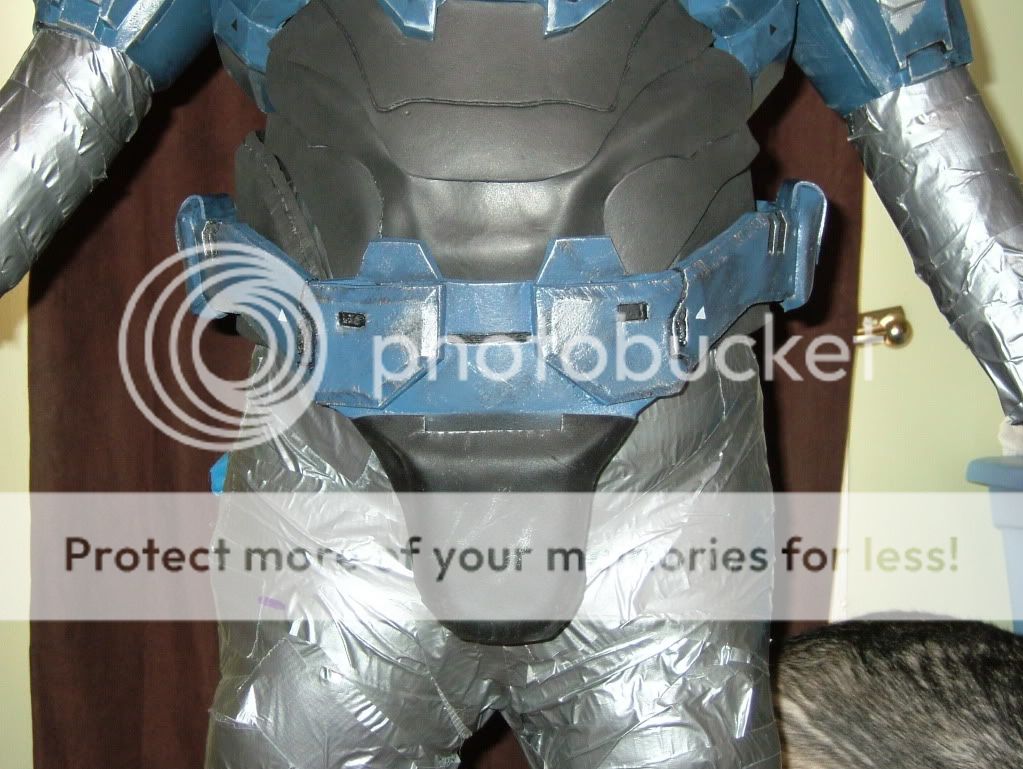


I joined it on the back left hip with overlapping velcro parts.


I figured out how to make a knife and a Magnum pistol out of a foam board and foam flooring. I don't know if anyone has done it that way before, but it worked out ok for what my son's going to use it for.


It, like most of the other parts, aren't 100% accurate, but for the overall look, I think it works out ok.
And here's the Magnum pistol and make shift holster I came up with. . .

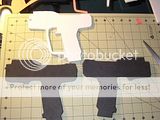


Again . . . . not 100% accurate, but it works. . . . LOL! I don't have pics of him with the thigh rig on yet, because I just finished it the other day and we haven't put everything back on him since.
The last thing I'd like to share is just some detail pics that show some of the decals like on his torso and on the thighs and shins.
This is at the top of both thighs and in the center of the back of both shins.


The things on the back and front of the torso.
[URL=http://s960.photobucket.com/albums/ae88/JSFinch/Tyler%20Spartan%20WIP/?action=view¤t=DSCF6835.jpg]
 [/URL]
On the left of the chest is the UNSC Eagle and Globe I suppose is what it's called and on the right of the chest, that is the emblem for the 405th. I learned a lot there on that site and wanted to put that on there, because of the respect that I have for their builders. Like this site, the 405th was a wealth of information while building this.
I put my son's initials and DOB for his Spartan number on the top right of the torso.

There are a ton of pics on my photobucket account that I haven't put on here for the sake of saving space and not knowing what I could get away with in a single post on this forum, if y'all would like to visit it through one of the thumbnails. I've tried to replicate what I could with painting on little triangles and weathering things and stuff like that. Like I said. Not 100% accurate on this Spartan outfit. There are a lot of things that with what I know now, I wish I could do over to be more "game accurate". Not having the game makes it difficult to do that, but I've found things since I finished up detailing other parts that I wish I would've had then. OH!!!!! Almost forgot. Here's what we have to date as an overall and thumbnails.


The only thing left to do is make some boots. LOL!
Please remember, that I actually started all of this back in late April and it has taken me to a couple days ago to get where I am not on this. I've posted the same information on the 405th. It is a little more in depth as to how everything came about, because I was doing it as I went and not all at once. I've tried to give a good representation of what I've done and the order that I've done it in.
I welcome all criticism, suggestions, comments and questions. Please let me know what you think. That is the only way I can get better. Without it, I cannot improve. I just ask that you be nice. . .
I really hope that you've enjoyed what I've got up and thanks for checking it out. Until next time, remember to keep your dreams alive and Keep Building and Make it Fun!!!!
_________________________________________
A little back round as to why I started this. . . . .
Back at the beginning of the year, my son came to me and originally wanted to be Iron Man for Halloween this year. He showed me a video on YouTube that had a guy in a pepakura costume, that I have to admit. . . LOOKED AWESOME. I figured that I'd look into it for him to see if it was something that I could do. I didn't know anything about Pepakura or what to do. I found videos on YouTube by the "hero Tutorials" and figured what the heck. I'll give it a shot.
After putting together an Iron Man helmet out of pepakura just to see if I could do it, my son changed his mind and told me that he wanted to be a "HALO guy". :facepalm I thought that this was a little odd, because 1) We've never played HALO (don't even own a XBOX) and 2) I didn't have anything at the house for reference that I knew of. Me being me. . . I told him I'd do it. Yep. SUCKER!!!! Like Daffy Duck in Looney Toons when the Donkey appears. . . . LOL. Anyway, that is how I got started with all this. I've still yet to play HALO and all I've had to go on for this are the pep files 3D pics and scattered reference that I have found through hours upon hours of research for screen shots. I am by no means an expert in the things I've attempted with this, but I've definitely learned a lot along the way, and hope to put all that knowledge into a personal build that should be done next year. All that being said, let me start posting some pics. Please be patient. . . . I have a lot of photos to go through.
Here's the starting stages. Duct tape dummy and all. My first pics were really fuzzy sometimes, because of a poor camera and I apologize for this. I'm also going to try to save space with thumbnails. If y'all prefer the bigger pics, please let me know. Like I said. . . I'm still new here.


And what my son looked like in that stuff at the time. . .


That's what I started out with. Earlier this year, my wife went to Germany (I met her there in the Army and brought her back. . . LOL) to visit her family and took our son with her. I took some time off while they were gone to do some of this. Here's after a couple weeks of vacation and non-stop pepping. LOL!


There's actually a story as to why the overall on top is missing a forearm. It fell off while I was moving the dummy and I didn't realize it. I found out where it was when I stepped on it and thought I'd have to redo it. Fortunately enough, I didn't have to. The crunched pieced popped right out and was ready for hardening.
I hardened the costume with Smooth Cast 321 and Fiberglass. The method took me a bit to get used to on how to mix the stuff so I wasn't wasting it, but I finally got it down to a science and knew when it was time to stop. In hind sight, I should have rondo glassed it instead, but I was new and learning. Here's what everything looked like after it was hardened and trimmed up.


I had an issue with the helmet once it was hardened. It no longer went over my son's head. It didn't have any flex whatsoever, and I didn't want to cut out the bottom, because it would've gotten rid of the overall look. Here's the process of what I did.

I cut off the back!!!!!! LOL. Then, I replaced it with foam that I cut out based on the original pep files. In retrospect, I should've done some heat forming to it to make it look better than it does. Here's what it looked like after I got the foam in.


Those are actually the first go at it. I felt like I had to redo it, because it didn't look like it was fitting right to me. Here's what the second go at it looked like after the helmet was painted.


And other pics of the paint on the helmet.


Here's an overall of what everything looked like a couple months ago during a test fit.


And this was him being happy thinking I put the camera down. . . . LOL!

And yes. . . that's an Angry Birds Pig sticking out beneath. He's already got the nick name of the Angry Birds Spartan and also the barefoot Spartan on the 405th. The barefoot thing is coming from some other pics and because I haven't made the boots yet. . . . LOL.
When I was at this point I finally got a visor in for the helmet and did that.

The pic looks good, but the visor is actually quite transparent. Here's how I got it in there.


I cut a ton of the visor off and just JB Welded some "Chicago Screws" in. One on the top and one on the bottom. That's all it needed to hold it in place on this one. After I got the visor in, I learned why you should wait to paint it until AFTER the visor is in place. I used magic sculpt to fill in all the gaps on the outside and then had to touch up everything gingerly to not mess everything else up that I had painted. The pics above are of the finished product. I don't think that I actually took pics of the WIP with the magic sculpt. Sorry
Here is my first go at the arms seals and stuff for the undersuit.


I quickly found that the whole separate vest thing worked, but didn't if you understand that. I've reworked the whole thing and added in even more details for it over the course of the last month or so. I'll get to that one in a minute. . . I can't find it on photobucket right now. I decided to go all out and add in some lights. Here's those pics and how he got the barefoot Spartan nickname.


Here's how I wired it all up.
This is the front of the Torso (Chest)

And the Back of the Torso

On the back of the torso, I used rondo to reinforce those rungs or whatever they're called under the arms, because my son wanted to play in it so much they started tearing a little. . . . LOL.
Here's the inside of the biceps and how they were wired.


The thighs were wired with the same type of circuit.

And this is that circuit when not in the parts.


OK. Now on to that new undersuit. As a base that he has on in the pics above, he is wearing a pair of black baseball pants and a knockoff under armor shirt. It may even be Nike, but I can't remember at this point. I did away with the vest and made a hybrid so-to-speak and it's velcroed in place and removable from the torso so I can change out lighting and batteries if necessary. The first few pics are an explanation of how I put it together.


This is what it looks like all together.


It was asked before, "how is the mobility?". The mobility for him because of the foam is not an issue. What is the problem is that I made the biceps and forearms for him to have room to grow and that is what is causing him to not be able to reach his head. . . . LOL. He can only bend his arms in about a 90 degree angle because of the hard parts. Not because of the foam.
On the knees, they weren't scaled right with the rest of the file. I decided to go with what I learned was a default knee instead of the FJ Para Knees for his costume. To save weight and for more mobility, I made those and his hand plates out of foam flooring.
The hands. . . .

And their development


The knees. . . .

And their development


And what they look like on my son.


When doing all the test fits and everything, I've learned that my son grew bigger around and a little taller in his legs. I've decided to not redo the shins. At first they were fine, but now they're not. I don't feel like messing with them again at this point. I have had to modify some things though like the torso to add more length in the middle and the thighs to add some size to the opening. What I did was cut them, and then I used rondo and fiberglass cloth to put it all back together.
This is where I cut the torso on both sides.

And where I cut the thighs

And what they look like now that they've been fixed.


I had to add the size to the torso especially, because I wanted to make some undersuit details there for the abs. I used drawer catches on the bottom part of the torso to hold it together. In retrospect. . . . not the smartest idea, but it works. This is what I'm talking about using there.


Again, with all the test fitting, I also found that my son couldn't even sit with the cod piece being hard. So, I redid the whole cod out of foam. Here's what it came out looking like from start to finish.


I joined it on the back left hip with overlapping velcro parts.


I figured out how to make a knife and a Magnum pistol out of a foam board and foam flooring. I don't know if anyone has done it that way before, but it worked out ok for what my son's going to use it for.


It, like most of the other parts, aren't 100% accurate, but for the overall look, I think it works out ok.
And here's the Magnum pistol and make shift holster I came up with. . .


Again . . . . not 100% accurate, but it works. . . . LOL! I don't have pics of him with the thigh rig on yet, because I just finished it the other day and we haven't put everything back on him since.
The last thing I'd like to share is just some detail pics that show some of the decals like on his torso and on the thighs and shins.
This is at the top of both thighs and in the center of the back of both shins.


The things on the back and front of the torso.
[URL=http://s960.photobucket.com/albums/ae88/JSFinch/Tyler%20Spartan%20WIP/?action=view¤t=DSCF6835.jpg]


On the left of the chest is the UNSC Eagle and Globe I suppose is what it's called and on the right of the chest, that is the emblem for the 405th. I learned a lot there on that site and wanted to put that on there, because of the respect that I have for their builders. Like this site, the 405th was a wealth of information while building this.
I put my son's initials and DOB for his Spartan number on the top right of the torso.

There are a ton of pics on my photobucket account that I haven't put on here for the sake of saving space and not knowing what I could get away with in a single post on this forum, if y'all would like to visit it through one of the thumbnails. I've tried to replicate what I could with painting on little triangles and weathering things and stuff like that. Like I said. Not 100% accurate on this Spartan outfit. There are a lot of things that with what I know now, I wish I could do over to be more "game accurate". Not having the game makes it difficult to do that, but I've found things since I finished up detailing other parts that I wish I would've had then. OH!!!!! Almost forgot. Here's what we have to date as an overall and thumbnails.


The only thing left to do is make some boots. LOL!
Please remember, that I actually started all of this back in late April and it has taken me to a couple days ago to get where I am not on this. I've posted the same information on the 405th. It is a little more in depth as to how everything came about, because I was doing it as I went and not all at once. I've tried to give a good representation of what I've done and the order that I've done it in.
I welcome all criticism, suggestions, comments and questions. Please let me know what you think. That is the only way I can get better. Without it, I cannot improve. I just ask that you be nice. . .
I really hope that you've enjoyed what I've got up and thanks for checking it out. Until next time, remember to keep your dreams alive and Keep Building and Make it Fun!!!!
