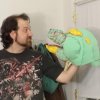
So Some have seen this already on facebook and at Dragoncon 2015, sunday night.
Check out our other things here: https://www.facebook.com/mabieknotsjewelry
So to start, I (we) were simply asked by a good friend (Josh) whether or not I could make a full godzilla suit, based on the Burning godzilla (vs Destroyah). Essentially he premised it, with "if you build it, i will get it to dragoncon"
I found a paper model book, in japanese (cant remember where, and im not sure i am supposed to share it anyway) that had an interesting design, but it was all PDF and missing a page or two, but I decided to try to use that as a base.
I did some math on paper and transferred a grid to each page of the book.
After scaling up all the parts onto upholstery foam using the grid, scaled up to 1" blocks on the foam, i hand copied the lines from the book to the foam.


I started with the head, not much construction pix here, but its all put together with high temp hot melt.


I then moved onto the main construction of the body.


You can see my gridding here on these parts, as I am putting together the torso.


Just some more lower abdomen parts for sizing reference.

I didnt get too many of the feet, but here is a shot, the foot itself was done in PVA/EVA foam as it was going to be taking all of the punishment during the wear time. I wrapped it in interfacing foam, to give a more regular surface to bond the scales to.


Once the torso was built It was time to install the lights, these are battery operated LED light strings, each individually mounted into the innermost layer of the foamsuit.
There are 27 strands of 50ct lights!


And now the tough work ahead!
The body I plastidipped and in some cases uses black leak seal to colorize the base, as it would show through the scales in areas i might not been able to make a glost scale jig-sawing, it also helped to normalize the color of the base layer as well.
This is the start of the scales which were all hand cut and dyed a dark green base (mostly) prior to glueing them to the suit.
We estimated that it was over 2000 scales.
Check out our other things here: https://www.facebook.com/mabieknotsjewelry
So to start, I (we) were simply asked by a good friend (Josh) whether or not I could make a full godzilla suit, based on the Burning godzilla (vs Destroyah). Essentially he premised it, with "if you build it, i will get it to dragoncon"
I found a paper model book, in japanese (cant remember where, and im not sure i am supposed to share it anyway) that had an interesting design, but it was all PDF and missing a page or two, but I decided to try to use that as a base.
I did some math on paper and transferred a grid to each page of the book.
After scaling up all the parts onto upholstery foam using the grid, scaled up to 1" blocks on the foam, i hand copied the lines from the book to the foam.


I started with the head, not much construction pix here, but its all put together with high temp hot melt.


I then moved onto the main construction of the body.


You can see my gridding here on these parts, as I am putting together the torso.


Just some more lower abdomen parts for sizing reference.

I didnt get too many of the feet, but here is a shot, the foot itself was done in PVA/EVA foam as it was going to be taking all of the punishment during the wear time. I wrapped it in interfacing foam, to give a more regular surface to bond the scales to.


Once the torso was built It was time to install the lights, these are battery operated LED light strings, each individually mounted into the innermost layer of the foamsuit.
There are 27 strands of 50ct lights!


And now the tough work ahead!
The body I plastidipped and in some cases uses black leak seal to colorize the base, as it would show through the scales in areas i might not been able to make a glost scale jig-sawing, it also helped to normalize the color of the base layer as well.
This is the start of the scales which were all hand cut and dyed a dark green base (mostly) prior to glueing them to the suit.
We estimated that it was over 2000 scales.


