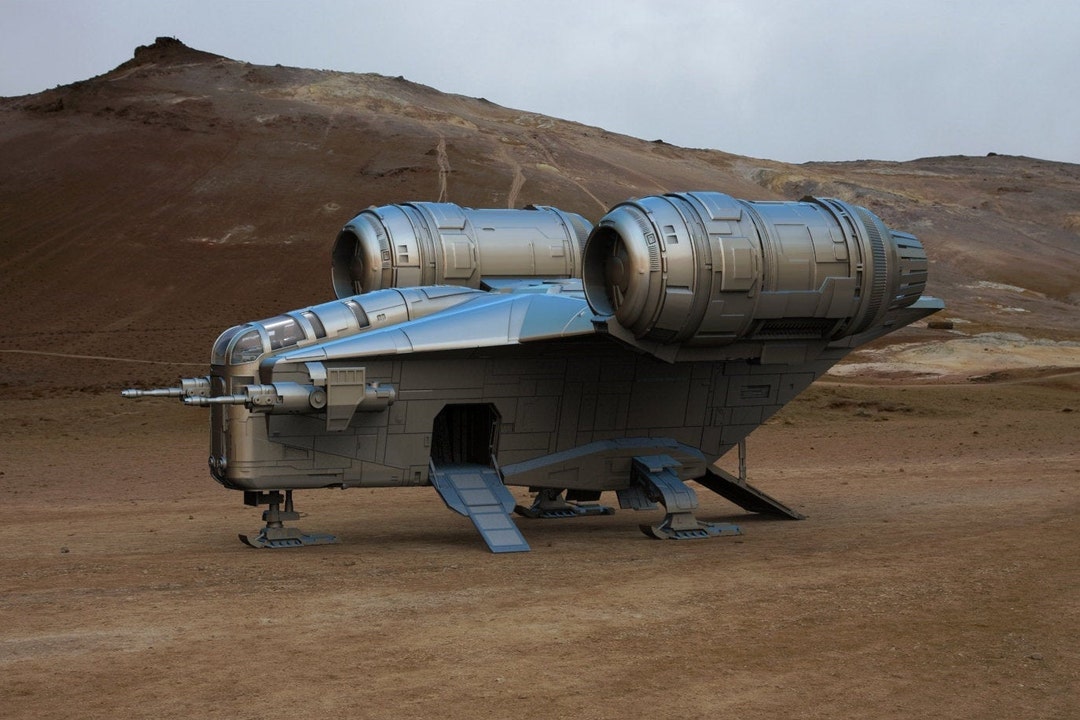
NEW PICTURES!! (last page) - Razor Crest - 1:34 - Modified/lights - Build log. - FINISHED!

Thank you for all the nice comments!


Really great work. I probably missed it, but what are your plans for the cockpit clear windscreen?
Thank you! I am debating between cutting a coke bottle or vacuumforming. The coke bottles I have at hand seem to have the correct curve for the front corner pieces. The rest only being curved in one direction.

Or getting some clear styrene from the model shop nearby and trying to vacuumform them over bucks or just with a heatblower.

Awesome! Also, your command of English grammar far exceeds mine of Dutch! Which is zero...sadly.
Now, vacuforming is no mystery. You obviously have the skills to fabricate the 'male' forms and a simple vac rig. I once made one from a cardboard shoe box reinforced with a coat hangar wire grid to support a window screen mesh 'platform' taped over the hole I cut in one side using duct tape. I cut some fiberboard frames of same outer dims as the platform side of the box, with rectangular cutouts of different sizes to let me match my form sizes and conserve plastic. The clear plastic sheet was secured over the cutouts using thumb tacks pushed through the plastic into small predrilled holes. A hole sized to fit my vacuum cleaner hole was cut into the end of the box and reinforced with duct tape as were the box sides and seams to ensure it was airtight. I used a couple of bricks on the oven rack to support the frames and to allow for the plastic to sag. So, hose in the box, vacuum on, once the plastic heated to the max droop point then tightened back up some, used oven mitt to grab and throw on the form setting on the platform and boom! It was done. Crude but it worked. The box would collapse a bit to relieve the suction, and the plastic would self seal the frame. The flexibilty of the setup made it work. The tricky elements were heating to correct temp, good aligment of the frame and speed!
So, moral of the story is if *that* works, I expect you can come up with something.too.
Cheers! Robert
Thx! As for the vacuumforming, I was indeed thinking of making a small wooden box with an adapter for my shop vac and just heating the clear styrene with a heatgun and then pulling it over. I'll let you know what contraption I put together when I get to the windows :).

-Hopli
 
(PART I picture limit)

Hey everyone,

I got an update!

I added windows using the coke bottle. Did think about using vacuum forming but then I had to print bucks etc... so I decided to see what the coke bottle would give. If it was good enough I'll use that, and it was or rather is.

I got some pictures of those, they will get window trims at the end. (also its a bit out of order, this is a picture from after doing the all black primer)

0Yzw3rQ.jpg
jmQ66XY.jpg


So since the black primer is spoiled some more shots of that:

hswhVFk.jpg
Zn9eOxP.jpg

iID3iy6.jpg

foTMUdQ.jpg


All seams disappeared for 99%. I liked my added detail on the top, engines and back and landing gear. I also loved the added lights.
This all marked the point for me to start painting.

After black comes!!! Tamiya TS 17.
(had to mask the windows again)

FYPuVaM.jpg
S3vM1BO.jpg

OdQ78Aj.jpg
k2yfFbf.jpg


I'm soooooooooo happy with this, seeing it all in the 'main color'. It really looks good in my opinion. I realized there are 2 base colors on this ship, the silver and the heavily flaked of markings on the side.
 
PART II (picture limit)

This realization was followed by a few hours of masking. I used the panels and various details to line up my tape and replicate it one the other side. It was hard to find the exact pattern but I think it is really close. Enjoy my pain:

vIU5A1l.jpg

GWn3P2E.jpg

ok0mdZt.jpg

Sz8xMmY.jpg


I then went into the masked area with a new product (for me at least) to try and get the chipping to look 'natural'

ucC0uyU.png

XXfjUc4.jpg


This stuff worked really well in the end but it takes a really long while to dry. And when you use a too small layer its almost impossible to find it again and peel it off.

But like I said, it worked sooooooooooooo well in the end:

THZQOjG.jpg

aA2tXNH.jpg


Again, soooooo happy with this result, the peeling off took a while but the chipped paint is spot on! For those interested the color is tamiya TS-46.

All this was followed by some shop cleaning. And now comes the part where I paint and weather this thing for a few hours to get it finished. But first I'll get the guns to the same level as the rest of the ship: detailed and painted in base colors.

This will have to wait for the next few days though since it was time to close up.
I did snag some more pictures before closing the door...

QJX5bwH.jpg

jawk2d8.jpg

nWOm2m9.jpg

lc0BYu2.jpg

CWDZVQS.jpg


This is all for now!!

-Hopli
 
Thanks Analyzer and Hoplitespear - great reference. I think I might have to try and replicate that top detail to some extent, although the sunken part with the radiators is going to be tricky without cutting a big hole in the hull.

I wish I’d noticed this before I printed it all out and stuck it together! Having said that at least I haven’t started painting yet. I need to decide whether to try to 3D model and print a replacement top part, or build it from styrene. I was hoping to be able to just add styrene bits on top, but I think I'll need to grind back the existing raised part first, or it will all stick up too high.

What a great build! I am currently working on this project and you have given me so many ideas, thanks for posting. This was so well executed.

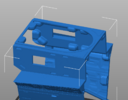
Also, as I have almost zero scratch building skills (your's looks awesome) I tracked down a 'more' accurate top and used Meshmixer to make a single part that I can then print. It does throw off the scale just a bit but it's close enough for me... I was not going to worry about it but when I saw your build I just could not let it go and I had to do something about it :)


Body3.PNGBody8.PNGBody7.PNG

And about the block, yeah, we all get it! It's why I always have 10 or more projects. This way I either have a lot of options or too much to do so if I get stuck I just turn around and start working on something else.

Again, nice work!
 
So in a rush late night (when thinking is out of the window) I 'quickly' glued the complete hull and engines together. The right wing didn't go in for 1.5mm and I panicked..... I couldn't push it further in and the glue set.
I just placed it there looking at it and feeling so gutted, closed my workshop and didn't go in for a few days.

This happens to me all the time when working with PLA! I am not sure if you were using super glue or not but it bonds crazy good with PLA, but you better get it right the first time as it bonds 100% in less than a second for sure!

Also, you may have mentioned this but I can't find it. What specific black did you use for the base and what silver color did you end up going with?

Thanks!!
 
Wow! so inspiring. I need to get back to mine. I've got it all printed out, but just totally stalled trying to figure out what to do with the landing gear. I'll definitely be following your lead
 
What a great build! I am currently working on this project and you have given me so many ideas, thanks for posting. This was so well executed.

Also, as I have almost zero scratch building skills (your's looks awesome) I tracked down a 'more' accurate top and used Meshmixer to make a single part that I can then print. It does throw off the scale just a bit but it's close enough for me... I was not going to worry about it but when I saw your build I just could not let it go and I had to do something about it :)


View attachment 1431044View attachment 1431045View attachment 1431046

And about the block, yeah, we all get it! It's why I always have 10 or more projects. This way I either have a lot of options or too much to do so if I get stuck I just turn around and start working on something else.

Again, nice work!
Ah that looks great! Did you find that top piece somewhere for free or did you have to pay for it? Would love to get the stl for it if it’s available.
 
No, you have to buy it. But it has (in my opinion) better landing gear, a more accurate dash (has the little silver knob modeled into it, it's called out as a separate part in the files > "Control_Panel_Baby's_Toy"), and of course the top section.

 
Last edited:
Hey Guys,

thank you as always for the very nice comments!

What a great build! I am currently working on this project and you have given me so many ideas, thanks for posting. This was so well executed.

Also, as I have almost zero scratch building skills (your's looks awesome) I tracked down a 'more' accurate top and used Meshmixer to make a single part that I can then print. It does throw off the scale just a bit but it's close enough for me... I was not going to worry about it but when I saw your build I just could not let it go and I had to do something about it :)


View attachment 1431044View attachment 1431045View attachment 1431046

And about the block, yeah, we all get it! It's why I always have 10 or more projects. This way I either have a lot of options or too much to do so if I get stuck I just turn around and start working on something else.

Again, nice work!

That looks amazing, wish I tought of that sooner XD.


I got a tiny update, I continued painting, the two things to show u is a huge wash over everything, some places even took back the silver to black but nothing major. It gives the whole ship this dirty darker metal look.

I'm still blocking out base colors, I painted the intake edges in a dirty white, weathered the exhausts and base colored the landing gear. Oh, and i got the cannons up to speed.

aEPFRf5.jpg

2pT5Gde.jpg

Dsvbdpu.jpg

eAKZn9o.jpg

XEGjqRP.jpg

76lsZ1v.jpg


Thats it for this one, short but powerfull!


-Hopli
 
This’s one of the reasons I applied to join the RPF , amazing personal detailed work (as always) sir. Thank you for sharing....
 
Must say have immensely enjoyed reading up on this build of your Razor Crest. Absolutely fantastic job on it! Wow! Your attention to detail and efforts to capture the essence of this ship have paid off. No mistaking this for what it is. It is very satisfying to see you share your pleasure in how it has turned out.

Yet another project to add to my "To Print" list.
 
Hey everyone, thank you for all the nice comments!

It is not finished though, I still got some painting to do and there is a base to be made!

last weeks where busy so I don't got any updates yet but they are coming soon!
She is becoming a thing of beauty...feel your pain with those stripes or the Orange 'R' as I call them, the Crest always seems to be parked, shot or standing so the Port side is showing - finally some rather crap 'as promised' landing gear & cat pics
Those gears look amazing! Cant wait to see more.

This’s one of the reasons I applied to join the RPF , amazing personal detailed work (as always) sir. Thank you for sharing....
More to come Gedmac66 not done yet!

Must say have immensely enjoyed reading up on this build of your Razor Crest. Absolutely fantastic job on it! Wow! Your attention to detail and efforts to capture the essence of this ship have paid off. No mistaking this for what it is. It is very satisfying to see you share your pleasure in how it has turned out.

Yet another project to add to my "To Print" list.
Thank you! But she's not done yet. I'll have more updates soon!


See uou all soon with more!
-Hopli
 
Hey everyone...

March 15th... OOF. It has been a while.

I might have mentioned I was doing a course to change my career. This week is the last week of said corse and I'll start working in my new field on the 1th of next month. The last lap of this course was an internship of 6 weeks. The most prominent reason I haven't been updating.

Anyway enough about me!

I have updates, this project is not finished yet but its getting close.

Before finishing off the paint job of the Crest I decided to make the base first.
I went for a basic star wars landing pad look. This took me longer than expected nearly two days of work.

Starting off with a piece of wood,
- creating an elongated octagon
- adding some strips to the side
- scribing some panel lines
- Primer black
- adding side panels to hide multiplex lines
- adding details on the top, some for show, some to hide the screw holes
- adding two electrical clamps disguised as refueling station. (The wires are camouflaged as fueling lines)
- Placing 8 corner lights for the pad
- deciding its to barren - creating 3 star wars looking crates
- creating two power cells and adding lights
- doing all the electrical stuff
- coat of Tamiya Gunmetal

U1LStOq.jpg
ft0RYWA.jpg

SjB9x2L.jpg
91cJDw0.jpg


AkMbWEt.jpg

HIpERsC.jpg

xDAoBE8.jpg

7oRrnU9.jpg


aR8gyxo.jpg

(tape is to mark where the landing gear goes, I will paint on some markings etc later )

I didn't make that many pictures I was mainly trying to get the basics finished and put the base colors on.
The 12v adapter for the LED's is mounted underneath between the feet.

So, this project is almost at an end. In the next few day's I will sit down and dirty up the pad allot, same goes for the crest, that one still needs some more detailed weathering. I will also add some markings to the pad, circles around the feet, some lines etc... Might add some star wars letters.

Following this, a friend of mine is going to help to make descent pictures to show it off.

For now, some crappy cellphone pictures of test setups. Some in daylight some in the dark (Still need to paint the energy canisters, the blue light is going to be toned down allot)

T8YTyFJ.jpg

otj8Jhu.jpg

khe6YEW.jpg


slC3iNq.jpg

L4nmt3V.jpg

SA2Xmdp.jpg


I hope you liked this update!

My apologies for the huge time gap, I had to focus on myself for a bit.

Finish in sight!

-Hopli
 
WOW, Amazing, Fantastic and all those other words that describe coolness! Love the landing platform great details and lighting. As for real life that will always come first gotta pay the bills right? Without a doubt, "This is the Way"
 
Back
Top