So I am new to this forum and costuming. I really enjoy this site and also reading and learning about all the amazing builds here. I made and bought Star Wars costumes for me and my family for halloween and for comic con...One of the costumes I bought was a rubies Stormtrooper for my 17 year old son to troop in. Of course I bought it without doing my homework and realized soon after that the rubies brand of costumes is sort of the Jar Jar Binks of the Star Wars costume world.

Anyway, as I educate myself and learn more about this cosplay/costuming world I decided to rebuild my stormtrooper costume. (So that we can wear it at comic cons proudly.) I am sure the trooper purists will still hate it, but I don't care, costuming is supposed to be fun and I like the costume. Its not a great costume, I did have to grind and cut the hell out of it to make it wearable and I wish the plastic was thicker. But I do love a good challenge and I want it to be somewhat closer to movie accurate. So I am starting this thread to share this journey and perhaps help others who bought one of these Jar jar specials to create a better fitting / looking costume.
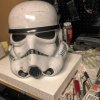
So I am starting with the helmet. (I bought the costume brand new but I didn't like the out of box look, so I weathered it up.)

The first thing I did was take it apart. Figured that would make it easier to work on it.

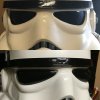
After that, I added epoxy to the inside of the mouth, to help secure it to the helmet. Then I applied bondo to the mouth - I did this to make it look like it as if the mouth was created as part of the helmet.


I also covered up the last tooth using bondo and each side now has 3 tooth holes vs. 4. Figured since this is not a true ANH or ROTJ trooper costume, it wouldn't matter. As for the final color of the mouth, I am not sure if I want to paint the mouth black vs. charcoal grey? Still undecided. I am leaning towards black, think it looks cooler.

After that I cut 1/2" off of each side of the helmet to shrink it down. It was too big and I am not a fan of the "one size fits all" helmet thing. Once I did that I epoxied it back together. I think it does look better.


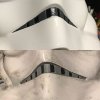
The next thing was fixing the black vocoder. I cut it and reshaped. The one the rubies comes with looks like crap. So I changed it up. Its still needs painting, The white you see in the back is wonderflex. I covered up the back of it, really like that stuff. Should paint out very well.
I also added wonder flex to the hole behind the vocoder. I had to because once I reshaped the vocoder, you could see inside the helmet. The rubies is a ****ty design. But with some help it should look alright. Tomorrow 'Ill add bondo to the wonder flex it to smooth out all the lines. and make the area cleaner and tougher. That is all I have done for today...more tomorrow.

Anyway, as I educate myself and learn more about this cosplay/costuming world I decided to rebuild my stormtrooper costume. (So that we can wear it at comic cons proudly.) I am sure the trooper purists will still hate it, but I don't care, costuming is supposed to be fun and I like the costume. Its not a great costume, I did have to grind and cut the hell out of it to make it wearable and I wish the plastic was thicker. But I do love a good challenge and I want it to be somewhat closer to movie accurate. So I am starting this thread to share this journey and perhaps help others who bought one of these Jar jar specials to create a better fitting / looking costume.
So I am starting with the helmet. (I bought the costume brand new but I didn't like the out of box look, so I weathered it up.)

The first thing I did was take it apart. Figured that would make it easier to work on it.

After that, I added epoxy to the inside of the mouth, to help secure it to the helmet. Then I applied bondo to the mouth - I did this to make it look like it as if the mouth was created as part of the helmet.


I also covered up the last tooth using bondo and each side now has 3 tooth holes vs. 4. Figured since this is not a true ANH or ROTJ trooper costume, it wouldn't matter. As for the final color of the mouth, I am not sure if I want to paint the mouth black vs. charcoal grey? Still undecided. I am leaning towards black, think it looks cooler.

After that I cut 1/2" off of each side of the helmet to shrink it down. It was too big and I am not a fan of the "one size fits all" helmet thing. Once I did that I epoxied it back together. I think it does look better.


The next thing was fixing the black vocoder. I cut it and reshaped. The one the rubies comes with looks like crap. So I changed it up. Its still needs painting, The white you see in the back is wonderflex. I covered up the back of it, really like that stuff. Should paint out very well.
I also added wonder flex to the hole behind the vocoder. I had to because once I reshaped the vocoder, you could see inside the helmet. The rubies is a ****ty design. But with some help it should look alright. Tomorrow 'Ill add bondo to the wonder flex it to smooth out all the lines. and make the area cleaner and tougher. That is all I have done for today...more tomorrow.
Last edited:


