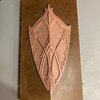
Shield from Alice in Wonderland

Valor

Master Member
RPF PREMIUM MEMBER
I'm just beginning the process of creating the silver shield carried by Alice in Tim Burton's version of Alice in Wonderland. There's not much in terms of resources out there. A few screen grabs and photos of the shield on display a few years ago

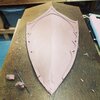
This is my first shield (well, outside of Captain America). Because the shield has such a hand-made organic look I plan on sculpting the shield out of clay and doing a mold and cast.

I've ball-parked the size to around 34" tall. Alice is smaller than me, but this feel like a good scale.

Instead of a round curvature, the shield has a sharp bend at its midpoint. To do that I created a angled surface to model the shield on top of. Once my box of Monster Clay arrives :)

ed839cfb49fb532d23ca647d7d09fc24.jpg
aliceshield1-1.jpg
AliceWonderland swordshield props.jpg
Alice wonderland vorpal sword props.jpg
open-uri20150608-27674-12vudau_579a1e85-1.jpeg
13VAYWabQ5eFtqt0ZSp9+Q.jpg
B7EC87E2-439B-45FB-9ADB-BC46CD42F1BB.jpg
33CE954E-DF3A-4E5E-BE34-45415A8609EF.jpg
CC9FE508-1C60-4361-9952-CE6503B16E1A.jpg
 
I was commissioned to build this, but never saw the film myself. Last night I did some screen grabs to confirm the scale and angle I'm using. I'm feeling really good about both.

When I mentioned to a friend that I had never seen the film, despite being a Burton fan his reply was "It's definitely Tim Burton at his most Tim Burtony" ... I have to agree :)
 

Attachments

  • Screen Shot 2020-08-21 at 11.48.16 PM.png
    Screen Shot 2020-08-21 at 11.48.16 PM.png
    2.8 MB · Views: 278
  • Screen Shot 2020-08-21 at 11.50.15 PM.png
    Screen Shot 2020-08-21 at 11.50.15 PM.png
    4.1 MB · Views: 210
  • Screen Shot 2020-08-21 at 11.49.59 PM.png
    Screen Shot 2020-08-21 at 11.49.59 PM.png
    3.9 MB · Views: 229
  • Screen Shot 2020-08-21 at 11.49.35 PM.png
    Screen Shot 2020-08-21 at 11.49.35 PM.png
    3.8 MB · Views: 212
  • Screen Shot 2020-08-21 at 11.49.11 PM.png
    Screen Shot 2020-08-21 at 11.49.11 PM.png
    4 MB · Views: 280
  • Screen Shot 2020-08-21 at 11.48.29 PM.png
    Screen Shot 2020-08-21 at 11.48.29 PM.png
    4.3 MB · Views: 230
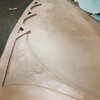
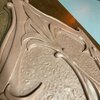
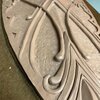
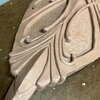
Chipping away at this everyday. I'm finding this is less subtractive sculpting and more additive. Most of the details are achieved by rolling clay out to a specified thickness and cutting a shape out with an X-Acto blade, then applying it to the surface. I'm using Monster Clay Medium which is just perfect. I warm it up in a small crock pot until it's soft. Once it cools it nice and firm for more detailed sculpting.
 

Attachments

  • F6471D62-FBFA-49A9-B1A3-9DE3F7CCCBF4.jpg
    F6471D62-FBFA-49A9-B1A3-9DE3F7CCCBF4.jpg
    508.2 KB · Views: 199
  • 52568AA1-1444-4B8B-BF5D-8F09C1BEEF1B.jpg
    52568AA1-1444-4B8B-BF5D-8F09C1BEEF1B.jpg
    268 KB · Views: 242
  • gEndJPxYRoOg5mpSa6o4ww.jpg
    gEndJPxYRoOg5mpSa6o4ww.jpg
    1.9 MB · Views: 181
The main sculpting is complete. I have some clear-up and smoothing to do. But one of the cool things about this prop is it is very "imperfect". It's not perfectly symmetrical. The details have a handmade feel. There's dings and nicks. I want to maintain that. Also, I have no idea why this clay looks gray in close ups and more red from far away.
 

Attachments

  • 0CC9F4B0-E908-4E50-B283-6B447B34E7B8.jpg
    0CC9F4B0-E908-4E50-B283-6B447B34E7B8.jpg
    393.7 KB · Views: 173
  • E0BB6592-7B3A-4399-A7C9-3AA30A7E8B1D.jpg
    E0BB6592-7B3A-4399-A7C9-3AA30A7E8B1D.jpg
    332.7 KB · Views: 252
  • BD4BD240-3A28-46DC-8400-C198F3678B22.jpg
    BD4BD240-3A28-46DC-8400-C198F3678B22.jpg
    419.5 KB · Views: 273
  • 007C9DA1-1C1E-415C-868D-B6C2DC183B96.jpg
    007C9DA1-1C1E-415C-868D-B6C2DC183B96.jpg
    363.3 KB · Views: 274
First coat of silicon. Hope to be casting shields by the weekend.
 

Attachments

  • A6FF7792-3637-4404-B2D4-DAA4FF439CA8.jpg
    A6FF7792-3637-4404-B2D4-DAA4FF439CA8.jpg
    1.6 MB · Views: 215
Second coat, third coat, fourth coat, and the mold jacket. Tomorrow ... opening this all up!
 

Attachments

  • 5D195C40-6A86-4A2C-B645-8F67952BD5F4.jpg
    5D195C40-6A86-4A2C-B645-8F67952BD5F4.jpg
    1.5 MB · Views: 188
  • E70194E1-C6CA-4D2F-A1E6-1097CE30FE71.jpg
    E70194E1-C6CA-4D2F-A1E6-1097CE30FE71.jpg
    1.7 MB · Views: 194
  • 2C215D33-8904-4FE4-AA8A-9A86164B147F.jpg
    2C215D33-8904-4FE4-AA8A-9A86164B147F.jpg
    2.2 MB · Views: 237
  • CB8CDD76-39CB-422A-B0C0-374256351690.jpg
    CB8CDD76-39CB-422A-B0C0-374256351690.jpg
    1.8 MB · Views: 193
I opened up the mold jacket today (Live on Facebook, because why not?) and found a GREAT mold to work with.

"Unboxing" the mold for my Alice Shield

Also, I'm casting my first shield tonight. I stared with several light coats of Smooth-on Onxy to get a good print layer. Then I'm building up the thickness of the shield with more Smooth-on Free Form Air (What can't you do with this stuff?). I attached some Threaded T-nuts to the resin before I coated with the Free Form Air. This will give me a place to attach straps when I'm done.


CFUb7lsKRamiHjVDbpgYYg.jpg
tmS6GP0yShe9D3aTDy8ZbA.jpg
JnZUKbXZRs24qnpzDbefbw.jpg
OBB6h3N%QnurW5spyTk4GQ.jpg
QkrcsPNNSny95LcjoA10aQ.jpg
 
Thanks. I wrapped this up tonight. Because the cast was black resin I simply used silver Rub-n-buff for the metallic effects front and back. It really brought out all the irregularities in the sculpt. Again, I was going for a hand-made, worn finish, similar to the screen-used shield. There wasn't decent shots of the back, but I presumed some simple leather handles we in order.

IMG_3888.jpeg
IMG_3887.jpeg
IMG_3889.jpeg
IMG_3891.jpeg
IMG_3900.jpeg
 
Back
Top