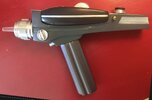
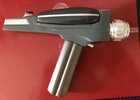
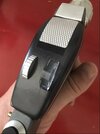
I'm not a huge Star Trek TOS fan, it was before my time, but as I have gotten older I have really fallen in love with the early sci-fi aesthetic. Of course, the whole Heritage Auction debacle caught my attention and and renewed my interest in the TOS phaser. I was able to acquire an RJS fiberglass midgrade which i am really happy with. I know there have been some goings on with RS on the forum so for the sake of this thread we will put that aside and just focus on my first TOS build.
Parts
-RJS fiberglass midgrade
-johnpaultrek2012 (on ebay) metal upgrade parts set
-RS 5/8" aluminum side knob
-proteus1 (on ebay) extra crispy mylar foil
Paints
-Black sandable primer
-Krylon shadow grey spray paint
-Krylon Satin Crystal Clear
-Model Masters Gloss Black
-Model Masters Gloss White
-Model Masters Metalic Silver
-Model Masters Thinner
-Humbrol gloss black enamel
-Tamiya Flat Black
-Tamiya Gun Metal
-Tamiya Dark Yellow
-Windsor Raw Umber oil paint
-Pigments (AK, MIG, Ammo) Dark Earth, Farm Dark Farm, Rubble, European Earth, Light Dust, pigment fixer
Materials
-Evercoat glazing and spot putty
-Mr. Surfacer 500
-Apoxie Sculpt
-JB Weld
-JB weld Plastic Bonder (Epoxy)
-Devcon Contact Cement
-Styrene
1/16" Aluminum Sheet
The RJS fiberglass kit is wonderful, It comes with the P2 L/R main shells and L/R Handle as well as the top/bottom P1 and all the small parts to make an excellent phaser. Most of the small parts are cast resin and I wanted a little more heft and realism so i opted to buy the the johnpaultrek2012 upgrade metal kit which is fantastic. The only part I didn't use was the side knob as it is 1/2" and the RJS is meant for 5/8". I contacted RS and he agreed to sell me a custom aluminum one that made a huge difference to the look, happy I opted for it. I used JB Weld Plastic Bonder for the majority of the glueing and Evercoat glazing and spot putty for the filling.
The rear of the P2 had about 1mm of separation when i went to fit the shells together so instead of sanding the front, i added some styrene to fill the gap. I JB Welded a couple of bolts onto the handle so that i had a really solid connection between the main body and the handle. I drilled a couple of holes in the bottom of the shells, slotted in the handle, and used a generous amount of JB Weld inside the shells to hold it all together.


Next I filled all the pin holes, seams, and low spots with evercoat glazing and spot putty. In the meantime i also assembled, puttied, and primed the P1


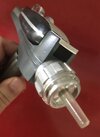
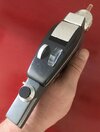
I really wanted to brush paint the P1, like the originals, but after doing a couple of tests with the decanted Krylon Shadow grey, i realized i needed to airbrush it on. What I found when i tried to brush the spray paint was that (1) the paint is super thin and transparent unless you apply a number of coats (2) the thinner used in the spray paint wipes away previous applications resulting in an uneven splotchy mess (3) the sheen is uneven even with sufficient mixing. So in order to get the brush strokes and texture i wanted while airbrushing, i applied a brushed layer of Mr. Surfacer, which is basically a very thinned out liquid putty. This gave me some great texture on the P2 main body and handle. Before i added the surfacer, I drilled and installed the emitter base, trigger, and side brass rod. Looks pretty messy at this point but its going to get better, trust me.
Next up with be priming the P2, painting the P1, and starting to add more of the small parts


Parts
-RJS fiberglass midgrade
-johnpaultrek2012 (on ebay) metal upgrade parts set
-RS 5/8" aluminum side knob
-proteus1 (on ebay) extra crispy mylar foil
Paints
-Black sandable primer
-Krylon shadow grey spray paint
-Krylon Satin Crystal Clear
-Model Masters Gloss Black
-Model Masters Gloss White
-Model Masters Metalic Silver
-Model Masters Thinner
-Humbrol gloss black enamel
-Tamiya Flat Black
-Tamiya Gun Metal
-Tamiya Dark Yellow
-Windsor Raw Umber oil paint
-Pigments (AK, MIG, Ammo) Dark Earth, Farm Dark Farm, Rubble, European Earth, Light Dust, pigment fixer
Materials
-Evercoat glazing and spot putty
-Mr. Surfacer 500
-Apoxie Sculpt
-JB Weld
-JB weld Plastic Bonder (Epoxy)
-Devcon Contact Cement
-Styrene
1/16" Aluminum Sheet
The RJS fiberglass kit is wonderful, It comes with the P2 L/R main shells and L/R Handle as well as the top/bottom P1 and all the small parts to make an excellent phaser. Most of the small parts are cast resin and I wanted a little more heft and realism so i opted to buy the the johnpaultrek2012 upgrade metal kit which is fantastic. The only part I didn't use was the side knob as it is 1/2" and the RJS is meant for 5/8". I contacted RS and he agreed to sell me a custom aluminum one that made a huge difference to the look, happy I opted for it. I used JB Weld Plastic Bonder for the majority of the glueing and Evercoat glazing and spot putty for the filling.
The rear of the P2 had about 1mm of separation when i went to fit the shells together so instead of sanding the front, i added some styrene to fill the gap. I JB Welded a couple of bolts onto the handle so that i had a really solid connection between the main body and the handle. I drilled a couple of holes in the bottom of the shells, slotted in the handle, and used a generous amount of JB Weld inside the shells to hold it all together.
Next I filled all the pin holes, seams, and low spots with evercoat glazing and spot putty. In the meantime i also assembled, puttied, and primed the P1
I really wanted to brush paint the P1, like the originals, but after doing a couple of tests with the decanted Krylon Shadow grey, i realized i needed to airbrush it on. What I found when i tried to brush the spray paint was that (1) the paint is super thin and transparent unless you apply a number of coats (2) the thinner used in the spray paint wipes away previous applications resulting in an uneven splotchy mess (3) the sheen is uneven even with sufficient mixing. So in order to get the brush strokes and texture i wanted while airbrushing, i applied a brushed layer of Mr. Surfacer, which is basically a very thinned out liquid putty. This gave me some great texture on the P2 main body and handle. Before i added the surfacer, I drilled and installed the emitter base, trigger, and side brass rod. Looks pretty messy at this point but its going to get better, trust me.
Next up with be priming the P2, painting the P1, and starting to add more of the small parts
Last edited:

