Alright, so this is my first posting here, and I'm not quite sure if it'll fly or not. If it's not kosher, or if it's in the wrong spot, please let me know, or Mods, do your thing.
What I've made isn't a prop or costume from any show, movie, or video game, but rather it's a reproduction of one of the most atrocious abuses of licensing that has ever occurred.
I'm talking about The Spock Helmet.
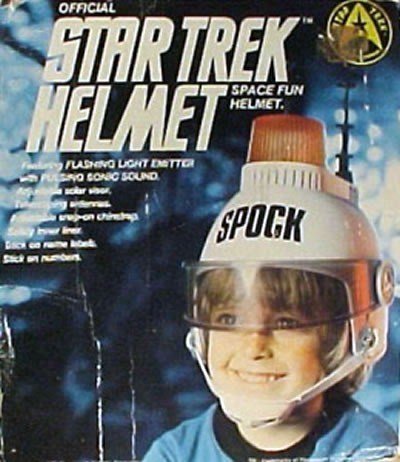
First, some backstory. Officially, it was "The Official Star Trek Helmet," and it was a children's toy released in the mid 70's by AHI. By the mid 70's, the original Star Trek TV show had run its course and was in reruns. In an effort to squeeze some more money out of it (before they saw Star Wars and decided to make movies), Paramount licensed out the Star Trek name to a lot of different toy companies. Most of those toy companies turned around and made toys that had something to do with the show. Action figures, Costumes, Playsets, etc. AHI decided that they could just slap the Star Trek brand on whatever they already made, including a really stupid looking white helmet with a blinking light on top. So they did, and they sold it as the Official Star Trek Helmet. It has nothing to do with the show. It was never in any episode or movie. It was never worn by any cast member. It was just a cheap kids toy. While we know it as the Spock Helmet, due largely to the above image turning into a bit of a meme in the Star Trek crowd, in reality the helmet came with a number of different decals so you could label it as you liked. I have a friend with a helmet he labeled "SCOTT" because everyone knows engineers are the coolest.
So, for my part, I work on a Star Trek Video game, and attend the big Star Trek convention in Las Vegas (Star Trek Las Vegas, or STLV) every year. I was talking with a friend about the helmet one day, and an image popped into my head of someone walking the halls at STLV, wearing the helmet, and how funny that would be. The problem is that the originals are child sized, 1970's kids toy quality, and nearly impossible to find (they sell for $400+ when they do come up). So I decided to make one.
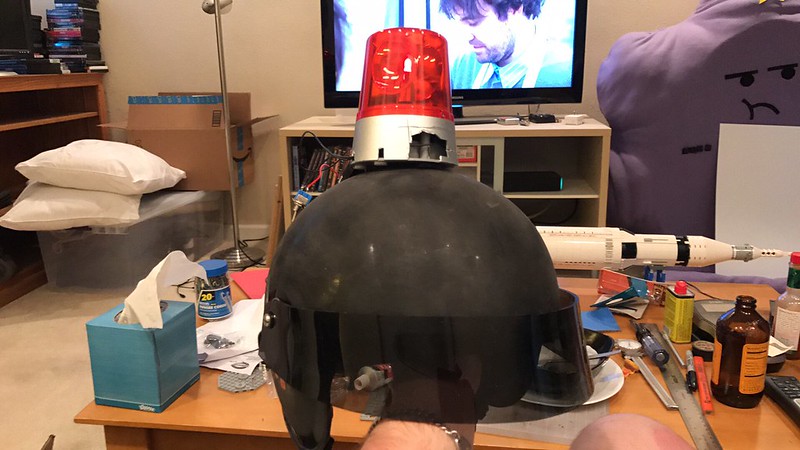
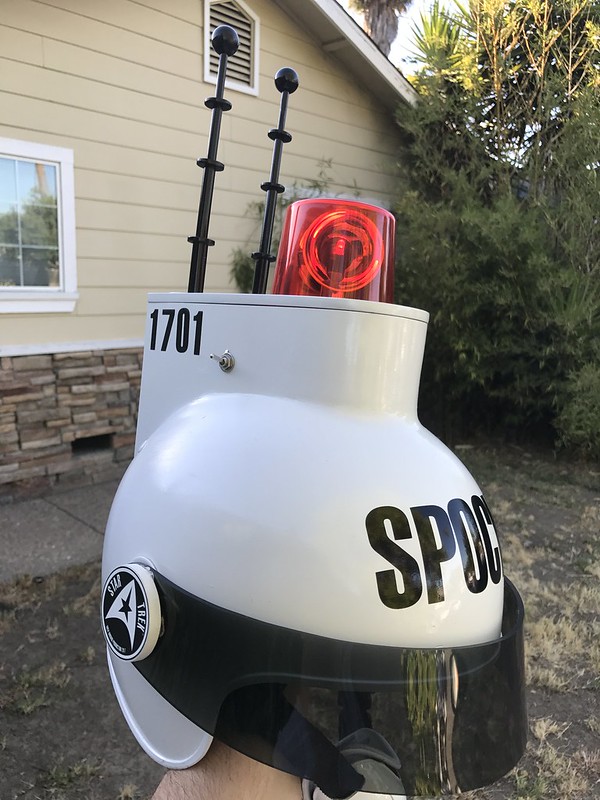
For the impatient among us, here's me wearing the finished product:
So, I don't have any prop making experience per se. I built plastic models as a kid, and I do some woodworking and minor electronics stuff. I have worked with acrylic and styrene before, but no hand crafting much. To make matters worse, I didn't think about making this helmet until less than a month before STLV. So this was a bit of an adventure.
The first step was to find a helmet to base it off of. The original kind of looks like a police helmet, and I figured if I could find a riot helmet with the face shield, I could use it to form the visor, and use the mounting points for that. I have a big head, and ordering a random helmet online is a craps shoot. I bought one off Ebay labeled "Large," for about $30.
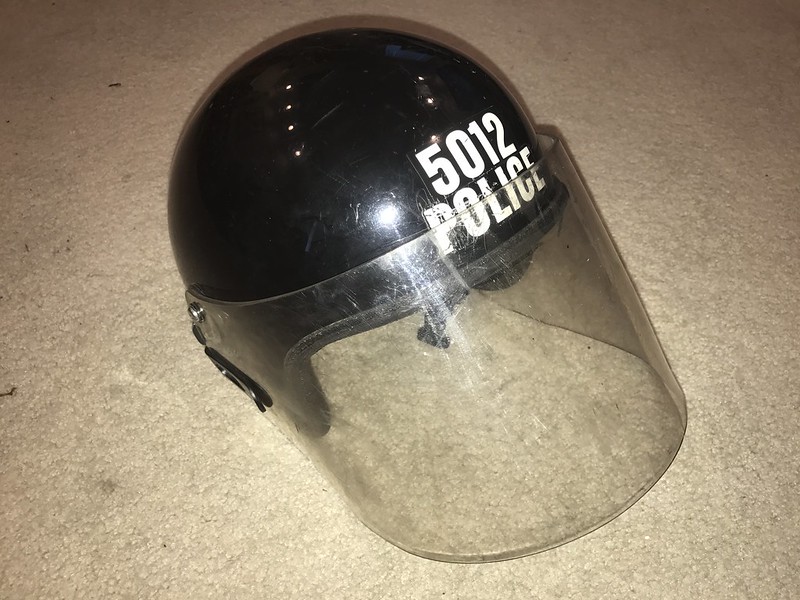

The helmet showed up on July 14th, and STLV started on August 1st, so I had 2 weeks to turn this thing around, with a fair number of tools, but only questionable skills. Magically, when it arrived, it fit my head quite well. If it had not, I would have probably abandoned this whole thing.
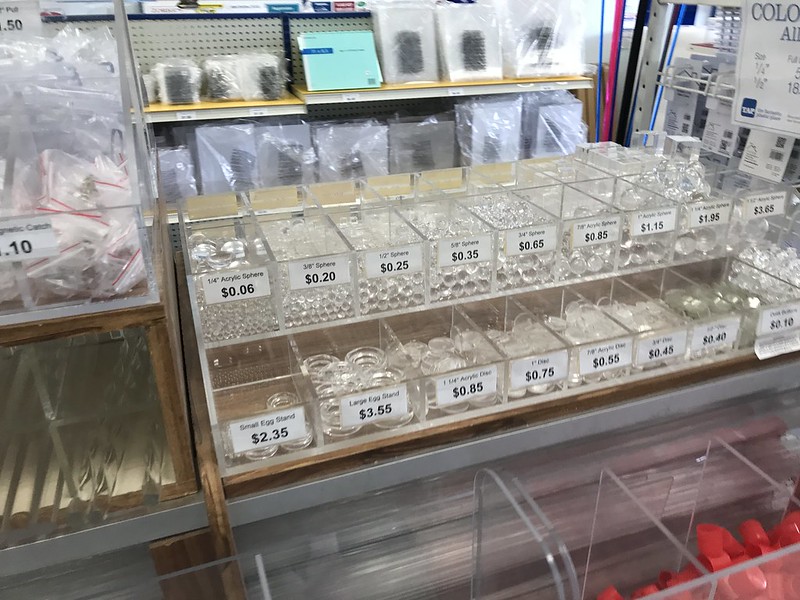
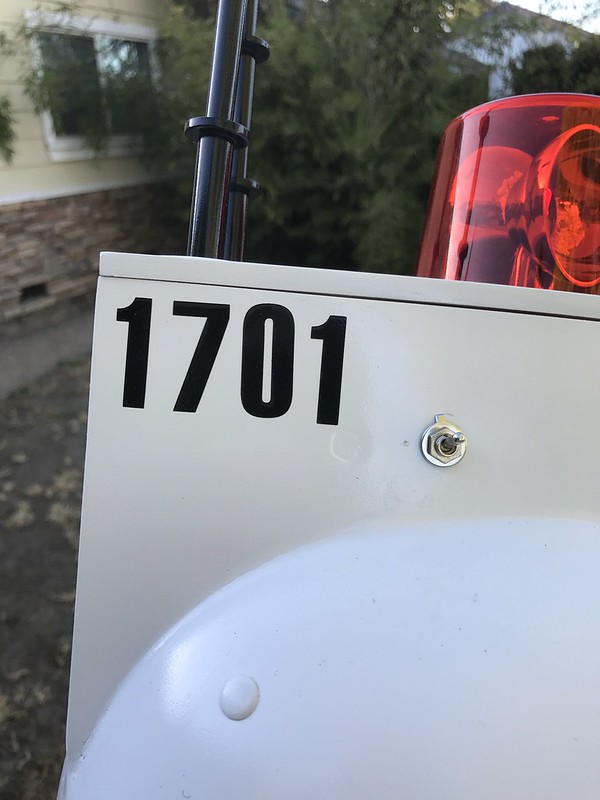
I quickly ordered up a spinning emergency light off Amazon, along with some toggle switches. The original had one of those little black sliding switches, but I wanted something easier to locate and flick with it already on my head. I headed off to Tap Plastics, a local plastics store I adore. There I bought a sheet of smoked 1/8" acrylic, and a sheet of 1/16" white styrene. I think they were both in the 2'-3' square/rectangle range. I also grabbed some nesting tubes that appeared to be roughly the right diameters for the antenna, and some 3/4" acrylic discs and balls for the antennas.
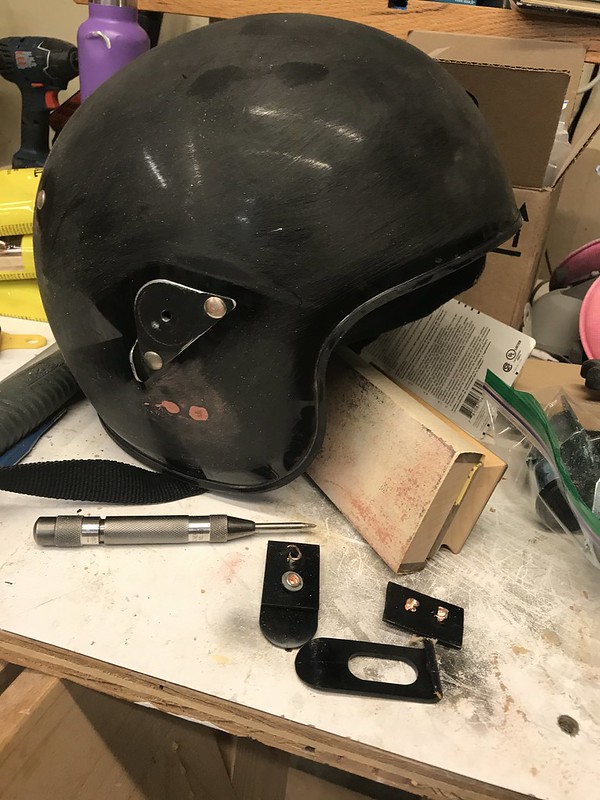
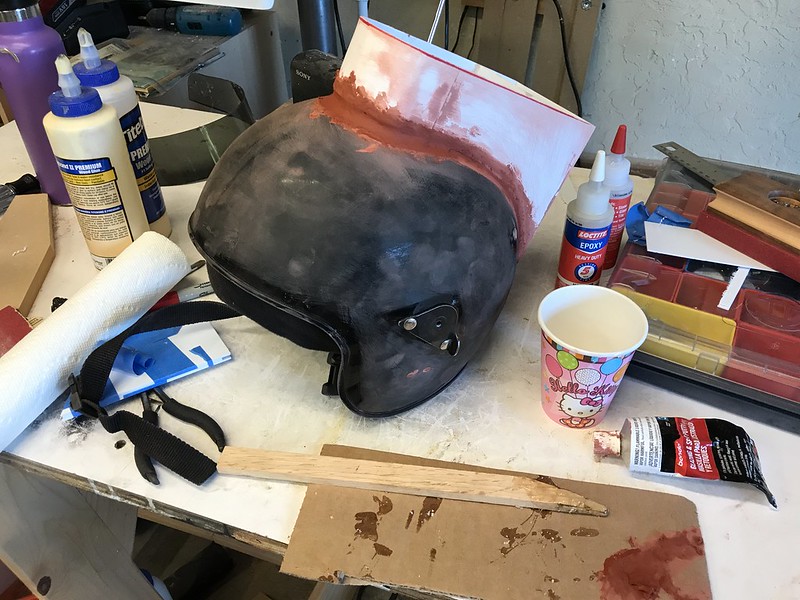
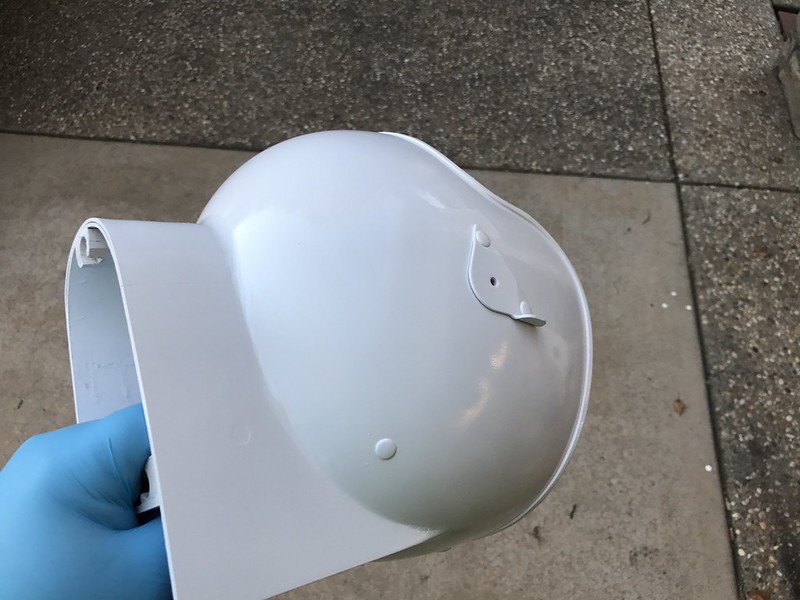
I then set to prepping the helmet itself. The brackets for the face shield were exactly what I wanted, but it also had these little plastic clips below that to hold the face shield down. They were riveted to the helmet. So I started drilling them out. I didn't realize it on the first one, but rather than drilling the rivet, the rivet was just spinning in place, and got hot enough to melt the surrounding plastic. It also burned off a little patch of my fingerprint. . . Anyway, I got them off, and then filled the holes with some of that red Bondo Spot Putty, which would soon become my best friend.
The police light arrived and was just what I needed, but I wanted to wire it for an external switch, and also an external battery, so I could change out the batteries more easily. At this point I thought the light base might end up less accessible. I figured I'd just glue the superstructre together and cut out a panel in the back to get at the batteries. That idea quickly fell by the way side.
I failed to get any photos of the process, but I started working on the visor. I first covered the original face shield in a couple layers of blue painter's tape. Then I drew out the shape I wanted the visor to be on that, and cut off the excess tape. I marked where the mounting holes were, and then peeled the tape mask off, and stuck it onto a piece of 1/4" hardboard. I used my bandsaw and belt sander to cut and shape that down to the shape of the tape, and then cut out a couple of blanks of the smoked acrylic for the visor. I mounted a blank to the hardboard using more painter's tape and superglue, rough cut it on the bandsaw, and then used a pattern cutting bit in my router to cut it down to shape. It made a mess, and all of the chips were staticky so I'm still finding them places. Sanded down all the edges afterwards.
https://c1.staticflickr.com/5/4436/36366762032_53d645c92e_c.jpg[img]
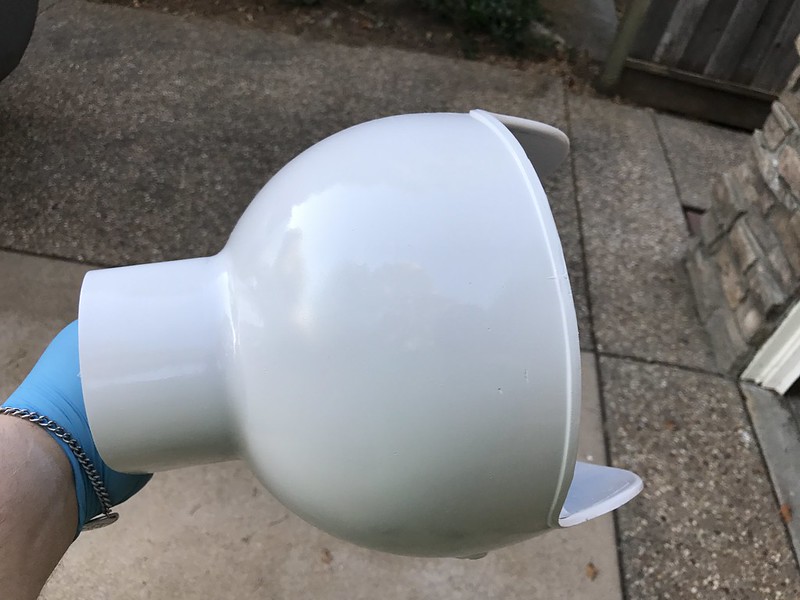
I've only ever bent acrylic using a heat gun to make right angles, so I looked up some youtubes on it, and it sounded like the oven was the place. I did a test piece from one of the offcuts. Worked great. So I put the real one in the oven, and then used the original face shield as my mold, and some more tape to hold it on until it cooled. Worked like a charm.
[IMG]https://c1.staticflickr.com/5/4426/36366761182_369a329696_c.jpg
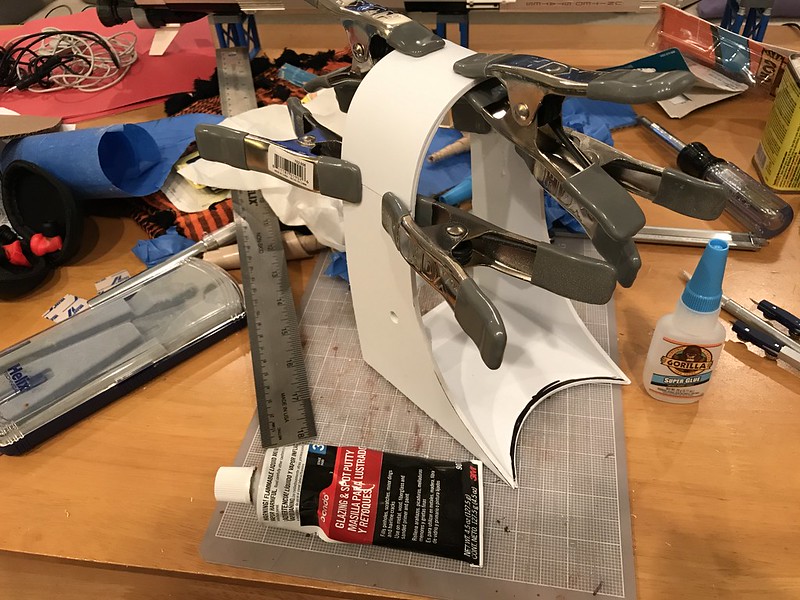
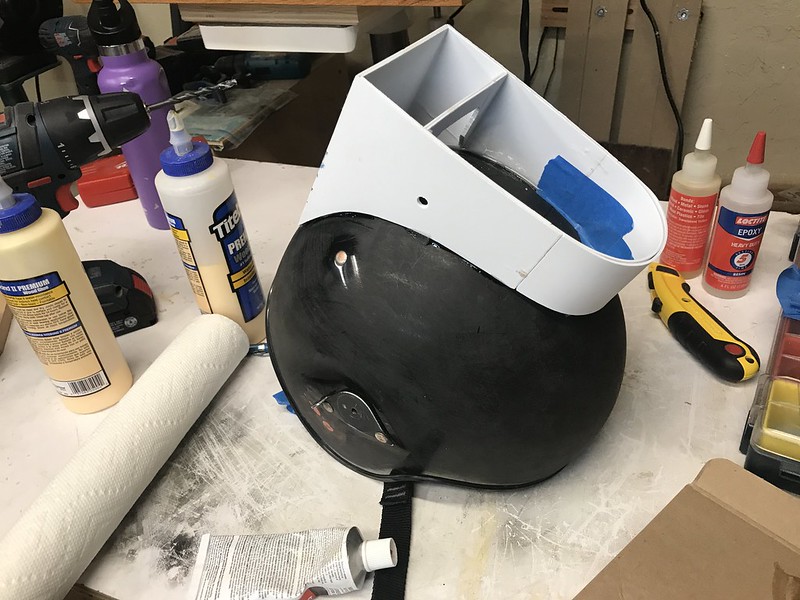
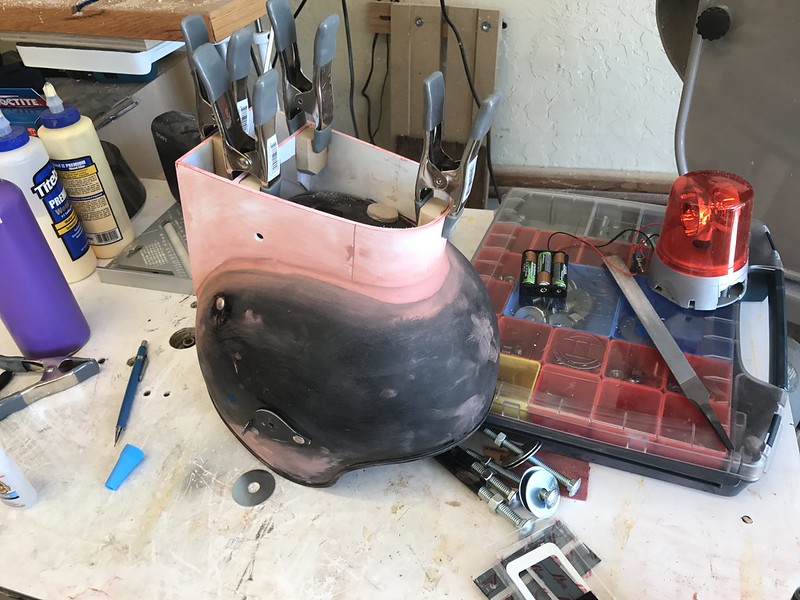
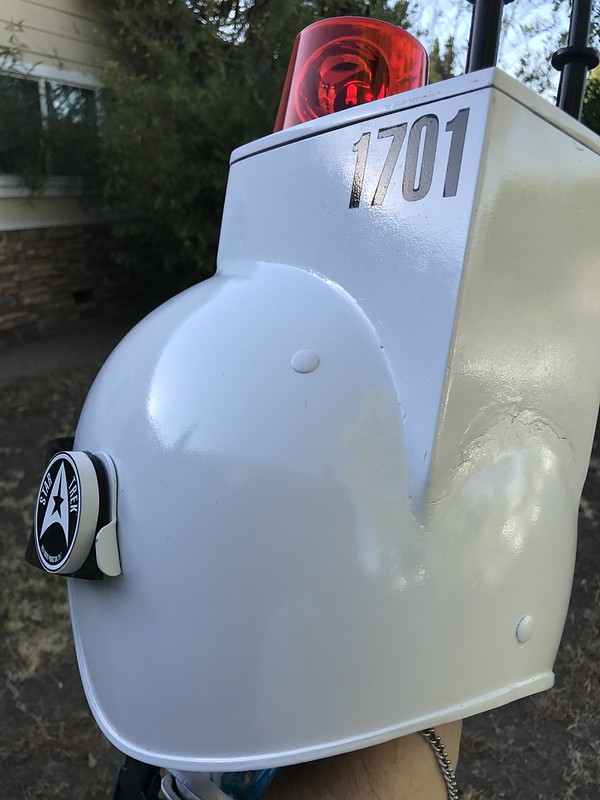
Next up was forming the superstructure. Again, I'm skipping some photos, but I marked some parallel lines, 4" apart on the helmet, and then used cardboard to figure out the curve (roughly). Then used that cardboard to pattern the styrene. I didn't think the 1/16" styrene would be sturdy enough, so I doubled it up. The side panels that have the curve to meet the helmet were glued up with a 1/16" inset at the rear, and a 3/8" overhang at the front. The rear rabbet would be used to give me some more glue surface for the rear panel, and the front is so I could mount and bend the curved part at the front. Once I had the side panels, I made up the back panel and a center support just behind the switch hole, so I could glue those all up as a box using CA. Then once that was done, I cut out some strips for the front, one 3/4" longer than the other. Unlike the sides and back, I didn't want to laminate them before putting them in place. I used a jar I have that was about the same diameter as the light, and my heat gun to bend the two pieces into shape. Then I glued them in place, and to each other. You can never have enough clamps.
After that cured, I placed it on the helmet, and used some epoxy to tack it into place.
Then we start with my old friend, Bondo. Again, I'm new to this, and so I only had an inkling of what I was doing. It didn't have to be perfect, it's a joke of a prop, and as long as it was recognizable, I was going to be happy. My Styrene superstructure still had some sizable gaps around the base, so I slathered it up, putting more on than is reasonable, figuring I'll just sand off what I don't want/need once it's dry.
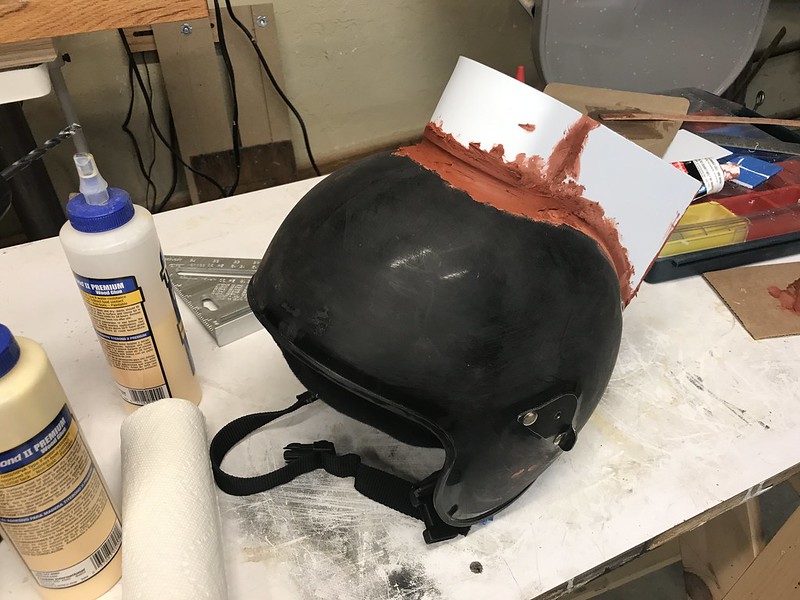
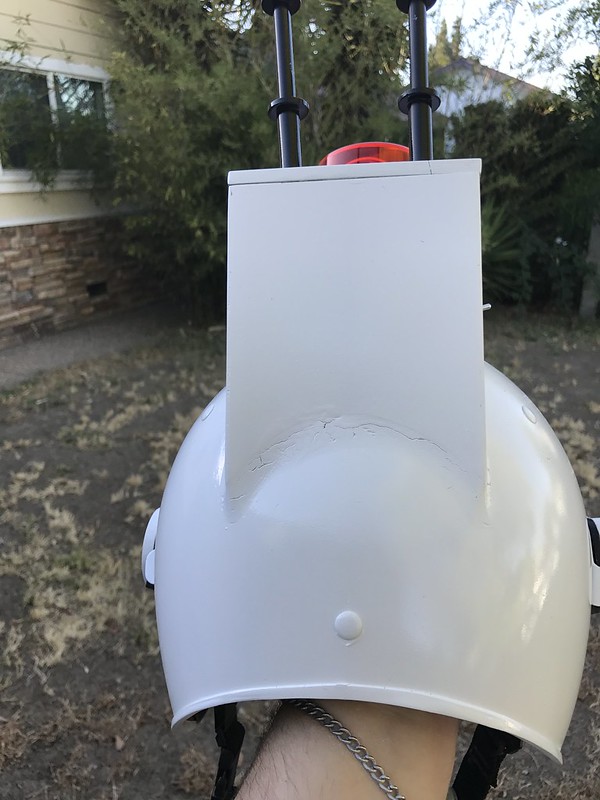
Dried and sanded, obviously it cracked because there was so much of it trying to fill too big of a hole in too short order. Again, I'm on a pretty strict deadline, so whatever. I'll just smear more on and keep going with it.
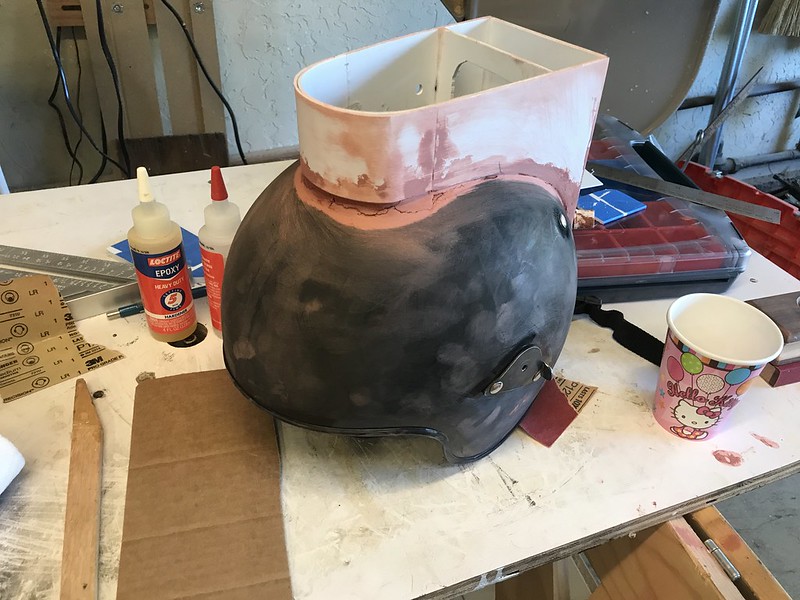
While the bondo was cracked and imperfect, I wanted to stabilize the top a bit, so I poured in a puddle of epoxy into the front and back, backing up the bondo, and holding the superstructure in place for more bondo/sanding/etc. In this photo you can see that my front curve bending wasn't perfect. Luckily it wasn't apparent in the end product.
Superstructure now firmly in place. . . more Bondo.
At this point I'm also doing electronics stuff elsewhere, and it's obvious that having everything being removable (for shipping), and also just accessible for repair, was key. So I had to reconsider my original plan of sealing it all up. I decided that since the top was flat, it was reasonable to make up a cap piece that could just be held on with neodymium magnets. That way it's easily accessible, but still strong enough not to go anywhere. The only thing the top has to hold up are the Antennae. So I ordered some magnets from Amazon, and OF COURSE, they get lost in the mail. So I checked online, and my local Home Depot supposedly has some in stock. I drive over, and find this.
I check three more HDs, all of which claim to have them in stock, and they're all out. Eventually I find some neo mags that I think will work, even though they weren't quite what I was originally thinking of. So I made some little blocks of MDF and mounted them in four spots around the helmet.
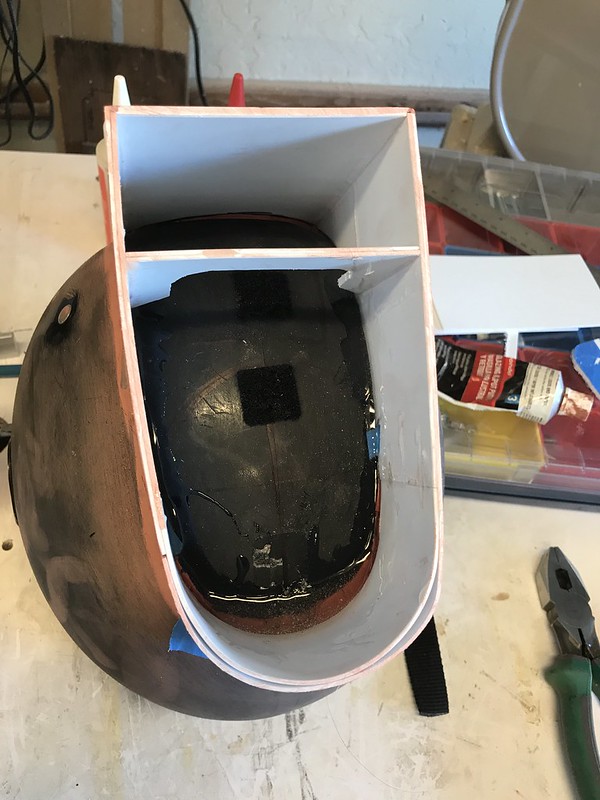
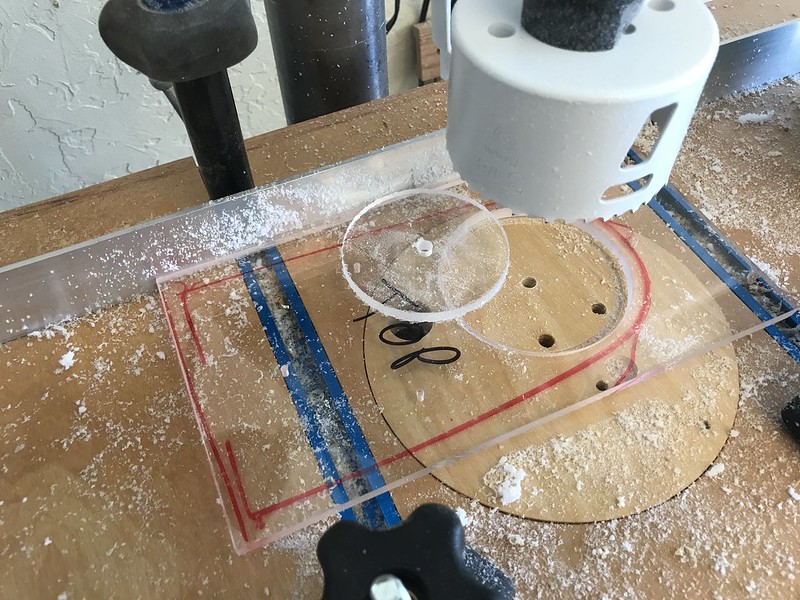
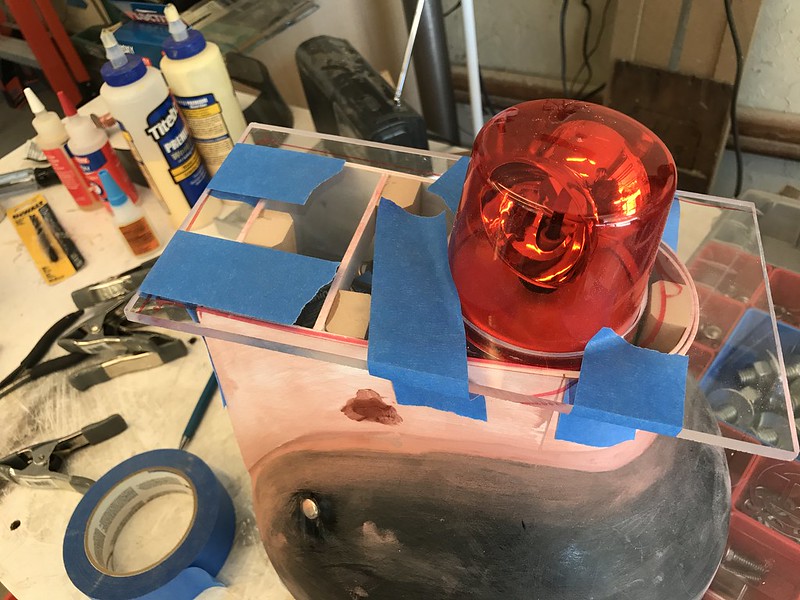
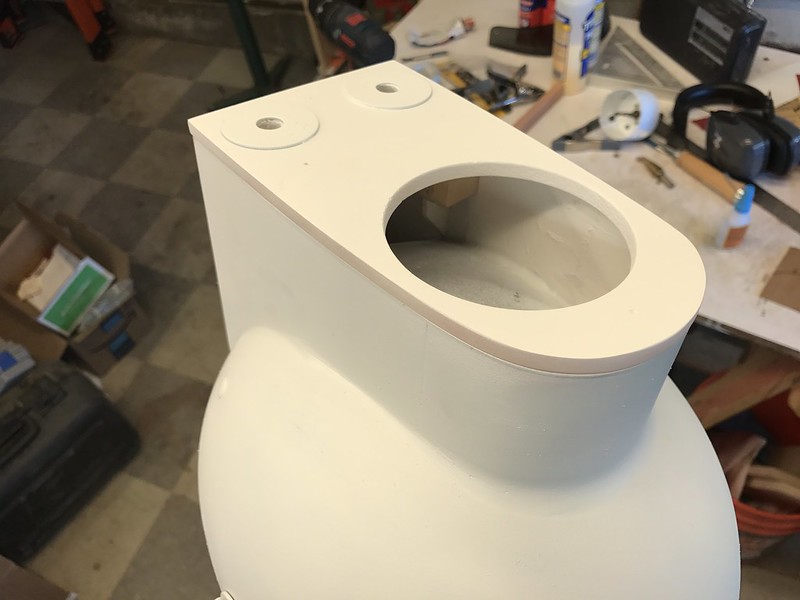
I cut a blank out of some 1/4" acrylic I had laying around, marked a rough outline, and then drilled a 3 1/8" hole for the light. Hindsight being what it is, I shouldn't have used acrylic, but I had it around, it was thick enough, and fairly sturdy, and being transparent would make it easier to drill and mount the magnets.
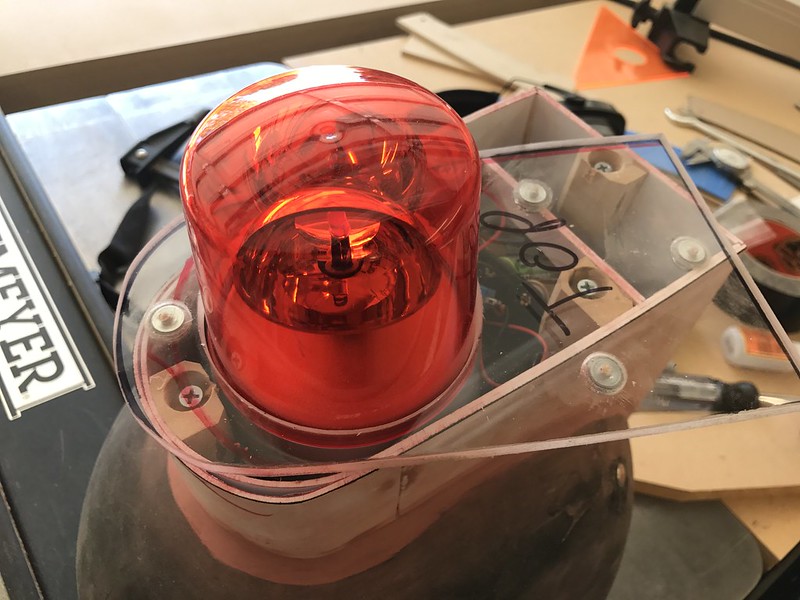
Reinstalled the light (velcro), and then placed the top piece in position. I taped it on so it stayed in one spot, and then used a narrow drill bit to drill through both the top and the four mounting blocks, so they were all aligned. Then I used a 1/2" forstner bit to recess into the acrilic a bit, and then epoxied the four magnets into position. (The top is still a big rectangle at this point.)
Once the magnets were in, I drilled out and added some small screws to the four blocks so that the magnets have something to grip. This is where I figured out that I should have used something more solid. The MDF split as I screwed them in. I glued it back together (more CA), and then used a smaller screw for the four blocks. Worked out in the end, but I should have used a stack of plywood, or even some chunks of plastic. Whatever, it worked. Once mounted, I marked and cut around the top on the bandsaw, and then shaped it using my belt sander, and eventually hand sanding.
Next up, I had to drill the 3/8" holes for the bolts that would hold the antennae in place. Again, I shouldn't have used acrylic, but I did. I've drilled acrylic plenty of times, and as long as you go slow, and scrape, it works fine. First hole worked great. Second hole, not so much. The drilling went fine, but when the bit broke through, the piece climbed up the bit, and that's when it broke.
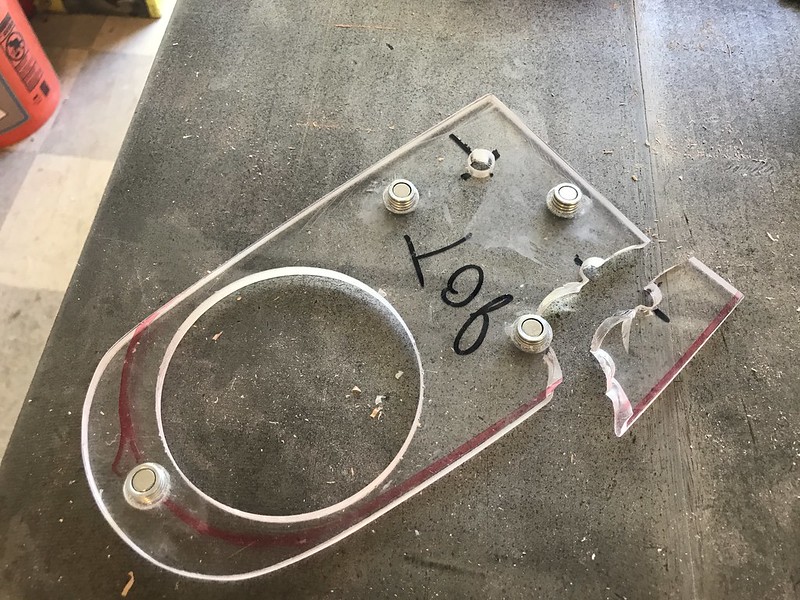
Luckily it glued back up pretty well (more CA). I was going to use some big 3/8" fender washers under the antennae anyway, so I used them and some 3/8" bolts to hold everything together while it set. Ended up just gluing the fender washers to the top to help reinforce the holes, and that worked fine.
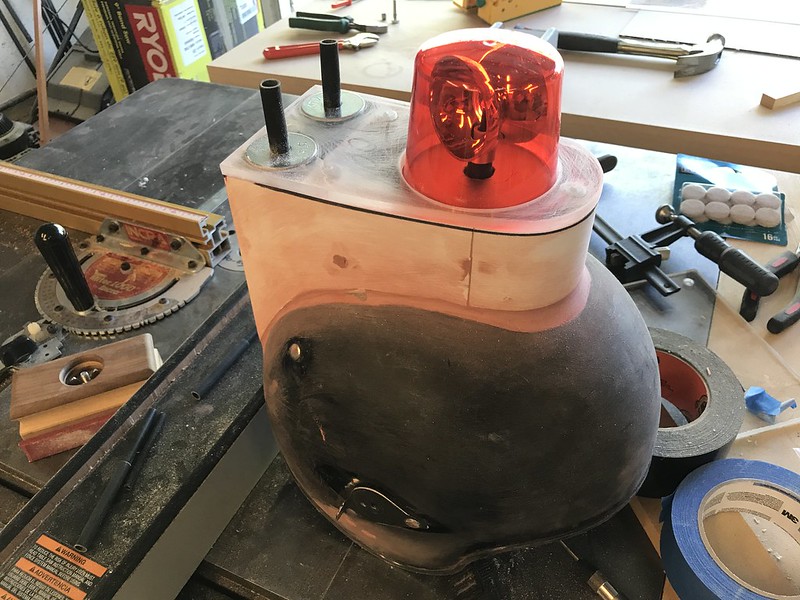
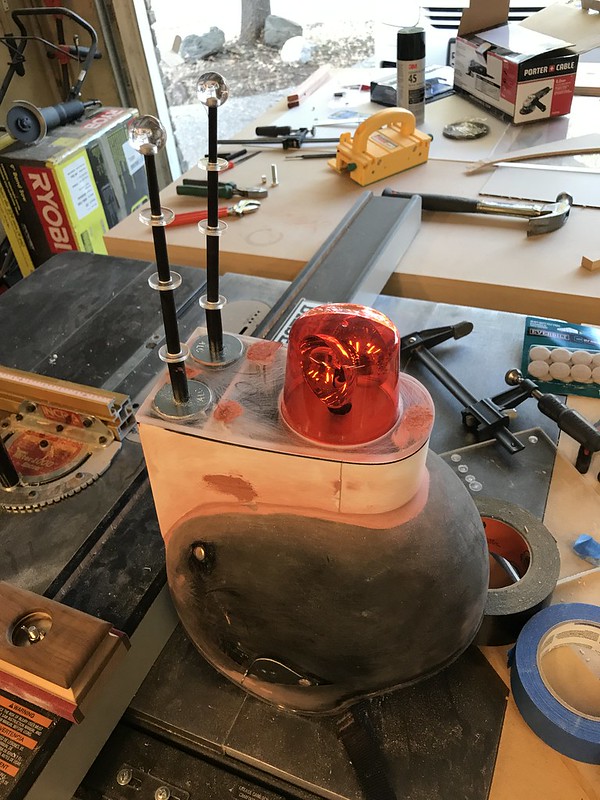
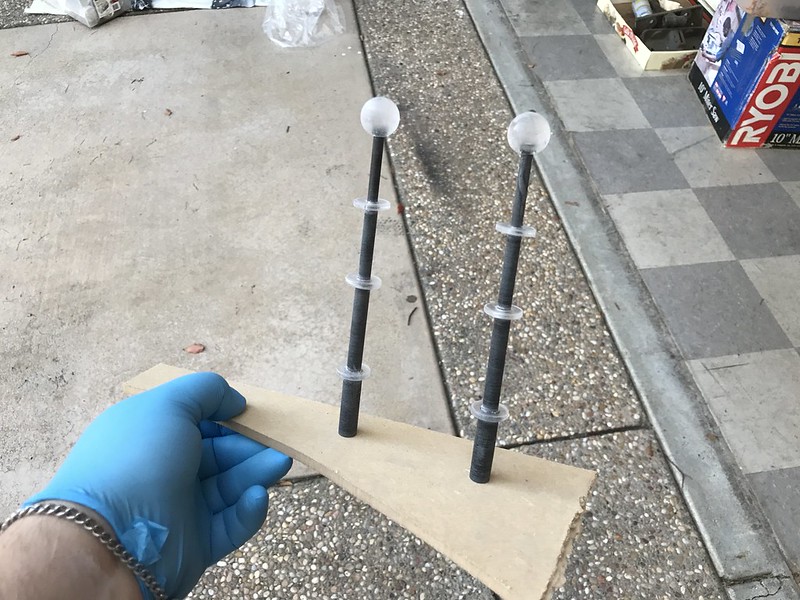
At this point, the bulk of the helmet is together, and I need to think about those antennae. I drilled some apropriately sized holes in the acrylic discs, and the balls for the tops. Here's a dry fit. (also featured, more bondo for the holes in the top, and the original switch hole as I decided to move the switch forward a bit.)

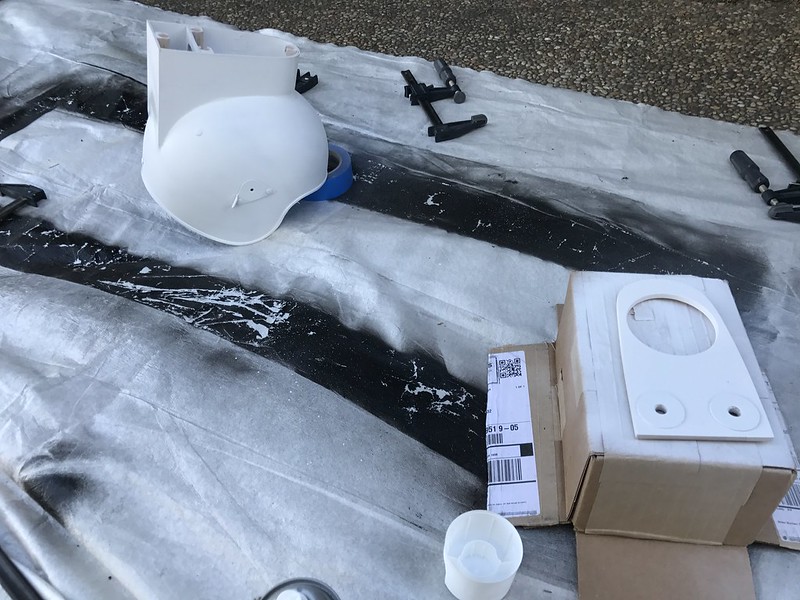
And with that, it's time to paint. A couple of coats of whatever primer I had on hand, with a light sanding between, and then a couple of coats of some high gloss white I also had left over from a drill press I rebuilt last year. Clamps are just there to weigh down the drop cloth.
The bondo in the back was still cracked, but I didn't have time to mess with it.

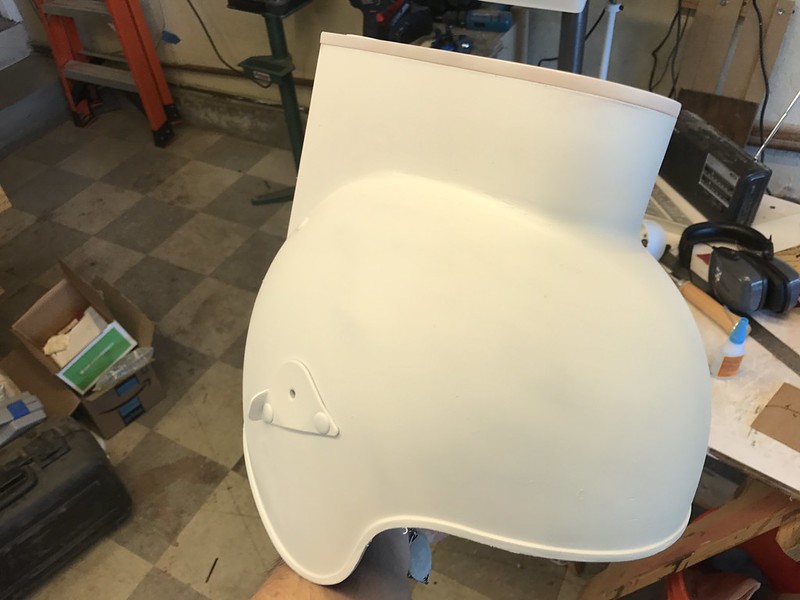
Luckily, the front looked pretty good.
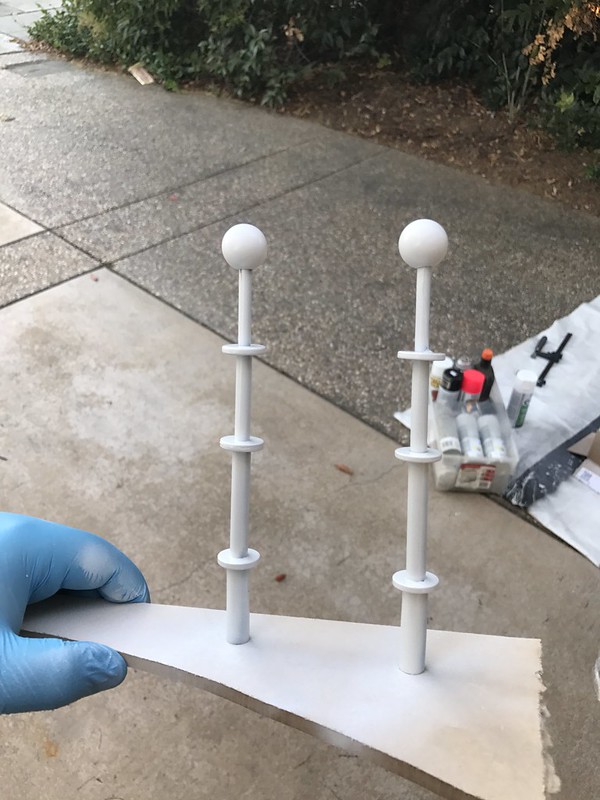
Time for the Antennae. They got glued up with some epoxy. Each segment is inserted about 1" into the one below it. The bottom segment is a little smaller than 3/8" so I tapped them, and epoxied some 3/8" bolts inside, and then cut the heds off of them.

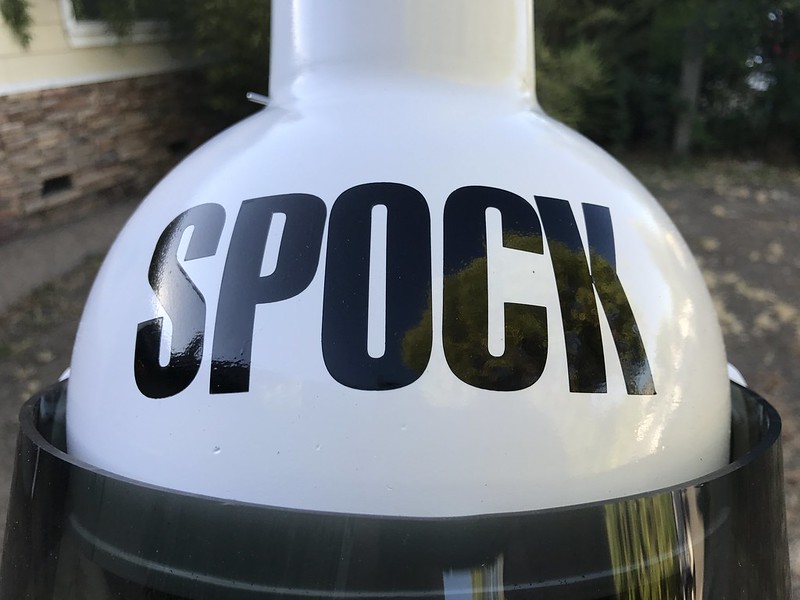
Next step was to think about the labeling. I ordered a couple of packs of adhesive 2" vinyl letters, but nothing I could find was the right font. My local Michaels has a ton, but they're all very whimsical. Luckily I have a friend with a laser cutter. . .

The original helmet made a really obnoxious siren noise, and at this point, as everything is coming together, I start getting notions of making up a little siren circuit to go with my spinny light. I didn't want to annoy myself though, so I rewired the light with a second switch in line, so I could potentially turn off the siren. In the end, I ran out of time and didn't get the siren made, so I removed the second switch. Maybe someday.
Coming together. . .
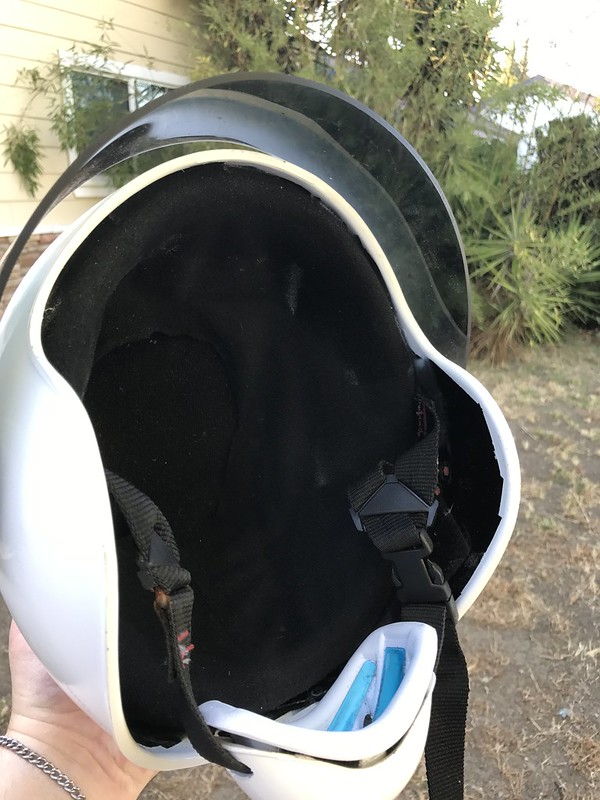
Down to the details now. I didn't take any photos of it, but the chin strap was kind of a key element. I bought a chin strap/cup off amazon, but it was textured weirdly and had "WILSON" embossed on the bottom. I ended up going and getting a second one, a smooth American Flag covered chin strap, from a local sports store. Initially, I had thought of replacing the actual helmet's strap somehow, but that didn't seem like a great plan once I got down to it. The original strap is riveted in, and those are the same rivets that hold the visor mounting plates. So I left it, and ended up just cutting wider slots in the chin cup, and slipping that over the real strap. Oh, and I painted over the American Flag, like the heathen I am.
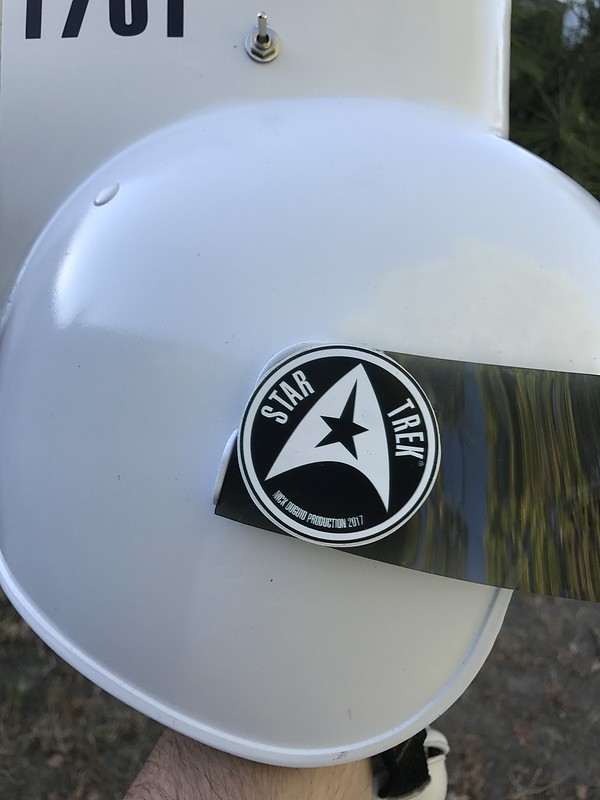
The original had these little Star Trek emblems on the sides of the visor, covering the pivot points. My visor didn't pivot from the middle, so I made up some rounds out of the left over styrene, 3 layers thick. The bottom two layers had a 1" hole drilled through them, so that the whole thing would fit over the mounting screws. I drew up the emblem in photoshop and then printed it out at one of those CVS photo stations.
And there we are.

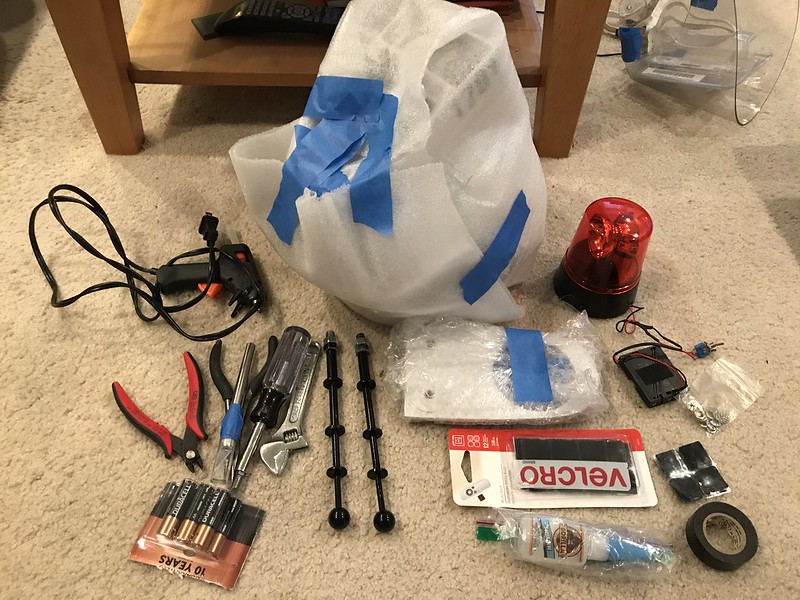
So, with the helmet done, I had to figure out how to get it to Vegas. It's bulky, and wearing it on the plane (though suggested by friends) didn't seem like the best plan. Not sure what TSA would think. It's jenky enough that I knew I wanted to bring a bunch of supplies along in case something broke. So I boxed it all up and checked it as luggage.
Checking a box as baggage isn't a great plan. If I had had more time, I would have shipped it, but it was finished just a couple days before the con. So. . . the guy at the Southwest desk said that they could guarantee it would get there, but couldn't guarantee it's would be undamaged. He was accurate in his promise.
Luckily I'd packed the helmet well enough that nothing was damaged inside. And in the end, nothing broke, and the only tool I needed was the adjustable wrench to tighten down the antennae.
So. . . the convention. I went in hoping that at least a few people would recognize it. The helmet is a deep cut, no doubt. I was just praying that I wouldn't end up getting blank stares all weekend. Suffice it to say, that was not the case.
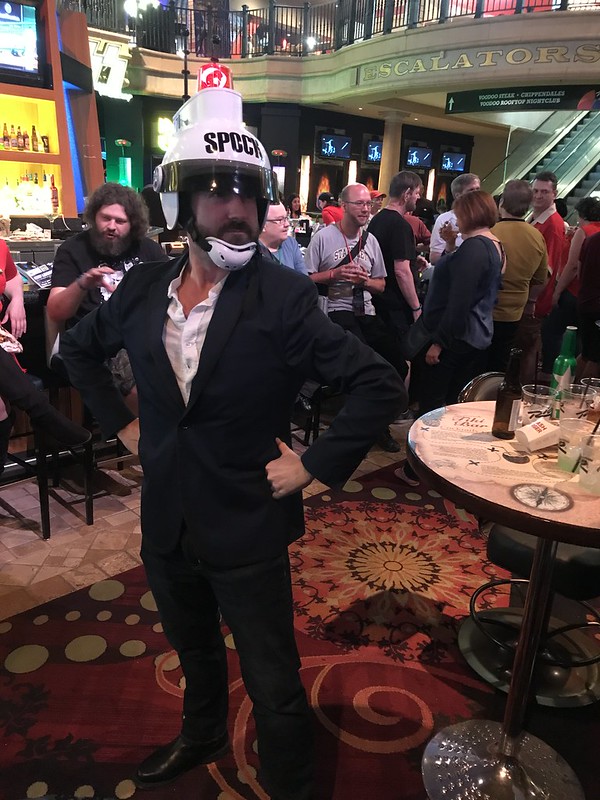
Above is my friend Holly, the one with whom I had been discussing the inanity of the helmet when I decided to make one. Despite appearances, she was not injured. Below is John, strutting his stuff, Vegas style.
Avery, rocking it in her TOS uniform (wrong color though).

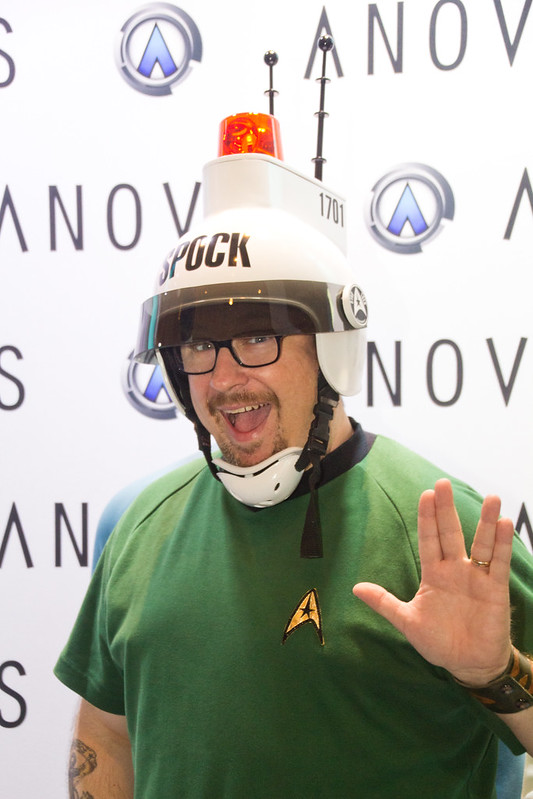
And another John, this one works at Anovos, and is wearing his reproduction Green Donmoor Tunic.
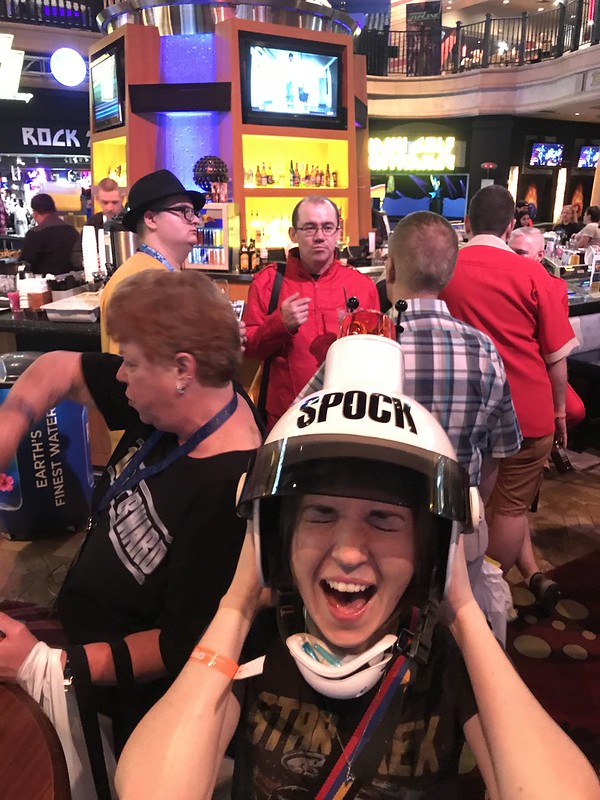
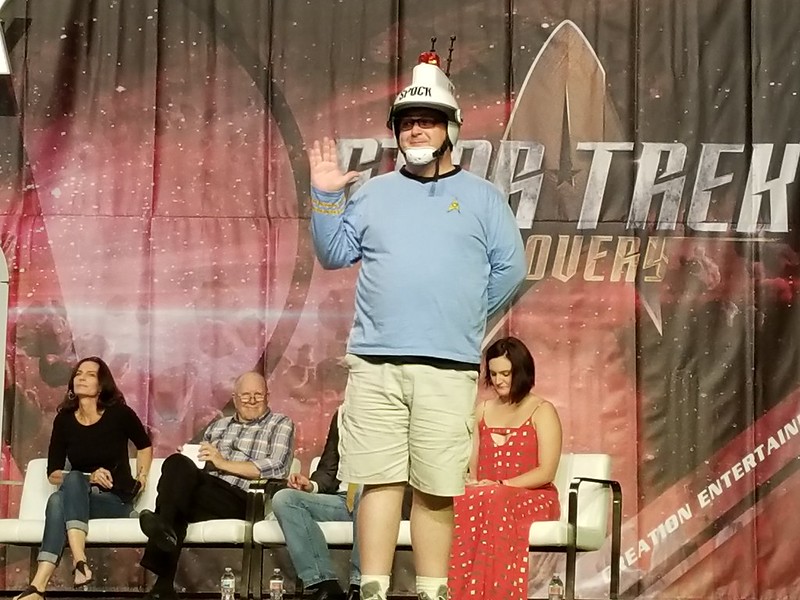
There was barely anything more to my costume other than the helmet. I wore a Blue TOS PJ top I had, because it seemed appropriate to the kid in the original photo, but that's it. Despite this, I had numerous people tell me I should enter the costume contest. So. . . I did. I ended up making it to the second round, and got to strut my stuff on the big stage, with judges Terry Farrell, Michael Westmore, Neville Page, and Mary Chieffo behind me.
In the end it was a ton of fun, and well worth the rush job to get it there for STLV this year. It's not a perfect reproduction. Its proportions are off, and there are some details wrong. But it was recognizable enough. I had a lot of people know exactly what it was, and many of them thought it was the original, or at least were impressed I'd made it. There were plenty who didn't know what it was, but even of those, there were a lot of them who were excited to see it and learn the history of the Spock Helmet.
I hope this post is worthy of the RPF. I've been a fan and a lurker for a long time, and am always impressed with what you guys are able to do.
Thanks
What I've made isn't a prop or costume from any show, movie, or video game, but rather it's a reproduction of one of the most atrocious abuses of licensing that has ever occurred.
I'm talking about The Spock Helmet.
First, some backstory. Officially, it was "The Official Star Trek Helmet," and it was a children's toy released in the mid 70's by AHI. By the mid 70's, the original Star Trek TV show had run its course and was in reruns. In an effort to squeeze some more money out of it (before they saw Star Wars and decided to make movies), Paramount licensed out the Star Trek name to a lot of different toy companies. Most of those toy companies turned around and made toys that had something to do with the show. Action figures, Costumes, Playsets, etc. AHI decided that they could just slap the Star Trek brand on whatever they already made, including a really stupid looking white helmet with a blinking light on top. So they did, and they sold it as the Official Star Trek Helmet. It has nothing to do with the show. It was never in any episode or movie. It was never worn by any cast member. It was just a cheap kids toy. While we know it as the Spock Helmet, due largely to the above image turning into a bit of a meme in the Star Trek crowd, in reality the helmet came with a number of different decals so you could label it as you liked. I have a friend with a helmet he labeled "SCOTT" because everyone knows engineers are the coolest.
So, for my part, I work on a Star Trek Video game, and attend the big Star Trek convention in Las Vegas (Star Trek Las Vegas, or STLV) every year. I was talking with a friend about the helmet one day, and an image popped into my head of someone walking the halls at STLV, wearing the helmet, and how funny that would be. The problem is that the originals are child sized, 1970's kids toy quality, and nearly impossible to find (they sell for $400+ when they do come up). So I decided to make one.
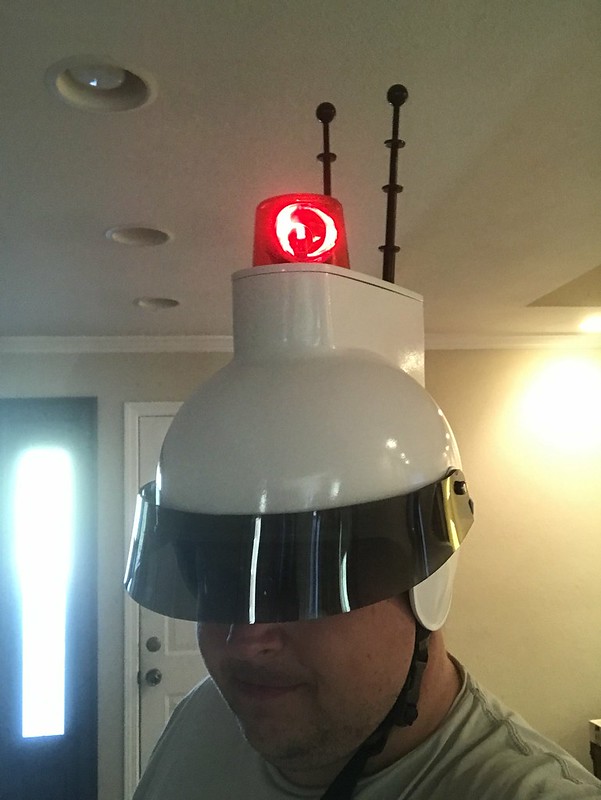
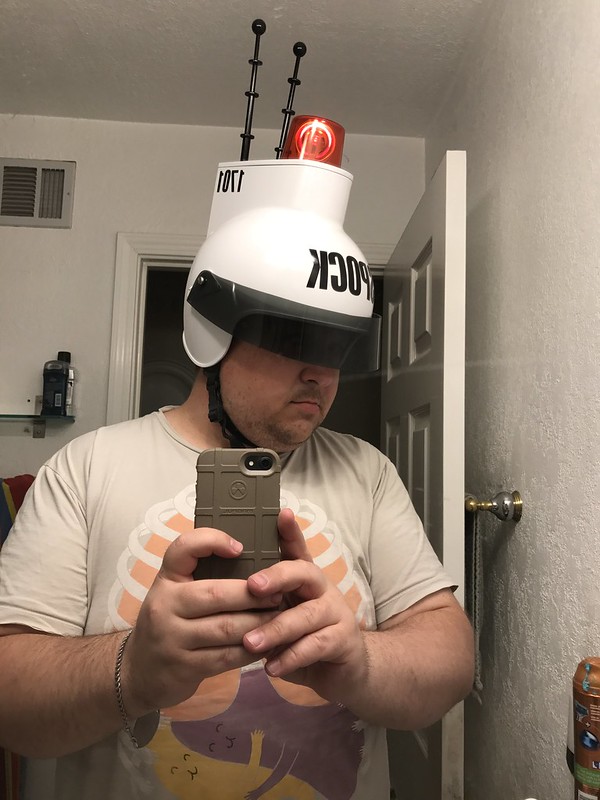
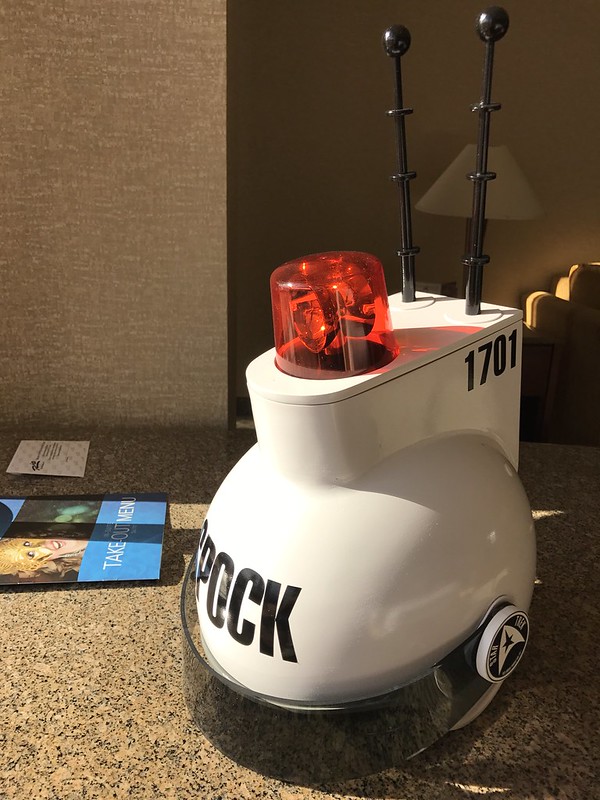
For the impatient among us, here's me wearing the finished product:
So, I don't have any prop making experience per se. I built plastic models as a kid, and I do some woodworking and minor electronics stuff. I have worked with acrylic and styrene before, but no hand crafting much. To make matters worse, I didn't think about making this helmet until less than a month before STLV. So this was a bit of an adventure.
The first step was to find a helmet to base it off of. The original kind of looks like a police helmet, and I figured if I could find a riot helmet with the face shield, I could use it to form the visor, and use the mounting points for that. I have a big head, and ordering a random helmet online is a craps shoot. I bought one off Ebay labeled "Large," for about $30.
The helmet showed up on July 14th, and STLV started on August 1st, so I had 2 weeks to turn this thing around, with a fair number of tools, but only questionable skills. Magically, when it arrived, it fit my head quite well. If it had not, I would have probably abandoned this whole thing.
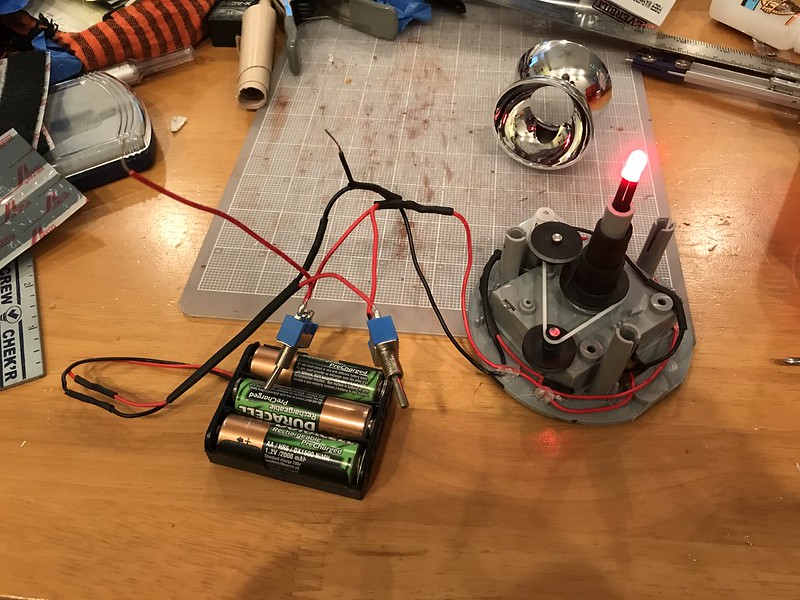
I quickly ordered up a spinning emergency light off Amazon, along with some toggle switches. The original had one of those little black sliding switches, but I wanted something easier to locate and flick with it already on my head. I headed off to Tap Plastics, a local plastics store I adore. There I bought a sheet of smoked 1/8" acrylic, and a sheet of 1/16" white styrene. I think they were both in the 2'-3' square/rectangle range. I also grabbed some nesting tubes that appeared to be roughly the right diameters for the antenna, and some 3/4" acrylic discs and balls for the antennas.
I then set to prepping the helmet itself. The brackets for the face shield were exactly what I wanted, but it also had these little plastic clips below that to hold the face shield down. They were riveted to the helmet. So I started drilling them out. I didn't realize it on the first one, but rather than drilling the rivet, the rivet was just spinning in place, and got hot enough to melt the surrounding plastic. It also burned off a little patch of my fingerprint. . . Anyway, I got them off, and then filled the holes with some of that red Bondo Spot Putty, which would soon become my best friend.
The police light arrived and was just what I needed, but I wanted to wire it for an external switch, and also an external battery, so I could change out the batteries more easily. At this point I thought the light base might end up less accessible. I figured I'd just glue the superstructre together and cut out a panel in the back to get at the batteries. That idea quickly fell by the way side.
I failed to get any photos of the process, but I started working on the visor. I first covered the original face shield in a couple layers of blue painter's tape. Then I drew out the shape I wanted the visor to be on that, and cut off the excess tape. I marked where the mounting holes were, and then peeled the tape mask off, and stuck it onto a piece of 1/4" hardboard. I used my bandsaw and belt sander to cut and shape that down to the shape of the tape, and then cut out a couple of blanks of the smoked acrylic for the visor. I mounted a blank to the hardboard using more painter's tape and superglue, rough cut it on the bandsaw, and then used a pattern cutting bit in my router to cut it down to shape. It made a mess, and all of the chips were staticky so I'm still finding them places. Sanded down all the edges afterwards.
https://c1.staticflickr.com/5/4436/36366762032_53d645c92e_c.jpg[img]
I've only ever bent acrylic using a heat gun to make right angles, so I looked up some youtubes on it, and it sounded like the oven was the place. I did a test piece from one of the offcuts. Worked great. So I put the real one in the oven, and then used the original face shield as my mold, and some more tape to hold it on until it cooled. Worked like a charm.
[IMG]https://c1.staticflickr.com/5/4426/36366761182_369a329696_c.jpg
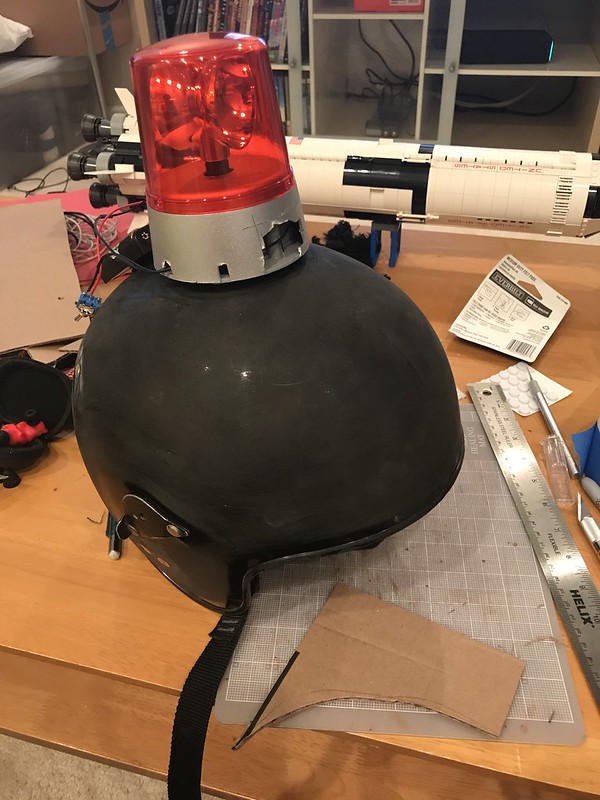
Next up was forming the superstructure. Again, I'm skipping some photos, but I marked some parallel lines, 4" apart on the helmet, and then used cardboard to figure out the curve (roughly). Then used that cardboard to pattern the styrene. I didn't think the 1/16" styrene would be sturdy enough, so I doubled it up. The side panels that have the curve to meet the helmet were glued up with a 1/16" inset at the rear, and a 3/8" overhang at the front. The rear rabbet would be used to give me some more glue surface for the rear panel, and the front is so I could mount and bend the curved part at the front. Once I had the side panels, I made up the back panel and a center support just behind the switch hole, so I could glue those all up as a box using CA. Then once that was done, I cut out some strips for the front, one 3/4" longer than the other. Unlike the sides and back, I didn't want to laminate them before putting them in place. I used a jar I have that was about the same diameter as the light, and my heat gun to bend the two pieces into shape. Then I glued them in place, and to each other. You can never have enough clamps.
After that cured, I placed it on the helmet, and used some epoxy to tack it into place.
Then we start with my old friend, Bondo. Again, I'm new to this, and so I only had an inkling of what I was doing. It didn't have to be perfect, it's a joke of a prop, and as long as it was recognizable, I was going to be happy. My Styrene superstructure still had some sizable gaps around the base, so I slathered it up, putting more on than is reasonable, figuring I'll just sand off what I don't want/need once it's dry.
Dried and sanded, obviously it cracked because there was so much of it trying to fill too big of a hole in too short order. Again, I'm on a pretty strict deadline, so whatever. I'll just smear more on and keep going with it.
While the bondo was cracked and imperfect, I wanted to stabilize the top a bit, so I poured in a puddle of epoxy into the front and back, backing up the bondo, and holding the superstructure in place for more bondo/sanding/etc. In this photo you can see that my front curve bending wasn't perfect. Luckily it wasn't apparent in the end product.
Superstructure now firmly in place. . . more Bondo.
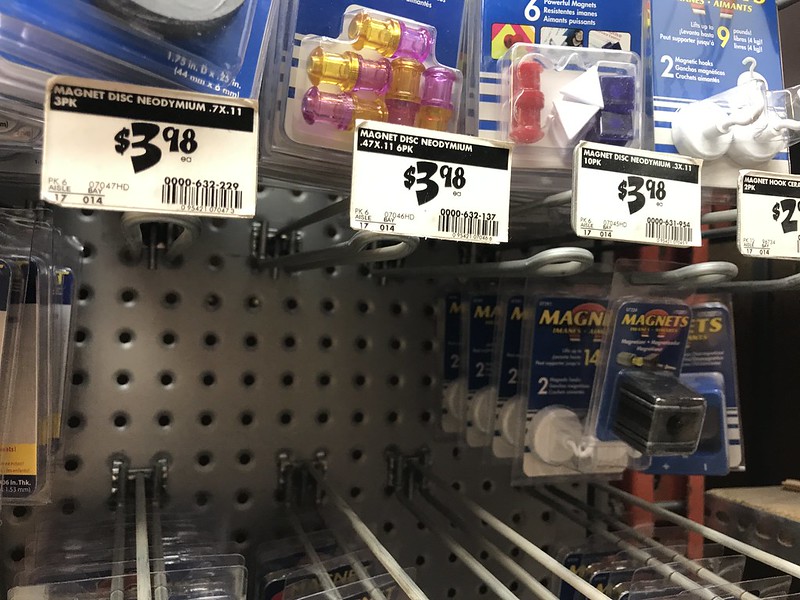
At this point I'm also doing electronics stuff elsewhere, and it's obvious that having everything being removable (for shipping), and also just accessible for repair, was key. So I had to reconsider my original plan of sealing it all up. I decided that since the top was flat, it was reasonable to make up a cap piece that could just be held on with neodymium magnets. That way it's easily accessible, but still strong enough not to go anywhere. The only thing the top has to hold up are the Antennae. So I ordered some magnets from Amazon, and OF COURSE, they get lost in the mail. So I checked online, and my local Home Depot supposedly has some in stock. I drive over, and find this.
I check three more HDs, all of which claim to have them in stock, and they're all out. Eventually I find some neo mags that I think will work, even though they weren't quite what I was originally thinking of. So I made some little blocks of MDF and mounted them in four spots around the helmet.
I cut a blank out of some 1/4" acrylic I had laying around, marked a rough outline, and then drilled a 3 1/8" hole for the light. Hindsight being what it is, I shouldn't have used acrylic, but I had it around, it was thick enough, and fairly sturdy, and being transparent would make it easier to drill and mount the magnets.
Reinstalled the light (velcro), and then placed the top piece in position. I taped it on so it stayed in one spot, and then used a narrow drill bit to drill through both the top and the four mounting blocks, so they were all aligned. Then I used a 1/2" forstner bit to recess into the acrilic a bit, and then epoxied the four magnets into position. (The top is still a big rectangle at this point.)
Once the magnets were in, I drilled out and added some small screws to the four blocks so that the magnets have something to grip. This is where I figured out that I should have used something more solid. The MDF split as I screwed them in. I glued it back together (more CA), and then used a smaller screw for the four blocks. Worked out in the end, but I should have used a stack of plywood, or even some chunks of plastic. Whatever, it worked. Once mounted, I marked and cut around the top on the bandsaw, and then shaped it using my belt sander, and eventually hand sanding.
Next up, I had to drill the 3/8" holes for the bolts that would hold the antennae in place. Again, I shouldn't have used acrylic, but I did. I've drilled acrylic plenty of times, and as long as you go slow, and scrape, it works fine. First hole worked great. Second hole, not so much. The drilling went fine, but when the bit broke through, the piece climbed up the bit, and that's when it broke.
Luckily it glued back up pretty well (more CA). I was going to use some big 3/8" fender washers under the antennae anyway, so I used them and some 3/8" bolts to hold everything together while it set. Ended up just gluing the fender washers to the top to help reinforce the holes, and that worked fine.
At this point, the bulk of the helmet is together, and I need to think about those antennae. I drilled some apropriately sized holes in the acrylic discs, and the balls for the tops. Here's a dry fit. (also featured, more bondo for the holes in the top, and the original switch hole as I decided to move the switch forward a bit.)
And with that, it's time to paint. A couple of coats of whatever primer I had on hand, with a light sanding between, and then a couple of coats of some high gloss white I also had left over from a drill press I rebuilt last year. Clamps are just there to weigh down the drop cloth.
The bondo in the back was still cracked, but I didn't have time to mess with it.
Luckily, the front looked pretty good.
Time for the Antennae. They got glued up with some epoxy. Each segment is inserted about 1" into the one below it. The bottom segment is a little smaller than 3/8" so I tapped them, and epoxied some 3/8" bolts inside, and then cut the heds off of them.
Next step was to think about the labeling. I ordered a couple of packs of adhesive 2" vinyl letters, but nothing I could find was the right font. My local Michaels has a ton, but they're all very whimsical. Luckily I have a friend with a laser cutter. . .
The original helmet made a really obnoxious siren noise, and at this point, as everything is coming together, I start getting notions of making up a little siren circuit to go with my spinny light. I didn't want to annoy myself though, so I rewired the light with a second switch in line, so I could potentially turn off the siren. In the end, I ran out of time and didn't get the siren made, so I removed the second switch. Maybe someday.
Coming together. . .
Down to the details now. I didn't take any photos of it, but the chin strap was kind of a key element. I bought a chin strap/cup off amazon, but it was textured weirdly and had "WILSON" embossed on the bottom. I ended up going and getting a second one, a smooth American Flag covered chin strap, from a local sports store. Initially, I had thought of replacing the actual helmet's strap somehow, but that didn't seem like a great plan once I got down to it. The original strap is riveted in, and those are the same rivets that hold the visor mounting plates. So I left it, and ended up just cutting wider slots in the chin cup, and slipping that over the real strap. Oh, and I painted over the American Flag, like the heathen I am.
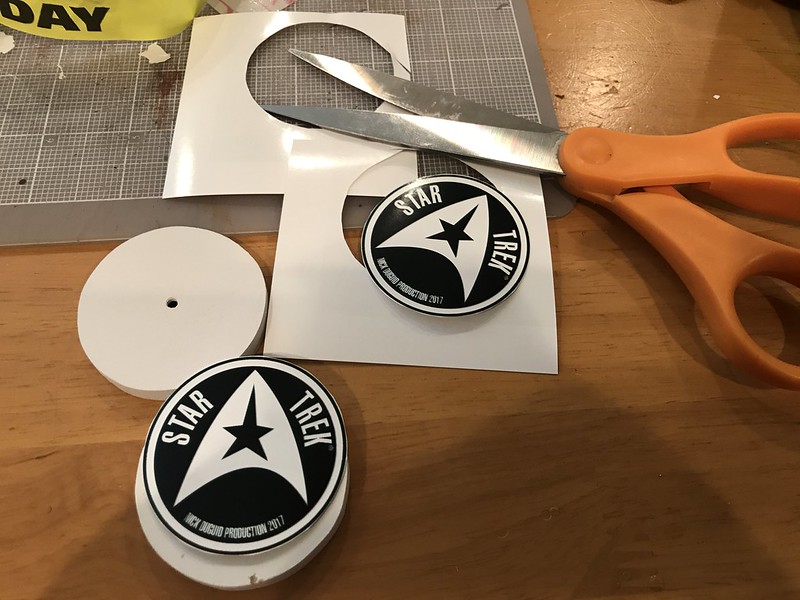
The original had these little Star Trek emblems on the sides of the visor, covering the pivot points. My visor didn't pivot from the middle, so I made up some rounds out of the left over styrene, 3 layers thick. The bottom two layers had a 1" hole drilled through them, so that the whole thing would fit over the mounting screws. I drew up the emblem in photoshop and then printed it out at one of those CVS photo stations.
And there we are.
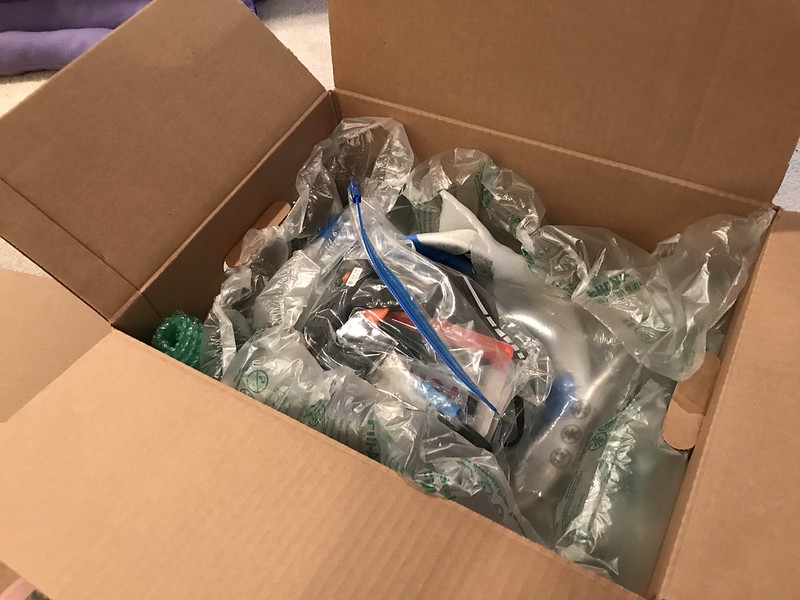
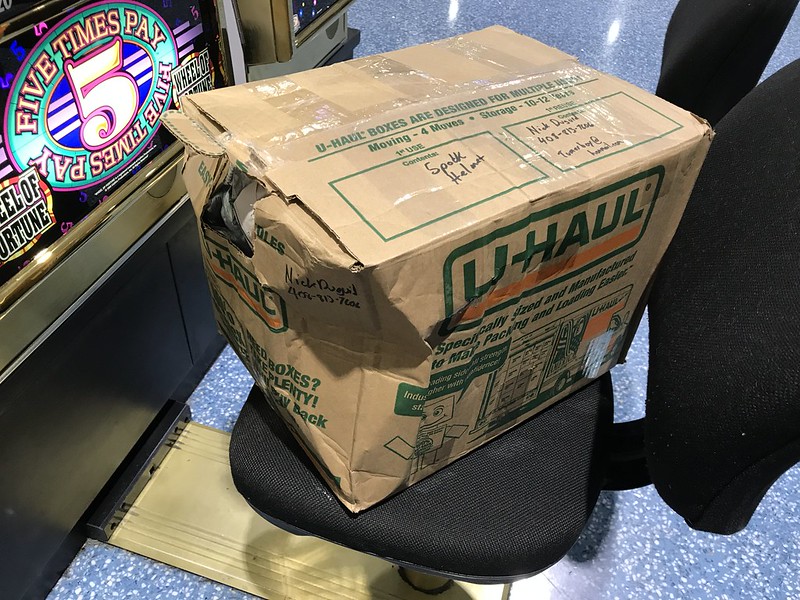
So, with the helmet done, I had to figure out how to get it to Vegas. It's bulky, and wearing it on the plane (though suggested by friends) didn't seem like the best plan. Not sure what TSA would think. It's jenky enough that I knew I wanted to bring a bunch of supplies along in case something broke. So I boxed it all up and checked it as luggage.
Checking a box as baggage isn't a great plan. If I had had more time, I would have shipped it, but it was finished just a couple days before the con. So. . . the guy at the Southwest desk said that they could guarantee it would get there, but couldn't guarantee it's would be undamaged. He was accurate in his promise.
Luckily I'd packed the helmet well enough that nothing was damaged inside. And in the end, nothing broke, and the only tool I needed was the adjustable wrench to tighten down the antennae.
So. . . the convention. I went in hoping that at least a few people would recognize it. The helmet is a deep cut, no doubt. I was just praying that I wouldn't end up getting blank stares all weekend. Suffice it to say, that was not the case.
Above is my friend Holly, the one with whom I had been discussing the inanity of the helmet when I decided to make one. Despite appearances, she was not injured. Below is John, strutting his stuff, Vegas style.
Avery, rocking it in her TOS uniform (wrong color though).
And another John, this one works at Anovos, and is wearing his reproduction Green Donmoor Tunic.
There was barely anything more to my costume other than the helmet. I wore a Blue TOS PJ top I had, because it seemed appropriate to the kid in the original photo, but that's it. Despite this, I had numerous people tell me I should enter the costume contest. So. . . I did. I ended up making it to the second round, and got to strut my stuff on the big stage, with judges Terry Farrell, Michael Westmore, Neville Page, and Mary Chieffo behind me.
In the end it was a ton of fun, and well worth the rush job to get it there for STLV this year. It's not a perfect reproduction. Its proportions are off, and there are some details wrong. But it was recognizable enough. I had a lot of people know exactly what it was, and many of them thought it was the original, or at least were impressed I'd made it. There were plenty who didn't know what it was, but even of those, there were a lot of them who were excited to see it and learn the history of the Spock Helmet.
I hope this post is worthy of the RPF. I've been a fan and a lurker for a long time, and am always impressed with what you guys are able to do.
Thanks
Last edited:

