IronManiac
Sr Member
After lurking the costume forum for a few months and getting inspiration from people like BrotherFoster, I decided to start my own Iron Man costume with the hopes of having it done by halloween. I'll be documenting my progress here.
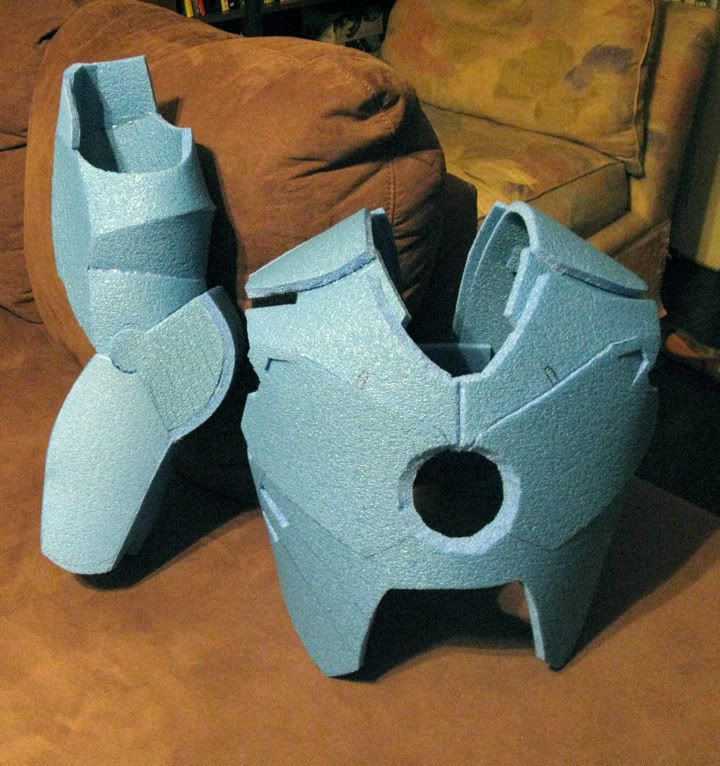
I wanted a mostly-accurate look, of course working with thick foam can't give you all the detail of a pep file, but I managed to get alot of depth out of the foam with some creative cutting and gluing.
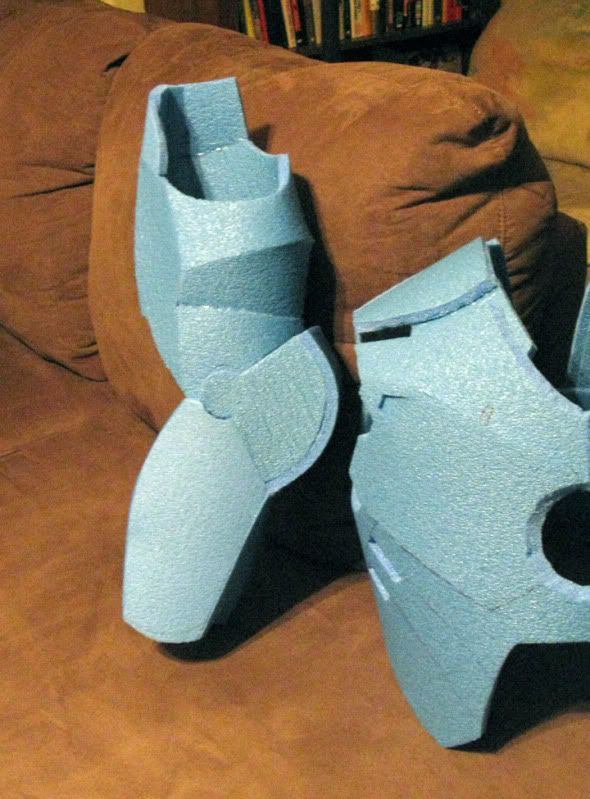
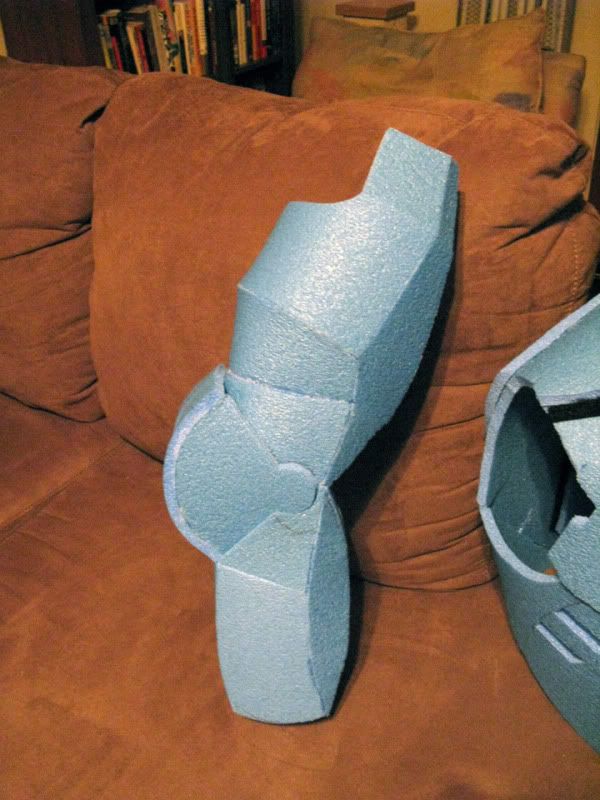
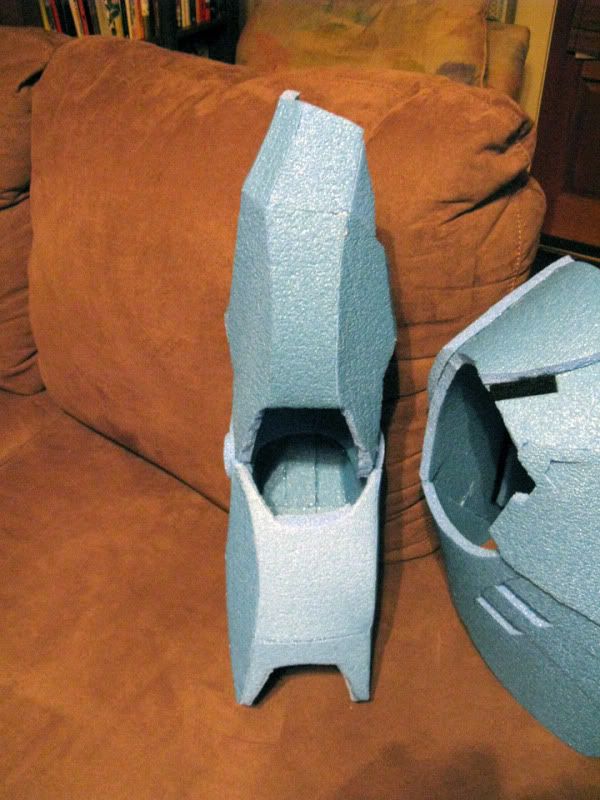
The process is really simple to master, foam and hot glue hold together REALLY well, so whatever shape you can dream up you can create and it will stick. These pieces can be thrown around, squeezed, bent and squished and they hold their shape without breaking the glue seams. It's been challenging to think in 3d, and while the chest piece is made up of just a few pieces, the arm pieces are considerably more complex. Now that one arm is done though, i should be able to make templates from the fitted pieces, flip them over, and get perfect duplicates for the other side.
Let's get to the pics, and i'll explain more about my processes for those interested.
Chest:


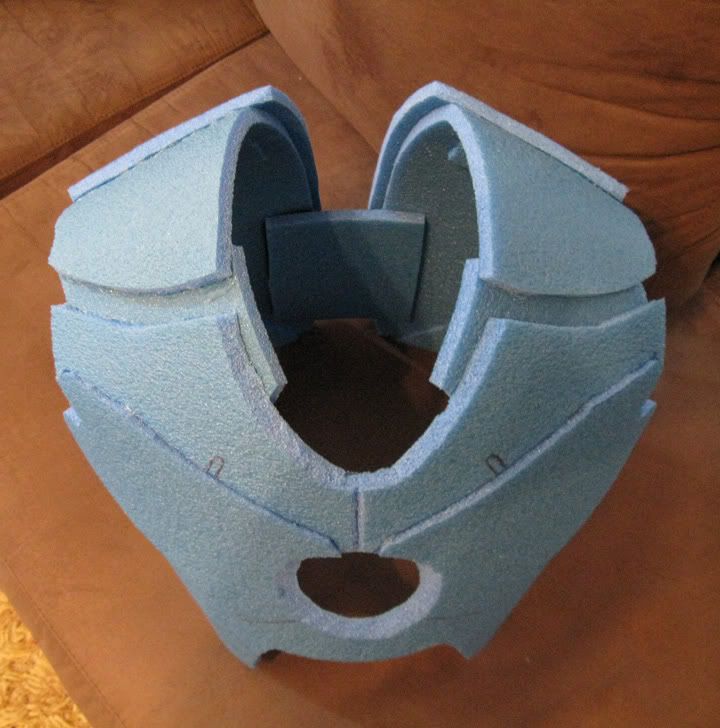
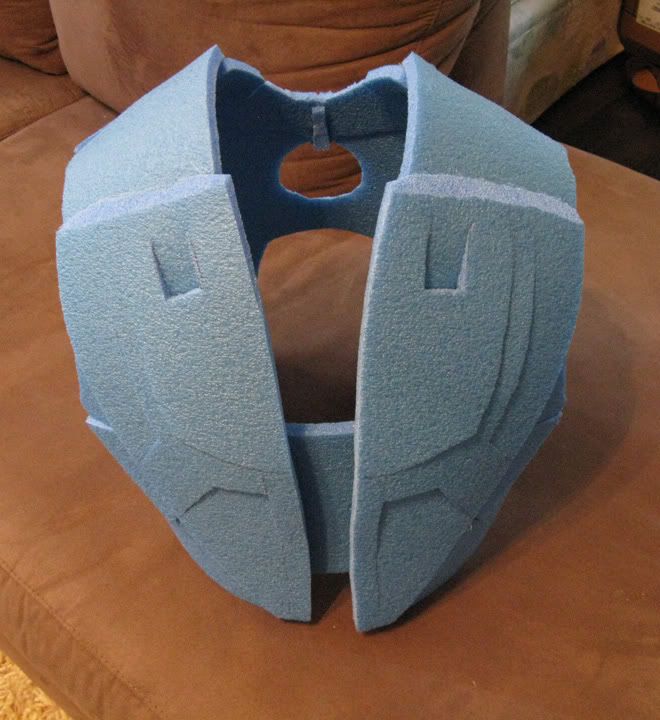
Here's the front. the entire vest portion was cut out of one piece of foam then glued together to create the chest shape. I'm really happy with how it looks so far. One of the great parts of the thick foam is the ability to create ridges and seams in the armor without needing to cut separate pieces. I simply slice a line through the foam where i want a ridge, stagger the two sides of the cut line, and apply glue the new ridge. I also cut through the foam at angles to give me more depth or an different shape. Very easy to do with an xacto blade.
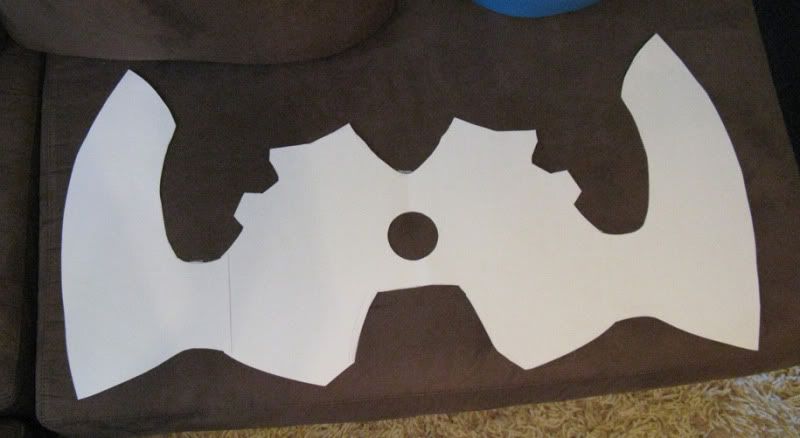
Here's the template i used to create the chest. The final piece would not match this shape, i've shaved and trimmed and notched the foam piece to better fit me under the arms, and other places. but it was the perfect starting point.
I wanted a mostly-accurate look, of course working with thick foam can't give you all the detail of a pep file, but I managed to get alot of depth out of the foam with some creative cutting and gluing.
The process is really simple to master, foam and hot glue hold together REALLY well, so whatever shape you can dream up you can create and it will stick. These pieces can be thrown around, squeezed, bent and squished and they hold their shape without breaking the glue seams. It's been challenging to think in 3d, and while the chest piece is made up of just a few pieces, the arm pieces are considerably more complex. Now that one arm is done though, i should be able to make templates from the fitted pieces, flip them over, and get perfect duplicates for the other side.
Let's get to the pics, and i'll explain more about my processes for those interested.
Chest:


Here's the front. the entire vest portion was cut out of one piece of foam then glued together to create the chest shape. I'm really happy with how it looks so far. One of the great parts of the thick foam is the ability to create ridges and seams in the armor without needing to cut separate pieces. I simply slice a line through the foam where i want a ridge, stagger the two sides of the cut line, and apply glue the new ridge. I also cut through the foam at angles to give me more depth or an different shape. Very easy to do with an xacto blade.

Here's the template i used to create the chest. The final piece would not match this shape, i've shaved and trimmed and notched the foam piece to better fit me under the arms, and other places. but it was the perfect starting point.


