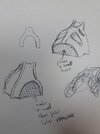
3D model and build of McQuarrie Vader helmet.

If you have been doing it that way for a while and happy with your own process, I am just offering a suggestion.
I hate heating PetG and vacuforming THEN having to dye it in boiling water. Much easier to just weigh some resin, add a few drops of pigment, degas, pour and done by tomorrow.
If done simultaneously, it isnt a time crunch.
These are of course very good suggestions. For me, I usually just build one or two helmets to get a feeling for the setup and to confirm that everything just works as intended. After that I sell the files, I hardly ever sell any of my own personal builds. Projects always starts off with me wanting to have an item of whatever and then I start modelling it. What I'm trying to say is that it's primarily for my own colllection and secondarily I sell the files to whoever else want a build. Therefore making a mold and casting is neat but a bit too much work for one helmet. Also, I don't really have the setup for it sadly. I have a bunch of printers though.... ;)

That said, I would love to do resin lenses for this build, I've haven't really done ANY casting since early 2000's so It's a process I'd need to relearn most likely. There is sadly no reseller of Smooth-On products here in Sweden so I'd need to find an equivalent of Epoxacast 690 or such that is available here first as well.
We'll see, Maybe I'll try it, I'll probably will be returning with a bunch of questions if so :)
 
  • Like
Reactions: JPH
Now I've managed to get a scan of my head , It turned out I needed to do a approximate 10% upscale in order to make it wearable(on my head that is). Pleaase ignore my George Lucas chin clashing a bit though....
1734105476106.png

1734105497322.png
1734105529222.png

So now that the final size is set I can focuse on splitting up the parts and make it printable. More on that later....
 
Small update,
I ran into issues with the sidewalls failiing mid print due to one side falling/loosing grip from the printsurface so I drew up some breakaway supports and am currently reprinting to see if those helps. It takes about 34h on this particular print.
1736145306852.png
 
That model looks awfully thin. Won't it be too fragile?
One could think that, agreed. but no, it's my standard 3mm thickness. of course a compromise between strength and weight but 3mm won't break. Also, The rear edge that is visible in the picture is slightly thinner(1,75mm) due to the overlap(gluechannel) between the parts.
 
Small update,
I ran into issues with the sidewalls failiing mid print due to one side falling/loosing grip from the printsurface so I drew up some breakaway supports and am currently reprinting to see if those helps. It takes about 34h on this particular print.
View attachment 1893853

Have you considered tree supports?
They go up the side of the model rather than just hangin out there. They are braced on the model, alllll the wayyyyy up.
When I print with resin, that is what I use.

Or, since you want to split the model, lay it down for a more stable build.

I check the final version of a print, with supports, before I print.
 
Have you considered tree supports?

Sorry for not being exactly clear. The issue I'm trying to fix with the struts on the side is that with the part printed in this orientation the sides first connect after printing as separate islands at approx 110mm Z-height. Without these the sides are prone to falling down before they connect to eachother due to vibration and such since there's only a small quite thin area connecting to the rafts on the print bed.

I always add tree support(or whatever serves the purpose best) onto these, that is why I kept the hole in the bottom of my custom structure to give the tree structure possibility to connect to the print bed. Also yes, I agree that you should always double and triple check the slicer result before starting a print.

1736167044388.png


1736166815096.png
 
  • Love
Reactions: JPH
Sorry for not being exactly clear. The issue I'm trying to fix with the struts on the side is that with the part printed in this orientation the sides first connect after printing as separate islands at approx 110mm Z-height. Without these the sides are prone to falling down before they connect to eachother due to vibration and such since there's only a small quite thin area connecting to the rafts on the print bed.

I always add tree support(or whatever serves the purpose best) onto these, that is why I kept the hole in the bottom of my custom structure to give the tree structure possibility to connect to the print bed. Also yes, I agree that you should always double and triple check the slicer result before starting a print.

View attachment 1893891

View attachment 1893890


Another idea is to make a wall at the neck and top of tbe piece, making it all one united piece from the base.
Cut ot off later.

Thabks for the receptiveness to folks annoyingly lookingnover your shoulder and giv8ng advice.

I will go away now.
 

Attachments

  • 20250106_092158.jpg
    20250106_092158.jpg
    1.1 MB · Views: 25
Another idea is to make a wall at the neck and top of tbe piece, making it all one united piece from the base.
Cut ot off later.

Thabks for the receptiveness to folks annoyingly lookingnover your shoulder and giv8ng advice.

I will go away now.

I add sacrificial walls like that in prints sometimes when I have to orient them in precarious positions for whatever reason and I am worried about support failures or the whole piece breaking free accidentally mid-print.

I had a curved revolver grip last week that I needed done ASAP, but a combination of factors with detail and nozzle size wouldn't let me print them flat on the bed. Just angling it up 45 degrees on edge left the grip with VERY little contact to the bed/ just one point on each end, so supports would be doing all the heavy lifting and likely want to fail (they did).
To prevent all of this, I modified the mesh and extruded a 1.2mm wide section of the grip back (right at that front edge) straight down and leveled it so now the grip was sitting on a single long thin wall running the whole edge of the back. I also flared the bottom of this wall out a little bit to give it a better footprint on the bed and more strength to prevent breaking free.

Anyways, worked great. Used my sprue cutters to carefully clip off the wall, even with the curve it came off clean and needs barely any cleanup.

This all might not be helpful at all, but add artificial walls like this quite a bit to just prevent failures.

grip example.png
 
Another idea is to make a wall at the neck and top of tbe piece, making it all one united piece from the base.
Cut ot off later.

Thabks for the receptiveness to folks annoyingly lookingnover your shoulder and giv8ng advice.

I will go away now.
Haha, of course I'll listen, you people here are my people so there are always stuff to learn. If that makes sense. And I love your idea, that definitely could have worked. Alas, I've already kicked off the print so we'll see if my version works, otherwise I'll try your proposal.
 
Last edited:
  • Like
Reactions: JPH
I add sacrificial walls like that in prints sometimes when I have to orient them in precarious positions for whatever reason and I am worried about support failures or
....
This all might not be helpful at all, but add artificial walls like this quite a bit to just prevent failures.
That's a great way to solve that issue, I love it and thanks for sharing.
I more and more design my own support structures in complicated areas and i find it often works better that the autogenerated ones
 
Last edited:
Back
Top