3d prototyping, what is the best?

The working bed of the MDX-15 is approximately 4"x2"x6".

By registration pins, I mean using pins to mark the location of the model so that it can be flipped over and the other side milled. As the MDX is out-of-the-box a 3-axis mill, you have to do a little work to get the other side milled out.

Hm, I see. I was thinking of something the size of a, say, BR PKD. I thought that since the mold that will be taken from the master is very likely to be at least a two part mold, it would be two parts that get milled. These two molds then would be taken to make molds to cast the master halves which make up the master for clean up. Sure, would imply double casting trouble, that would be the case either way if the master has to be cleaned up.

So, what would a project like a PKD cost and how long would that take ? Two part grip section, two part upper section, and greeblies.

Michael
 
I have an MDX-20 which is a little bigger than the MDX-15. With a little lateral thinking you can make some interesting things with an MDX.

e.g machining a mould positive directly - complete with registration keys and pour spouts...

dsc_1730.jpg


This had high temp silicone poured over it and pewter casts made

dsc_1731.jpg


It's also possible to machine wood directly.

dsc_1749.jpg


This one made my head hurt - machined the inner and outer surfaces for a small model part.

dsc_1552.jpg


dsc_1544.jpg

Maybe this is no help, but here are links to some of the things I have made with my MDX-15:

ROM Spaceknight
http://www.deviantart.com/deviation/57126319/
http://www.deviantart.com/deviation/57126474/
http://www.deviantart.com/deviation/57126577/

Ette (my own character)
http://www.deviantart.com/deviation/43046513/?qo=38&q=by:bohnded&qh=sort:time+-in:scraps

Endeavor (Micronaut's ship)
http://www.deviantart.com/deviation/44795367/?qo=17&q=by:bohnded&qh=sort:time+-in:scraps

Orion (New Gods)
http://www.deviantart.com/deviation/56543656/?qo=5&q=by:bohnded&qh=sort:time+-in:scraps

All the pieces, even the Endeavor. were comprised of multiple pieces, molded, then cast and put together.

This is subtractive rapid prototyping. It can achieve very smooth results. The texture on the ROM is a result of the source material it was cut from. None of the other pieces were made from that media.
 
Very nice!

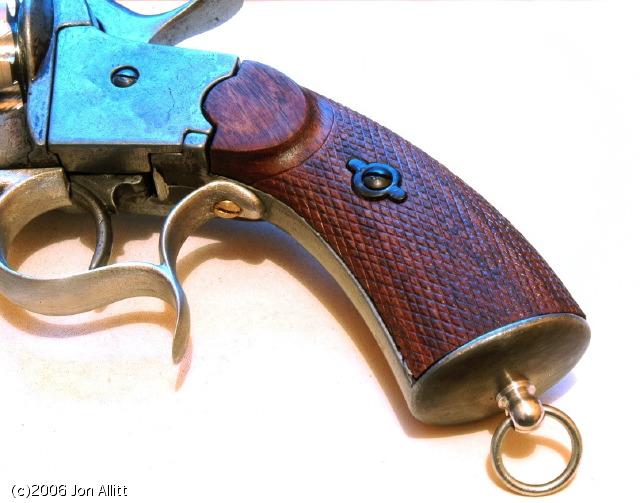
Now I am curious about your machining of the wood directly -- were you machining the whole piece or just the checks?
 
Very nice!

Now I am curious about your machining of the wood directly -- were you machining the whole piece or just the checks?

I scanned the original plastic denix grips (with the MDX scanner attachment), planed a piece of walnut down to the correct thickness and milled out the whole thing.
 
I have an MDX-20 which is a little bigger than the MDX-15. With a little lateral thinking you can make some interesting things with an MDX.

e.g machining a mould positive directly - complete with registration keys and pour spouts...


It was after seeing your example of this that I started using this route as well.
 
I have an MDX-20 which is a little bigger than the MDX-15. With a little lateral thinking you can make some interesting things with an MDX.

e.g machining a mould positive directly - complete with registration keys and pour spouts...

Exactly what I meant. Cutting up the parts, arranging them in a fashion that allows for instant mold making.

And the MDX-20 can even do scans !

A great toy ! :)
And put to good use, as the pics show.

Michael
 
Both the MDX-15 and 20 do scans.

Here's an example:
render1lr4.jpg


Here is a hi-res scan of the same object. Notice how clear the text on the object is now:
incgp4.jpg
 
Is there a limit as to how large an object can be for scanning with this software/hardware and is scaling up and down possible?

I guess that the scanning with the MDX15/20 is limited to the size of the work area iirc 15x20x6 cm or something like that.

And I´d say that scaling is not that big a problem, although large to small should be easier than vice versa.

With that free software I think there are no real size restrictions. I was just thinking about having a Vader helmet scaled down.

Michael
 
Is there a limit as to how large an object can be for scanning with this software/hardware and is scaling up and down possible?
I guess that the scanning with the MDX15/20 is limited to the size of the work area iirc 15x20x6 cm or something like that.
And I´d say that scaling is not that big a problem, although large to small should be easier than vice versa.
With that free software I think there are no real size restrictions. I was just thinking about having a Vader helmet scaled down.
Michael
Yeah... that's pretty much what I was hoping for and thinking. Would be nice to have a better 1:6 scale Vader helmet for my figure, imo.

I may have to look into this more, but I think most of these things are pretty much out of my price-range...
 
Jon, on those grips were you working from a 3D model with the checking wrapped around it or did you machine the model and then engrave the checking after?
 
Regarding the Roland MDX 15 and 20... what do you do about undercuts? Do they only mill "top-down" or can the mill heads tilt/swivel and work from the sides?
 
Regarding the Roland MDX 15 and 20... what do you do about undercuts? Do they only mill "top-down" or can the mill heads tilt/swivel and work from the sides?

IIRC what you talk about is five-axis work. The Rolands are three-axis machines, with the difference being the size of the workable area.
Undercuts are IMO a problem with those, except maybe if you can tilt the piece you work on on the table.

Michael
 
They only mill top down, but you can buy an attachment (that further reduces the work area) to turn the mill into a 5-axis machine.
 
Jon, on those grips were you working from a 3D model with the checking wrapped around it or did you machine the model and then engrave the checking after?

The scan had enough detail for the checks and I used a 1mm end mill for the finishing pass which got pretty deep into the grooves. After the grips were sealed and steel wooled I cleaned up the lines with a triangular needle file though.

But I think I see what you're asking - how to engrave lines onto a 3d shape.

dsc_1660.jpg

For this one I milled out the round shape then engraved the lines which were projected onto the surface in rhino. I don't think you can do that with the roland software - I used visualmill which allows lines to be traced over a shape (these were cut with a 0.5mm ball burr)
 
Back
Top