You are using an out of date browser. It may not display this or other websites correctly.
You should upgrade or use an alternative browser.
You should upgrade or use an alternative browser.
5 ft. ANH “Wooden” Falcon
- Thread starter Searun
- Start date
I dunno, I don't think production damage would bend the plating like that. It would just break it.Love it -- looks awesome.
For whatever goofy internal algorithm aesthetic reason, I always perceive the 'pilot tube dent' as ILM handler's/filmmaker's error
Now that I think about it, you're probably right. It just looks so "goofy" to my eye, as in, "What interstellar galactic battle were you in that THIS was the result?" The other damaged areas are clearly/obviously/visually "direct hits" from enemy ships' laser cannons. Whereas this one always strikes my eye as a dropped prop that caught the corner of a table before hitting the floor, and film scheduling was too rushed to repair it since it would likely never get seen. But now that I'm saying it out loud, I wonder if there is a scene in A New Hope in which you can clearly see this area on screen?I dunno, I don't think production damage would bend the plating like that. It would just break it.
Nice! That's a definitive answer, and I'm grateful to know it. (And now annoyed that I'll have to include it on my build!)
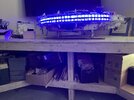
Trying some lighting. Two lengths of Neon blue 12v DC LED light strips tacked on to the engine the deck exhaust compartment. For some reason the photo of the exhaust grill does not show the actual blue “Cherenkov” effect very well. Good for now unless I find something better. Some light bleed since engine deck is not screwed down.
Attachments
Last edited:
Busy checking out retractable landing gear and other moveable systems. Minor wiring adds to mock-up control panel to include low amperage fuses.
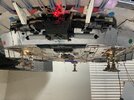
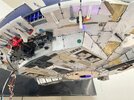
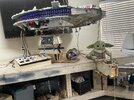
Side tracked to make a shipping container load based on Falcon interplanetary scheme on the web. Note that matches the Solo Train Heist and double monorail configuration of the Conveyex train of Vandor.
Side tracked to make a shipping container load based on Falcon interplanetary scheme on the web. Note that matches the Solo Train Heist and double monorail configuration of the Conveyex train of Vandor.
Attachments
-
 36E9D48D-6322-4DC1-AE61-C0BF04D11A9D.jpeg4.2 MB · Views: 109
 -
 F72173D4-B236-4B3D-AB81-C32C1BBE5F7A.jpeg4.1 MB · Views: 108
 -
 4C90EC4A-6F32-425C-8D43-8D5E4F82DF45.jpeg4.4 MB · Views: 116
 -
 A0A45907-A291-48A9-837A-3AF373E475BE.jpeg4.2 MB · Views: 104
 -
 FCD523C8-000C-449A-81A8-A1DF0D41758F.jpeg3.9 MB · Views: 120
Last edited:
Dazza007, Studiokitbash & Daddyfrom Naboo made me do this.
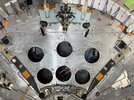
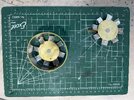
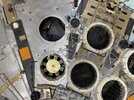
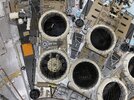
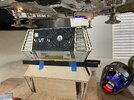
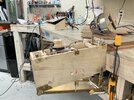
Drilled holes in my removable engine deck, since the close knit tank deck greeblies were put on equipment skid plates. Started a mock-up ducted fan housing design that recessed the representation of muffin fans. These simply drop in so they are easily removed to maintain the landing gear limit switches when deck is off. Need to get the recess depth correct but this is a start. Thanks guys.
Drilled holes in my removable engine deck, since the close knit tank deck greeblies were put on equipment skid plates. Started a mock-up ducted fan housing design that recessed the representation of muffin fans. These simply drop in so they are easily removed to maintain the landing gear limit switches when deck is off. Need to get the recess depth correct but this is a start. Thanks guys.
Attachments
Last edited:
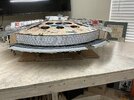
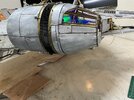
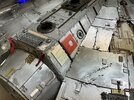
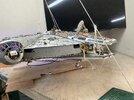
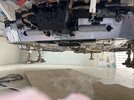
Few photo’s of some rework of small things while in the process of obtaing a few remaining greeblies prior to anchoring a painting commission.
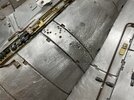
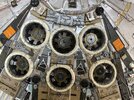
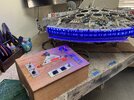
Recessed the deck fan replicas to a depth that appears appropriate, replaced my mock-up control panel after limit switches added to landing gear and ramp. Smoke system improved for rear jets but pictures still really do not show the flow very well. Front tubing run for the (4) disc front jets on the removable mandibles, but these are not reattached since the piping and greeblie interface is a pain to keep removing and reinstalling. Added some more flak damage.
Recessed the deck fan replicas to a depth that appears appropriate, replaced my mock-up control panel after limit switches added to landing gear and ramp. Smoke system improved for rear jets but pictures still really do not show the flow very well. Front tubing run for the (4) disc front jets on the removable mandibles, but these are not reattached since the piping and greeblie interface is a pain to keep removing and reinstalling. Added some more flak damage.
Attachments
-
 B7D38183-1F9B-4D10-A5F6-DB708FB796E9.jpeg4 MB · Views: 104
 -
 3FB6E181-FD1E-48D6-8742-8686ACB1D3CB.jpeg4 MB · Views: 98
 -
 1A82386B-8032-4D0E-9053-F61945B432A0.jpeg5.3 MB · Views: 94
 -
 D0CDB7B5-1671-4DB5-83BD-308276E5D8F3.jpeg4.4 MB · Views: 87
 -
 16965550-15E0-4267-9B03-70B4EDAF9484.jpeg4.2 MB · Views: 89
 -
 FE817E52-B2A9-489B-B4B6-90AC86A46512.jpeg5.3 MB · Views: 91
 -
 1EDD2BE1-1426-48BC-AF10-2A2FF094293A.jpeg4.4 MB · Views: 88
 -
 F7F8F0A9-65A5-470D-9944-EF00F468ACC1.jpeg4.3 MB · Views: 97
Last edited:
I love the battle damage to your metal plating -- that is finely detailed work, and will look very authentic under paint with true "bare metal" peeking through.
Thanks SK. It takes some trial and error. What is amazing is the research the ILM folks have done to get the different types of flak damage patterns from battered ships, planes and tanks.I love the battle damage to your metal plating -- that is finely detailed work, and will look very authentic under paint with true "bare metal" peeking through.
Similar threads
- Replies
- 10
- Views
- 806
- Replies
- 0
- Views
- 112
- Replies
- 18
- Views
- 4,111

