Re: Age of Ultron Captain America Build (first attempt at cap build, 95% done)
Alright guys, here we are. The last update to this thread (that is before I get some shoot photos done

). The suit was completed with the harness, so all that was left is my helmet and shield. I bought one of Pannaus Props' rubber AoU helmets that came in last Friday and it looks great!
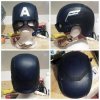
The fit's a liiiittle bit tight around the eyes, just enough to make the skin around them puff a bit if I don't settle the helmet right. But no pain or discomfort at all and looks great. As for the shield, I ordered a fiberglass one from Art Funk Props with some money I was able to make from selling off some old costumes and props I don't use anymore, but it won't be in until later this month. So, in the meantime I thought I use one of the Disguise cap shields. The elastics on it were way too flimsy and weirdly place though, so I wanted to make some quick brackets and handles for it.
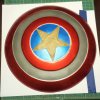
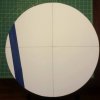
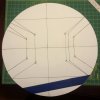

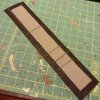
(If you're wondering why the star is gone, I actually bought two Disguise shields. One to use as my regular shield, and one to modify into a blank silver shield for a quick SSR Uniform Cap. I used the SSR one to mark the circle into the oaktag since it'll be repainted and it doesn't matter if I get sharpie on it). First step was figuring out a pattern for the brackets. I traced a circle using one of the Disguise shields, cut it out, and then more or less marked the center of it. I then used a ruler to draw the brackets where I approximately wanted them to lay while looking at how Art Funk places their brackets. Then after I figured out a size/placement that I liked, I cut out the patterns, laid them into the back of the shield, and wrote down how much I'd need to increase each bracket to compensate for the curve.
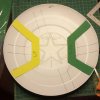


I traced the patterns onto some craft foam and then doublechecked to make sure they fit correctly. I also used a sharpie to mark where I wanted to align the brackets, it took me a few tries hence the extra lines. Then I got some worbla and heated it up to wraped around the brackets as flat pieces, reheated the covered brackets and shaped them to the curve of the shield before they cooled. The wax paper is there to prevent the worbla from adhering itself to the plastic shield, and to protect the shield when I needed to reheat the worbla while it was still on it. After I got both of them shaped I made some loops for the straps to go through using some rectangular o-rings and some strips of worbla to adhere them in place. Luckily, the worbla didn't stick to the metal so they can still swing freely!


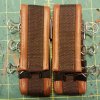
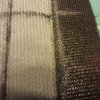
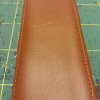
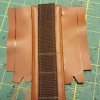
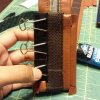
I made some quick straps using the same method as I did for the belt and harness, foam strips wrapped in pleather. Got some buckles from a cheap trimmings store and removed the tines from them and looped the end of each belt through there, securing it with epoxy. I took measurements by putting the left gauntlets on and measuring around the hand where the magnet rests, and around the opening at the other end of the glove. That way they'd fit snugly around the gauntlets while still having some extra room to loosen if necessary. Then I just looped the belts through the rings, and bam, a much more sturdy way to hold the shield the gives it some extra reinforcement! Instead of attaching the brackets permanently, I attached them with 1" wide industrial velcro. That way I can remove them from the shield and use them with the blank silver shield as well instead of having to make a whole other set of brackets. I'll be smoothing out and sealing the brackets for painting when I paint the silver shield tomorrow, but I'll probably leave the back of the disguise shield unpainted since I'll only need it for NYCC.
And finally, the suit up!


Apologies for the lighting not being the best, but my girlfriend managed to get a quick shot of the details as I was reaching to take off the helmet haha. Thanks a lot for all the encouragement as I worked on this build you guys! Once I've got some good photos of the suit in action I'll be sure to post them up here (and probably of my Art Funk shield when it comes in haha). Hope you all had as much fun watching the progress as I did doing the build!


