Gremlins Bathroom Buddy

Will do! :thumbsup

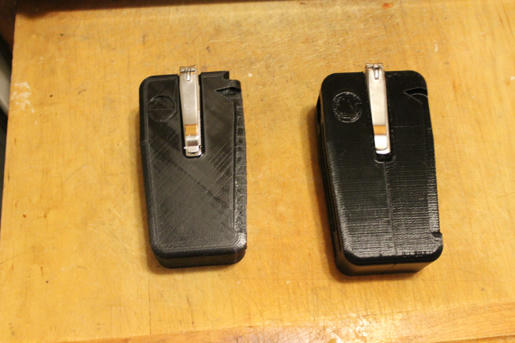
The reworked 95% body is a vast improvement over the first blank, it's now got just enough heft to look right and doesn't feel oversized anymore. A 5% change doesn't sound like much, but it is pretty significant.


and with some (still not SA) pieces, checking fit and movement


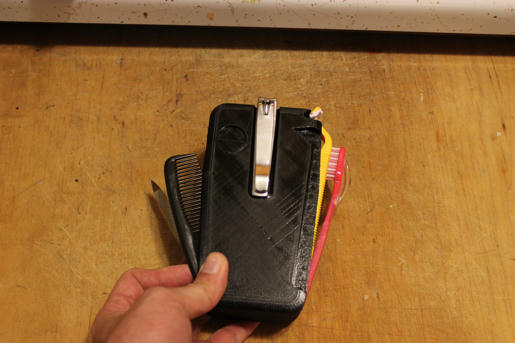
I've also been on the hunt for the correct style of toothbrush, and it's a heck of a lot harder (so far anyways) than I thought it would be. Nothing fancy about the brush itself, it's a translucent orangish-red body, something that in 1995 I could have gotten BOXES of no problem. Problem is now, everything is ergonomic, multicolored, motorized, etc :lol

Here's the style:

single-red-toothbrush-bww2pa.jpg


.... And here's a good approximation of the type of translucent tint:

toothbrush-2-12784771.jpg


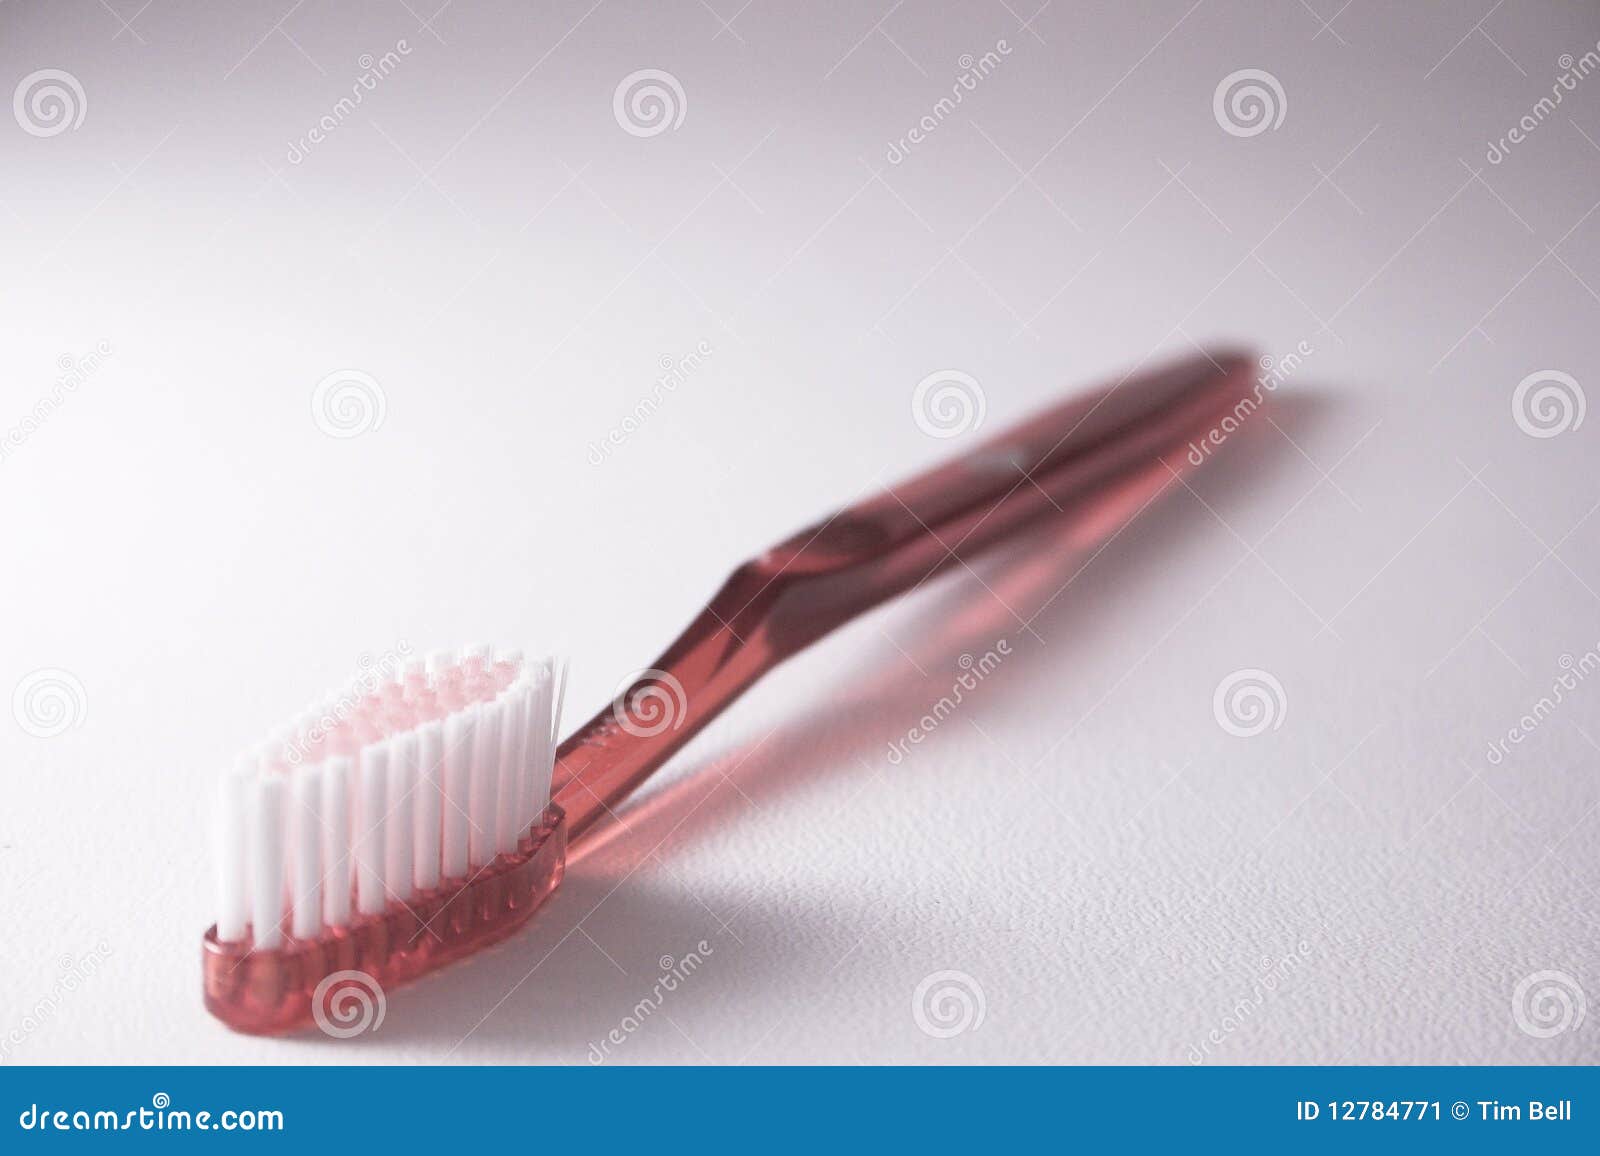
Anyways, still looking. There are other parts on the Buddy (like the orange side-pick) that I'll have to scratch-build and then cast, but this toothbrush would be a huge headache I think to produce. Translucent resin + specific tint + BRISTLES added? :facepalm I have a feeling I'm going to end up buying a case of 144 correct but assorted color toothbrushes and end up with about 120 of the wrong color :lol
 
Not a spectacular update, but some good news nonetheless....

Firstly, looks like I've got the toothbrush figured out. I tracked down a source that can send me a few samples, from there I'll post up pics and let you guys be the judge for the correct color/etc. I've not got a lot to work with, but here's why I've been pushing for a red/orange transparent finish:


Second, I've been tossing around other options for the toothpaste and shaving cream dispensers; namely, do I want them working 'as-seen' or instead functioning as if the Buddy worked properly in the first place. In the movie, both features spit and sputter, with the toothbrush shooting out a green syrupy slop and the shaver a frothy white stream (wow that just sounded horrible when I reread it). Bear with me, but here's what I'm looking at:

Option 1 is for me to use small brand-manufactured aerosols of the shaving cream (Barbasol) and toothpaste (Aquafresh), installed into the body with the actuators. Using these will get the attachments to work in the way they were intended, so technically not screen-accurate, but also not as messy if they are activated. The only other concern I have in using these is their size; I'm really pushing it for room as-is, so fitting (nevermind changing out) these two small cans will be a bit of a headache.

Option 2: I have a way to pressurize and fill my own aerosols, so I can actually use cans that are half as small as the travel cans, giving me a lot more room in the interior. The catch here though is that I am limited in what materials I can put IN these cans; I can put in liquids, but I don't think I can get something that will then foam up a bunch when expelled. Put another way, I can get the attachments to spit and spurt just like on the screen and have the look of the liquids match up pretty well, but it would be MESSY.

I've been waffling on this while waiting for some other parts to show up. Anybody got an opinion on this? I do plan on putting together a static (solid) model as well, but just thought I'd see if anybody's got a preference for the a working one. Thanks for look'n!
 
I don't know if I'd try and actually USE this regularly, but it looks like I've got the toothpaste issue figured out, so I guess you could. :lol Anyways, I did choose option 1, that way it can be shown off without creating a huge mess.

Still waiting on my toothbrushes, but I did manage to work up a few more prototype parts. Modeled up the comb, the pick, and a custom handle for the metal file, then test-printed a few parts to check fit and such on one of the (very ugly) prototype bodies. Here are the V1 pieces:


These were printed in low resolution with no cleanup, but I think they're going the right direction. The replacement handle slipped right onto the file with no problems, and the pieces are fitting in their slots fairly well for a first pass:


I also cleaned up and added hinge points to the vanity mirror door before printing that out as well. The hinges are open-ended, so the door can be snapped into place by hand before the zebra-skin fabric is added. Looks like I need to thicken this up a bit, but that's an easy fix and I'm otherwise very happy with it:


So it's getting there.....Thanks for looking, and happy New Year!
 
Thanks guys :)

Well, with the day off I actually have managed to knock out a bit of stuff. Printed up some rough dummies of the remaining parts that I'd modeled, and also the caps and buttons to go with the other parts:

tool selection.jpg

The plan is to have all of the regular attachments hinge out but remain attached (except for the clippers and tweezers) , while the end caps will unscrew. I think these were implied be the compartment caps for the shaving foam/toothpaste/shampoo/whatever, but I'll either leave them threaded but static or as functioning fastener(s) to hold the case together. Still need to get the dental and vanity mirrors sourced, but that's a relative cakewalk. Here's how the prototype is looking now:


Getting there, I've gotta get going on a new prototype body pretty quick. Thanks for look'n!
 
Getting there......


..... And some bad news...... There is ZERO space inside the body... I have just enough space for shaving cream the way I want it, but it kills out the toothpaste option.

Sooo...... Here's where I am right now. Top and bottom caps are screw-on. I also added tube space for both the toothbrush and shaver.
 
Last edited:
Thanks guys!

My printed toothbrush actually came out better than I had anticipated, but I still want the clear tinted version. Also, think I forgot to mention, I did incorporate the tweezers per my earlier assumption... So nice when something works out on the first try; the tension of the tweezers when they compress in the slot holds them perfectly while still removing with no problems:


So, now I gotta go find the button that I managed to slingshot off the printer (hence the missing button in an earlier shot, yeah I noticed :) ) Also, gotta pick you guys' brains again: What the hell is that mini 'toothbrush' thing visible in the tweezer pics? I keep thinking some kind of tooth buffer/polisher/ I dunno? I've got it modeled fairly well I think, but I just wish I knew what it is... I've been stuck in this position several times before on projects, where I guess what something is, make it, and then find out what it really is (and how wrong I got it). It just drives me nuts, it looks so familiar, but I'm at a loss.

Thanks for looking!
 
Well this is a bit of a resurrection, but looking for advice. After several manufacturer fails, I think I'm best off just making my own toothbrush attachment for the Buddy. I'm looking at casting a toothbrush handle in tinted transparent resin, which by itself would not be a huge headache, but I would like the piece to also have actual bristles like a real toothbrush. Any suggestions? I was thinking maybe a two-piece mold for the handle, but oriented so I could sink the bristles of another toothbrushinto the head of the new toothbrush head as it's curing in-mold... After it all cures up, I would razor-blade the bristles free of the donor-toothbrush and hopefully have a new brush in it's place... Having said all of that, I think I'm overthinking this, but I'm open to whatever. If I could find a properly-tinted toothbrush in the first place, I would just drill the holes and trim it down, but I also want the finish to to look, well, proper. :)
 
I would check dollar store's?? I would think you could find a real toothbrush in semi correct color, maybe in a multi pack?? that would work better instead of going thru the hassle of molding and casting/cutting etc.. seems like a ton of work JUST for the toothbrush part. my 2 cent's :popcorn
 
I would check dollar store's?? I would think you could find a real toothbrush in semi correct color, maybe in a multi pack?? that would work better instead of going thru the hassle of molding and casting/cutting etc.. seems like a ton of work JUST for the toothbrush part. my 2 cent's :popcorn

Great minds, as they say... :) That's actually exactly what I did. I did the same for the other pieces, such as the floss dispenser, tweezers, nail file, and clippers, just to be sure that the parts that worked best would still (hopefully) be available. And yep, you're completely right on the headache of casting a custom one... I've got the whole OCD/stickler for detail thing going on, but what may work in the end is getting a correct toothbrush in the correct tint if I can find it, and making it work. The toothbrush would have to be cut down, have a pivot pin added, and then a hole for the toothpaste feeder tube to string through. Those cuts and holes would then need to be chemically or mechanically polished out (at least I think they'd need to be) so they aren't, well, ugly.
Anyways, the irony isn't lost on me that the original probably didn't even have that decent of a finish, but oh well. :lol FYI the difficulty with finding the proper toothbrush is it is so PLAIN... Orange transparent tint, no narrowed/curved/ angled neck, just a generic-looking piece, but of course hard to find now. Anyways, I'm sure soemthing will turn up, or I'll bite the bullet. :)
 
maybe check the "travel size" isle? dollar store items are usually REALLY generic in there travel section. if I can tomorrow I will stop bye my dollar store on the way home and just check what I can see.. :cheers
 

Your message may be considered spam for the following reasons:

If you wish to reply despite these issues, check the box below before replying.
Be aware that malicious compliance may result in more severe penalties.
Back
Top