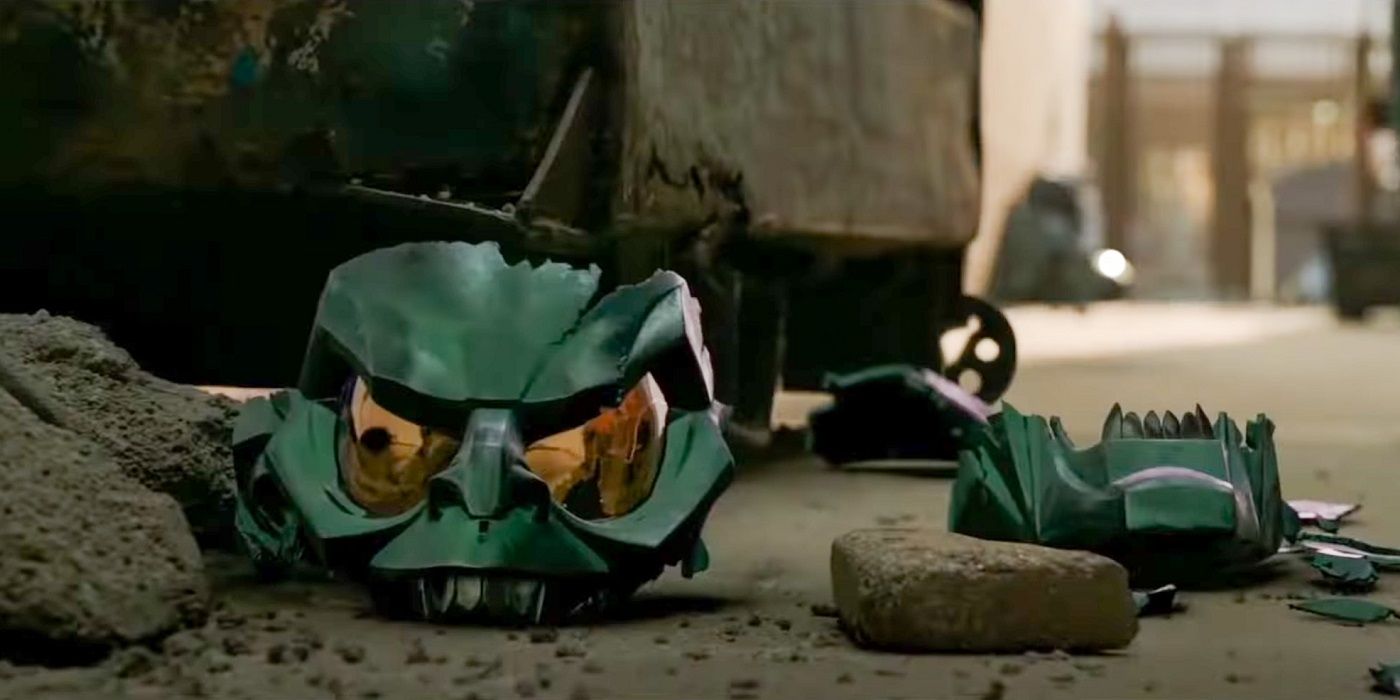
Hasbro Green Goblin mask & Pumpkins

Anyone try taking the mask apart to repaint yet? Do you need to completely disassemble it to remove the lenses and mouth screen?

I'm tempted to get one to repaint it, but I want to fill in any seamlines and the screw holes on the back. It might be easier to mask off the mouth and eyes instead.
 
I haven't yet disassembled my mask yet but looking at the interior, I think the inner grey shell is screwed into the outer green shell with a bunch of screws, and the mouth screen and lenses are sandwiched between. There's definitely an extra black frame on the interior around the lens part, but I'm not sure if this is for comfort/wear or is part of the mechanism holding in the lenses. (gotta love the OSCORP logo stamped inside!)
I will say that the gold covering in the lenses is likely incredibly fragile so take a lot of care when disassembling and re-assembling. Masking the lenses runs a risk of damaging that coating.

IMG_1123.jpg
IMG_1124.jpg


As for the pumpkin bomb, removing the four screws around the battery compartment detaches the lower copper ring and allows the lower set of copper "ribs" to be removed, in four parts.
IMG_1125.jpg

Theres an additional three screws that appear to hold the two halves of the inner green sphere together. Removing those should allow the bottom half of the sphere to be removed... except the top set of copper ribs are locked into the bottom half of the green sphere with plastic clips and seem to be holding it in place even with the screws removed. I can't see any easy way to remove those ribs without snapping either them or the plastic inserts holding them in place. I'm reasonably certain there's no glue involved, it's just the order of operations to assemble the parts doesn't really work in reverse to allow for it to be disassembled. Maybe someone with better coordination than me can figure it out.
Removing the lower ribs should make it easier to paint them and mask off all the green parts and paint the other copper parts.
IMG_1129.jpg
IMG_1127.jpg
IMG_1126.jpg

I really wish I could remove the inner electronics/core because I want to insert some diffusing material under the end/cap button. The single LED there is really noticeable and needs something to diffuse it. I put some 2mm packing foam/fabric under the bottom end cap and it helped to diffuse the two LED's there quite a bit - it just needs some slightlythicker material - maybe some aquarium filter floss...
I would love to find a way to do the same with the top LED, but short of snapping the ribs off and re-gluing them later, I can;t see any easy way to do that, and there's no guarantee it will come off even after snapping the ribs!!

IMG_1130.jpg
 
This helmet looks really cool.
I´ve found this online...W.Dafoe explains why they changed the design for the new movie:


Its a shame that the new mask has not really a lot screentime in the movie.

And here the older suit in detail when Adam visits it:


Here the Legends next to the 2002 hero mask:
I think when you repaint(this purple looks so nice)it and make the nose thinner and the chin longer it has "the look" from 2002.
Not 100% perfect I know but I think it can be modded.

xx.jpg
test.jpg
 
Last edited:
Dafoe ain't talking about the change to the mask design tbf, he's talking about removing the mask entirely from Goblin's costume - it's only present in two scenes after all. I imagine the small redesign wasn't a super intentional thing, since it appeared so briefly and was a fully CGI creation, could see the changes being the result of less time and attention being spent on it than other elements. The new brow lines could be a misinterpretation of light playing on the chameleon paint on the original prop, for example.
 
Dafoe ain't talking about the change to the mask design tbf, he's talking about removing the mask entirely from Goblin's costume -
Ah yes your right.Had only seen the headline.They are talking about that the real Goblin in the comics is a real Goblin and has not a robotic mask on his head.
 
I haven't yet disassembled my mask yet but looking at the interior, I think the inner grey shell is screwed into the outer green shell with a bunch of screws, and the mouth screen and lenses are sandwiched between. There's definitely an extra black frame on the interior around the lens part, but I'm not sure if this is for comfort/wear or is part of the mechanism holding in the lenses. (gotta love the OSCORP logo stamped inside!) I will say that the gold covering in the lenses is likely incredibly fragile so take a lot of care when disassembling and re-assembling. Masking the lenses runs a risk of damaging that coating. View attachment 1884033View attachment 1884034 As for the pumpkin bomb, removing the four screws around the battery compartment detaches the lower copper ring and allows the lower set of copper "ribs" to be removed, in four parts. View attachment 1884035 Theres an additional three screws that appear to hold the two halves of the inner green sphere together. Removing those should allow the bottom half of the sphere to be removed... except the top set of copper ribs are locked into the bottom half of the green sphere with plastic clips and seem to be holding it in place even with the screws removed. I can't see any easy way to remove those ribs without snapping either them or the plastic inserts holding them in place. I'm reasonably certain there's no glue involved, it's just the order of operations to assemble the parts doesn't really work in reverse to allow for it to be disassembled. Maybe someone with better coordination than me can figure it out. Removing the lower ribs should make it easier to paint them and mask off all the green parts and paint the other copper parts.View attachment 1884038View attachment 1884037View attachment 1884036 I really wish I could remove the inner electronics/core because I want to insert some diffusing material under the end/cap button. The single LED there is really noticeable and needs something to diffuse it. I put some 2mm packing foam/fabric under the bottom end cap and it helped to diffuse the two LED's there quite a bit - it just needs some slightlythicker material - maybe some aquarium filter floss... I would love to find a way to do the same with the top LED, but short of snapping the ribs off and re-gluing them later, I can;t see any easy way to do that, and there's no guarantee it will come off even after snapping the ribs!! View attachment 1884042
There are 4 clips around the top button, hold it down and insert flathead screwdriver and the copper ring pops out.
 

Attachments

  • IMG_0787.jpeg
    IMG_0787.jpeg
    1.2 MB · Views: 11
The cool thing is when you activate 2 of this bombs at the same time it feels a lot louder and you have 3D soundfeeling. :D
 
This helmet looks really cool.
I´ve found this online...W.Dafoe explains why they changed the design for the new movie:


Its a shame that the new mask has not really a lot screentime in the movie.

And here the older suit in detail when Adam visits it:


Here the Legends next to the 2002 hero mask:
I think when you repaint(this purple looks so nice)it and make the nose thinner and the chin longer it has "the look" from 2002.
Not 100% perfect I know but I think it can be modded.

View attachment 1885682View attachment 1885683
Angles aren't the same. The Hasbro is looking downwards.

Try comparing with the same angle?
IMG_6469.jpeg

This is closer. Do a side by side with this.
 
So the pumpkin bomb has an extra sound, 5 clicks of the button displays half the lights shutting down at a time then a green glow.
I've got 2 and the one I've dismantled to paint I have removed the speaker on, very interested if anyone can find a way to bypass the laugh sound effect on the board, it's pretty annoying on an otherwise great product, considering the 22 year wait.
 
Back
Top