You are using an out of date browser. It may not display this or other websites correctly.
You should upgrade or use an alternative browser.
You should upgrade or use an alternative browser.
Leif Ericson Galactic Cruiser-FINISHED PICS!!!
- Thread starter trekriffic
- Start date
trekriffic
Sr Member
Re: Leif Ericson Galactic Cruiser
Pics from this past weekend...
Here are the nameplates included in the ParaGrafix PE set:
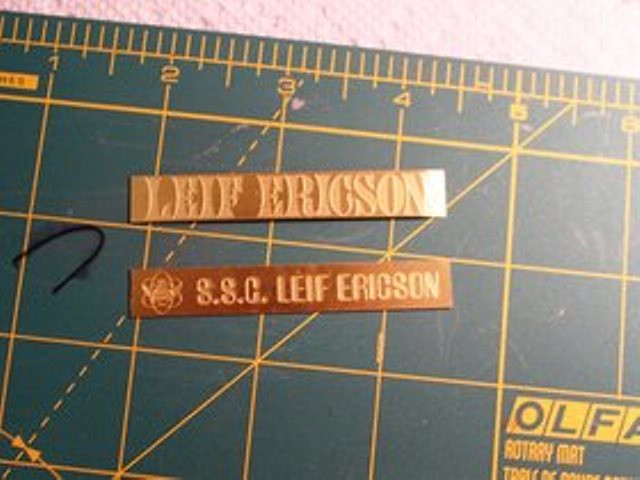 Photo-etch Name Plates by trekriffic, on Flickr
Paul gives you two of each. I only ended up using one of the SSC Leif Ericson plates.
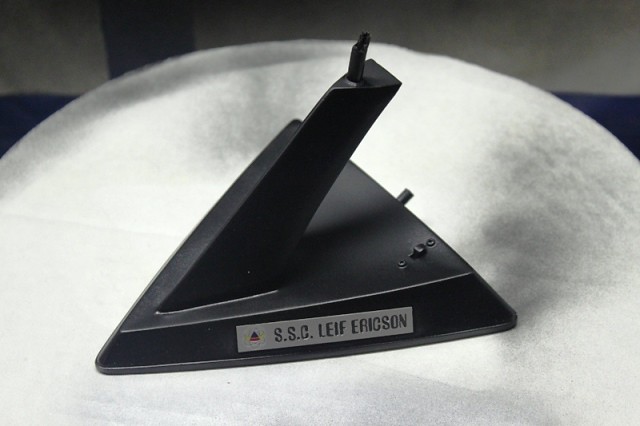
The stand after spraying with Testors flat black enamel and sealing with Krylon Clear Satin acrylic spray. The nameplate was sprayed with Tamiya silver; the recessed lettering was painted with thinned Testors black enamel; the emblem is a decal cut from the kit decal sheet:
 IMG_2487 by trekriffic, on Flickr
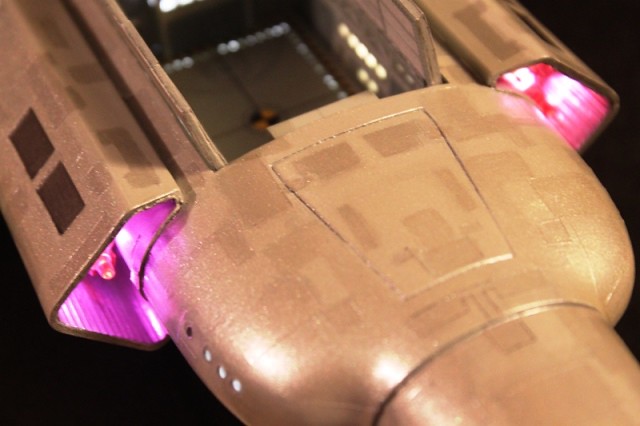
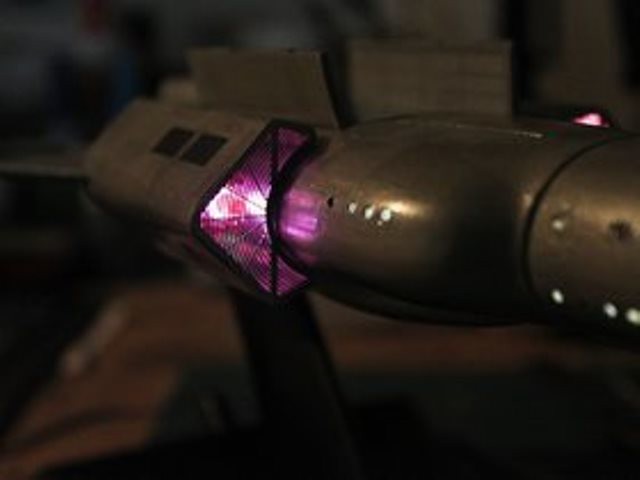
The ion engines aglow. I really like the look of the corrugated aluminum foil inside the shrouds:
 Ion engines Aglow by trekriffic, on Flickr
 IMG_2426 by trekriffic, on Flickr
I know, I know, I still need to attach the PE engine grills front and back. Please don't shoot me... yet!")
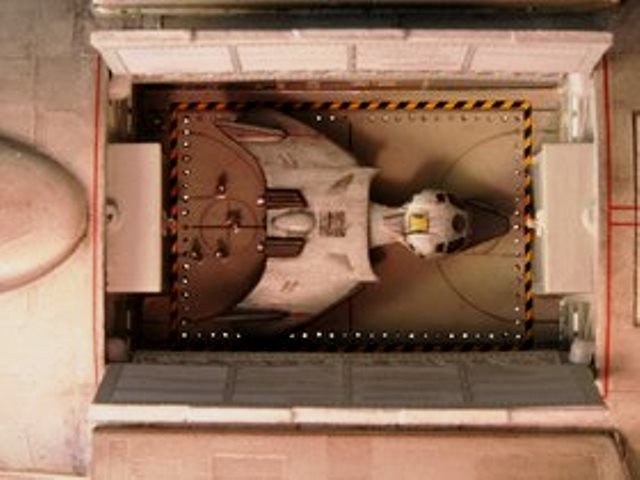
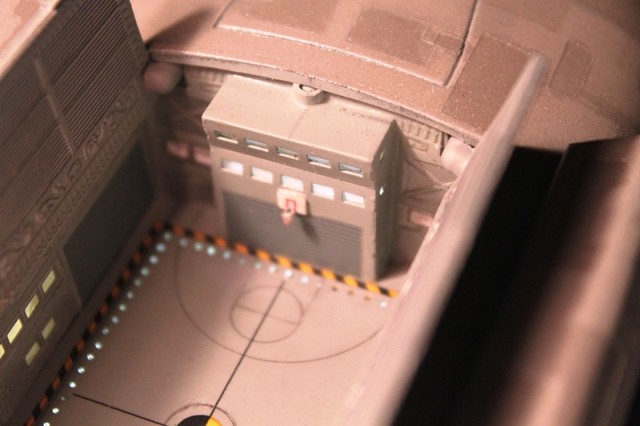
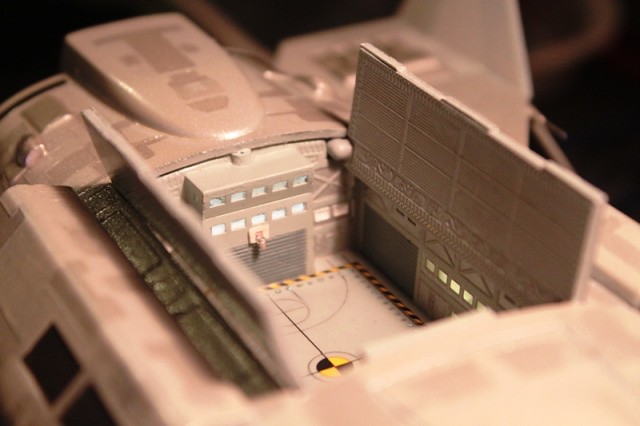
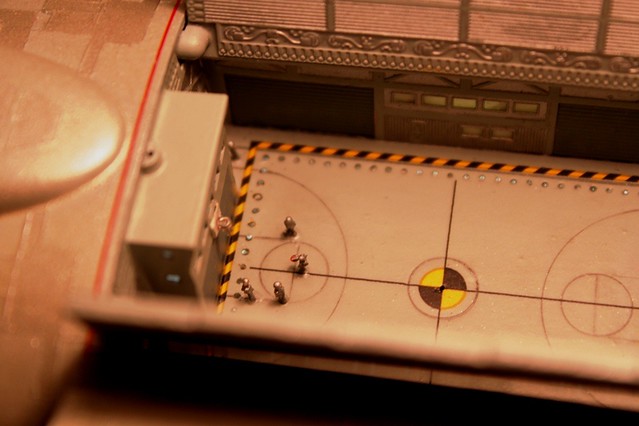
The launch bay with lights on and the floor decal in place:
 IMG_2635 by trekriffic, on Flickr
Running the fiber to each landing light around the edges was a pain but well worth the trouble I think.
I need to touch up the circle in the center with my mechanical pencil once I've sealed with Glosscote and sprayed with Dullcote.
Then I'll seal the pencil with Dullcote. There is a hole in the floor in the center of the circle with a short tube underneath the floor into which a brass wire inserted in the underside of the scout ship will slide. This will keep the scout ship from sliding around inside the bay.
There will also be two other mounting holes atop each tower at either end of the bay for inserting a longer wire when I want to display the scout ship in flight over the bay.
More to come...
as if I need to tell you guys that!
Pics from this past weekend...
Here are the nameplates included in the ParaGrafix PE set:
Photo-etch Name Plates by trekriffic, on Flickr Paul gives you two of each. I only ended up using one of the SSC Leif Ericson plates.
The stand after spraying with Testors flat black enamel and sealing with Krylon Clear Satin acrylic spray. The nameplate was sprayed with Tamiya silver; the recessed lettering was painted with thinned Testors black enamel; the emblem is a decal cut from the kit decal sheet:
IMG_2487 by trekriffic, on FlickrThe ion engines aglow. I really like the look of the corrugated aluminum foil inside the shrouds:
Ion engines Aglow by trekriffic, on FlickrIMG_2426 by trekriffic, on FlickrI know, I know, I still need to attach the PE engine grills front and back. Please don't shoot me... yet!
The launch bay with lights on and the floor decal in place:
IMG_2635 by trekriffic, on FlickrRunning the fiber to each landing light around the edges was a pain but well worth the trouble I think.
I need to touch up the circle in the center with my mechanical pencil once I've sealed with Glosscote and sprayed with Dullcote.
Then I'll seal the pencil with Dullcote. There is a hole in the floor in the center of the circle with a short tube underneath the floor into which a brass wire inserted in the underside of the scout ship will slide. This will keep the scout ship from sliding around inside the bay.
There will also be two other mounting holes atop each tower at either end of the bay for inserting a longer wire when I want to display the scout ship in flight over the bay.
More to come...
as if I need to tell you guys that!
Last edited:
yuumi2891103
Master Member
Re: Leif Ericson Galactic Cruiser
Great solution!!
I love your hanger bay lighting.
Paint job are splendid!!
More pics please!!
katsu
Great solution!!
I love your hanger bay lighting.
Paint job are splendid!!
More pics please!!
katsu
trekriffic
Sr Member
Re: Leif Ericson Galactic Cruiser
OK katsu. You twisted my arm...:lol
Some pics from yesterday evening...
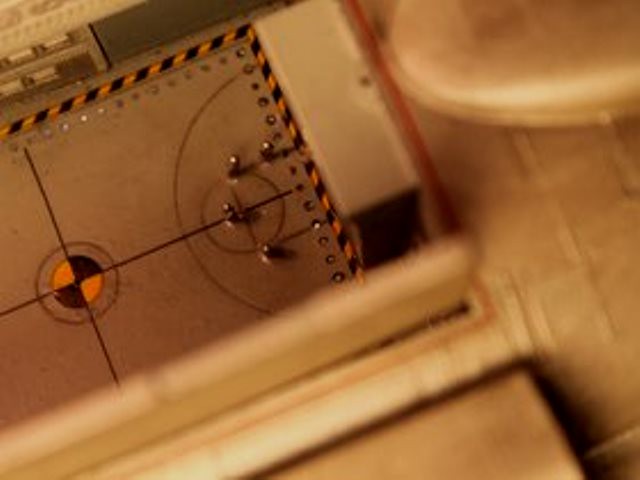
After spraying the launch bay with Glosscote to seal the decals a shot of Dullcote was applied. Then I took an HB pencil and some Evergreen tubing-the same diameter as that penciled on center circle-and used the tubing as a guide to redraw the mssing section of the center circle. That did the trick. Afterward I sealed the pencil with another shot of Dullcote:
 IMG_2616 by trekriffic, on Flickr
This morning I went back and gave the yellow/black decal in the center a good coat of Future. I want to protect the decal as much as possible from getting scratched when inserting the brass wire from the scout ship.
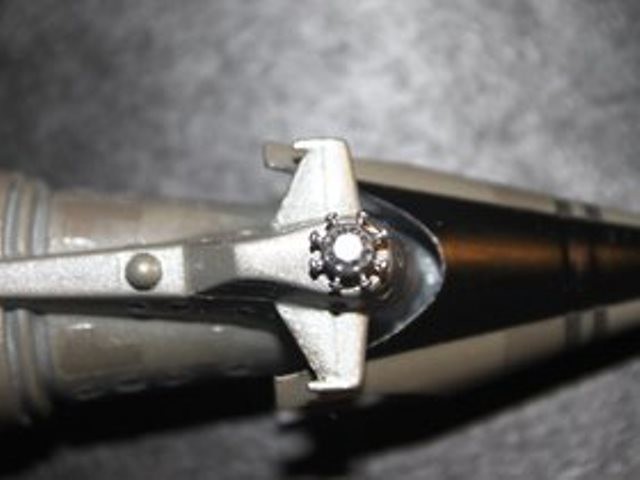
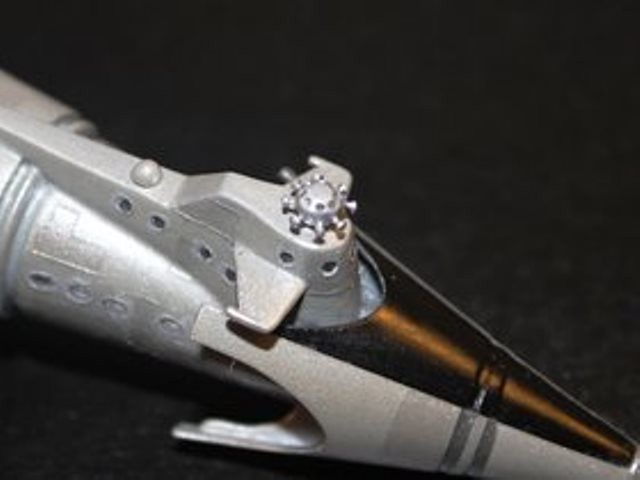
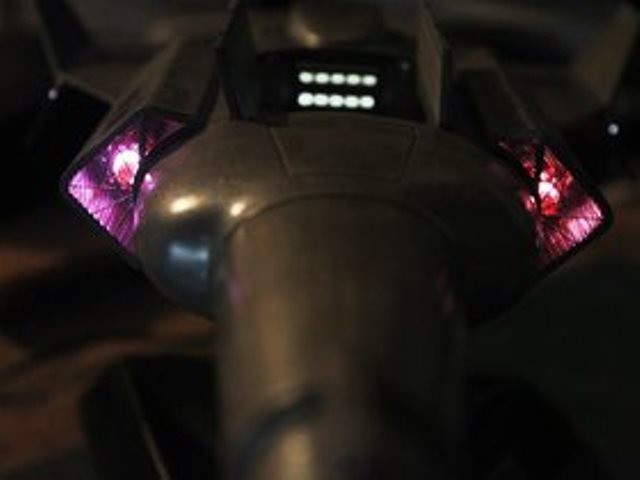
The sensor array I'd finished weeks ago was inserted over the bridge with the fiber strand facing back to the center forward facing LED:
 Main Sensor Array Installed by trekriffic, on Flickr
 Finished Bridge and Nose Detail by trekriffic, on Flickr
I used a rhinestone on top with tiny metal pins cropped and inserted around the edges. The round ports you see in the center of the angled facets
actually do light up when the ship is powered up.
Thanks for reading! Comments welcome as always!
Great solution!!
I love your hanger bay lighting.
Paint job are splendid!!
More pics please!!
katsu
OK katsu. You twisted my arm...:lol
Some pics from yesterday evening...
After spraying the launch bay with Glosscote to seal the decals a shot of Dullcote was applied. Then I took an HB pencil and some Evergreen tubing-the same diameter as that penciled on center circle-and used the tubing as a guide to redraw the mssing section of the center circle. That did the trick. Afterward I sealed the pencil with another shot of Dullcote:
IMG_2616 by trekriffic, on FlickrThis morning I went back and gave the yellow/black decal in the center a good coat of Future. I want to protect the decal as much as possible from getting scratched when inserting the brass wire from the scout ship.
The sensor array I'd finished weeks ago was inserted over the bridge with the fiber strand facing back to the center forward facing LED:
Main Sensor Array Installed by trekriffic, on FlickrFinished Bridge and Nose Detail by trekriffic, on FlickrI used a rhinestone on top with tiny metal pins cropped and inserted around the edges. The round ports you see in the center of the angled facets
actually do light up when the ship is powered up.
Thanks for reading! Comments welcome as always!
Last edited:
shadowwolf
New Member
Re: Leif Ericson Galactic Cruiser
Been watching this since the beginning,All I can say is WOW!!!!Incredible job on this ship.
Been watching this since the beginning,All I can say is WOW!!!!Incredible job on this ship.
yuumi2891103
Master Member
Re: Leif Ericson Galactic Cruiser
This is such a lovely star ship!!:lol
Great work!
This is such a lovely star ship!!:lol
Great work!
trekriffic
Sr Member
Re: Leif Ericson Galactic Cruiser
Today's Update...
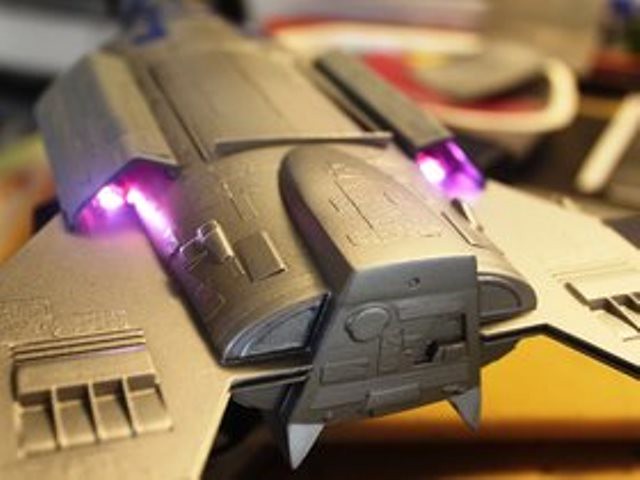
At lunch today, I finally got around to installing the engine shroud grills. Here are some pics with the lights turned on:
 IMG_2520 by trekriffic, on Flickr
 IMG_2505 by trekriffic, on Flickr
 IMG_2524 by trekriffic, on Flickr
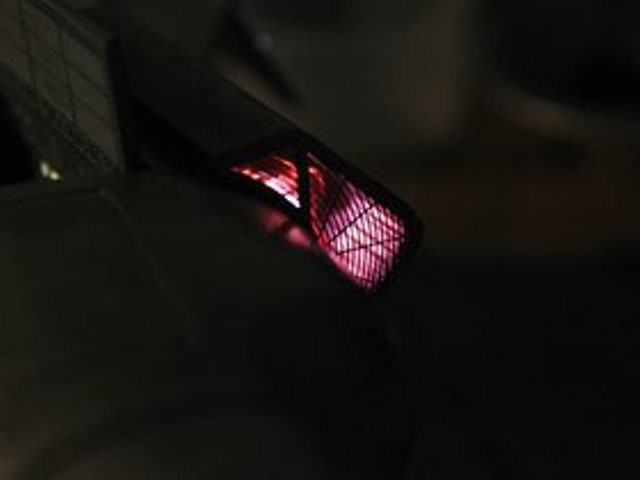
Here are a couple of pics of the wing mounted laser cannons. I got lucky and caught the red and green flashers when they were lit up too:
 IMG_2516 by trekriffic, on Flickr
 IMG_2519 by trekriffic, on Flickr
Next post will show the launch bay with basketball goals installed!
Today's Update...
At lunch today, I finally got around to installing the engine shroud grills. Here are some pics with the lights turned on:
IMG_2520 by trekriffic, on FlickrIMG_2505 by trekriffic, on FlickrIMG_2524 by trekriffic, on FlickrHere are a couple of pics of the wing mounted laser cannons. I got lucky and caught the red and green flashers when they were lit up too:
IMG_2516 by trekriffic, on FlickrIMG_2519 by trekriffic, on FlickrNext post will show the launch bay with basketball goals installed!
Last edited:
LMFAOSchwarz
Sr Member
Re: Leif Ericson Galactic Cruiser
Oooh, those grills are a nice touch!! :thumbsup
Oooh, those grills are a nice touch!! :thumbsup
trekriffic
Sr Member
Re: Leif Ericson Galactic Cruiser
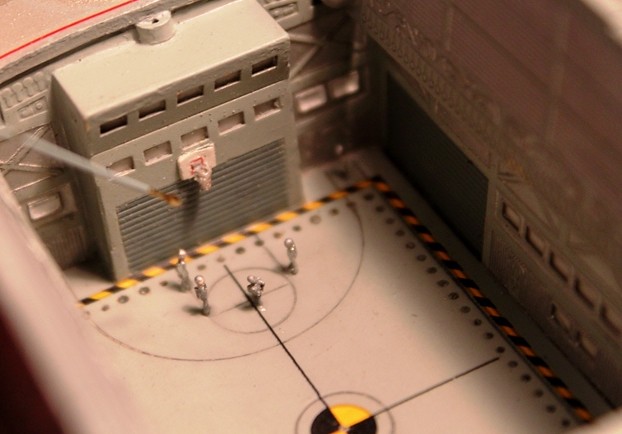
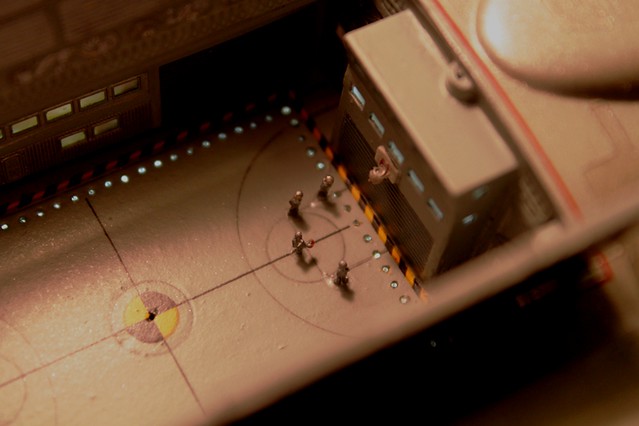
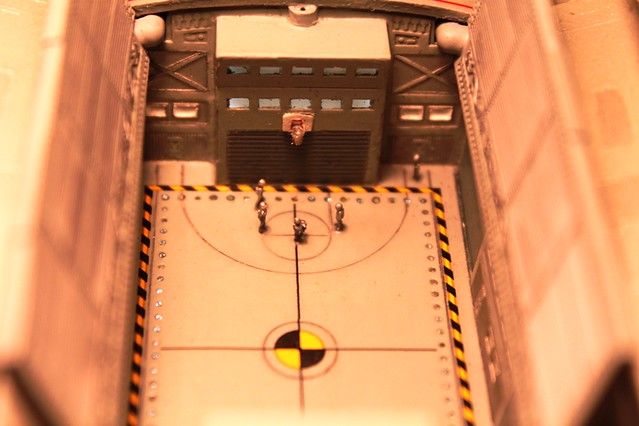
Basketball goals!
 Basketball Hoops by trekriffic, on Flickr
 Hoops by trekriffic, on Flickr
If you look closely at the sidewall windows in the pic above you can see the silhouette of a crewman behind one of the windows.
I should have the crewmen playing two-on-two basketball (with one spectator) in their spacesuits for the next post.
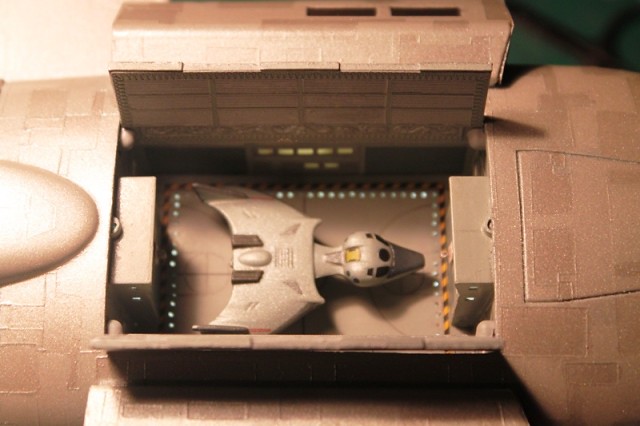
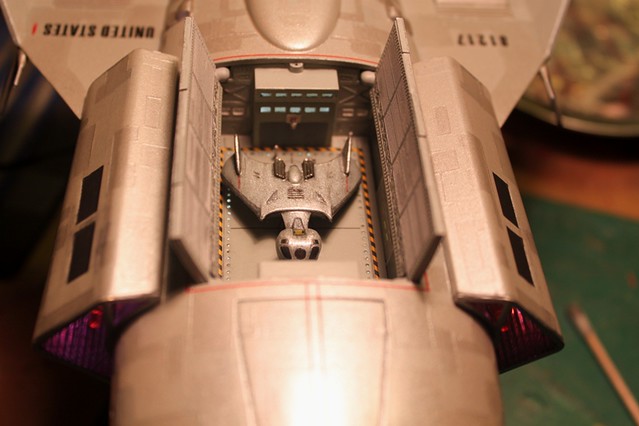
Launch bay with scout ship:
 Scout in Bay by trekriffic, on Flickr
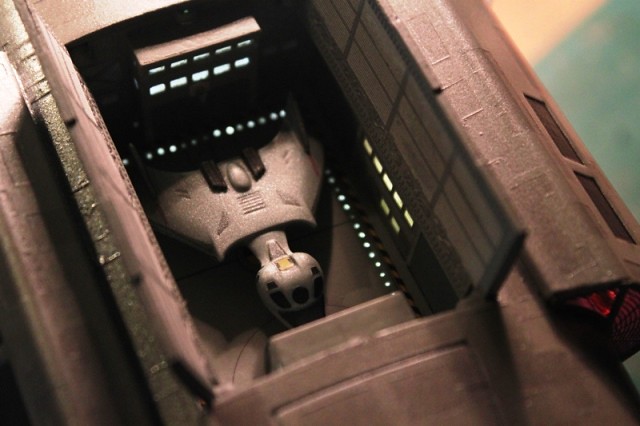 Scout in Bay Low Light by trekriffic, on Flickr
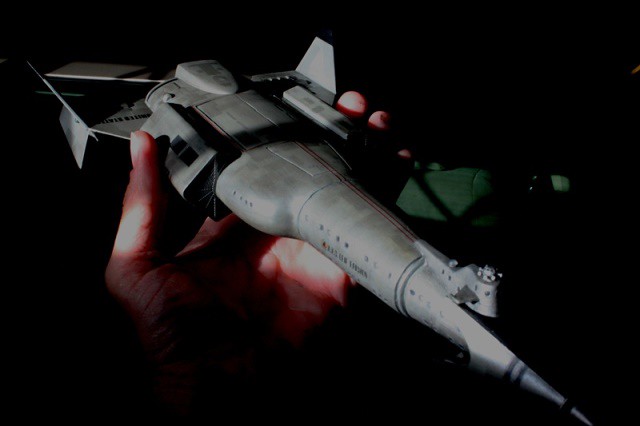
The scout was sprayed with pearl like the Leif.
I didn't want the windows, nose panel, and hatch to be pearl so I brushed on some liquid masking fluid beforehand.
Once the pearl coat dried I sprayed with some Dullcote for a flat finish.
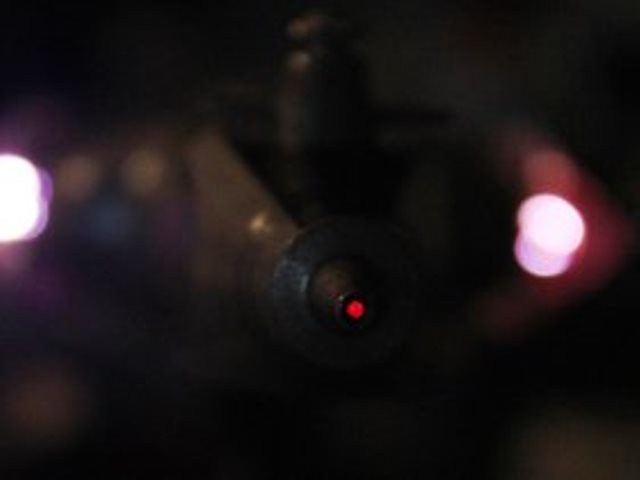
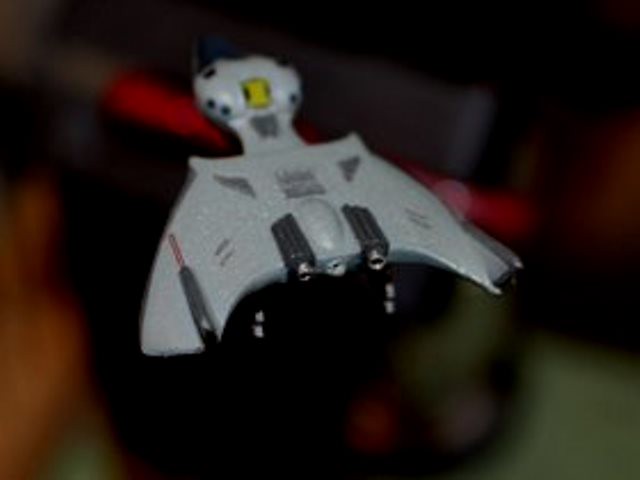
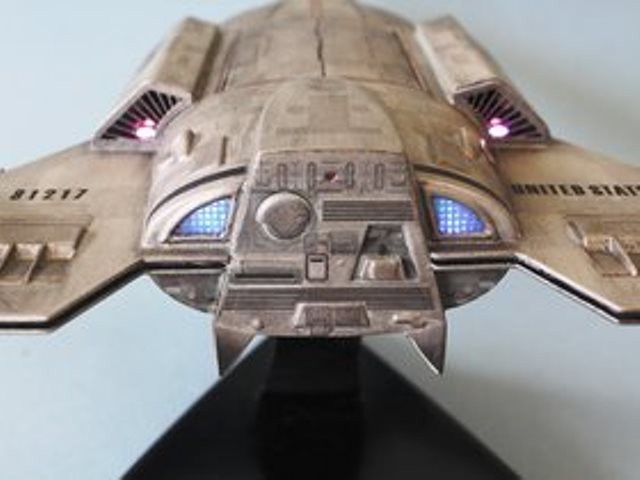
The bow phaser projector lit up:
 IMG_2506 by trekriffic, on Flickr
After looking at this pic I did a little cleanup inside the phaser barrel with a rasp so it's nice and round in there now.
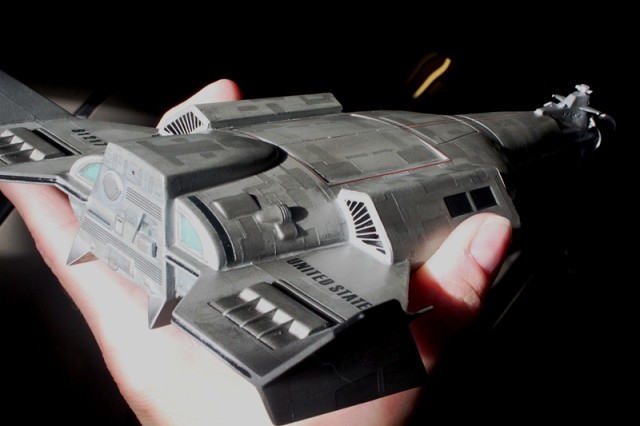
The Leif on her stand and ready for decals:
 IMG_2571 by trekriffic, on Flickr
You can't see it in this pic but I glued a piece of black felt to the top of the stand to prevent scratching the underside of the ship.
Thanks for hanging in! We're almost there!
Basketball goals!
Basketball Hoops by trekriffic, on FlickrHoops by trekriffic, on FlickrIf you look closely at the sidewall windows in the pic above you can see the silhouette of a crewman behind one of the windows.
I should have the crewmen playing two-on-two basketball (with one spectator) in their spacesuits for the next post.
Launch bay with scout ship:
Scout in Bay by trekriffic, on FlickrScout in Bay Low Light by trekriffic, on FlickrThe scout was sprayed with pearl like the Leif.
I didn't want the windows, nose panel, and hatch to be pearl so I brushed on some liquid masking fluid beforehand.
Once the pearl coat dried I sprayed with some Dullcote for a flat finish.
The bow phaser projector lit up:
IMG_2506 by trekriffic, on FlickrAfter looking at this pic I did a little cleanup inside the phaser barrel with a rasp so it's nice and round in there now.
The Leif on her stand and ready for decals:
IMG_2571 by trekriffic, on FlickrYou can't see it in this pic but I glued a piece of black felt to the top of the stand to prevent scratching the underside of the ship.
Thanks for hanging in! We're almost there!
Last edited:
trekriffic
Sr Member
Re: Leif Ericson Galactic Cruiser
Thanks trooper!
Last pic for the night...
 IMG_2562 by trekriffic, on Flickr
Thanks trooper!
Last pic for the night...
IMG_2562 by trekriffic, on Flickr
Last edited:
trekriffic
Sr Member
Re: Leif Ericson Galactic Cruiser
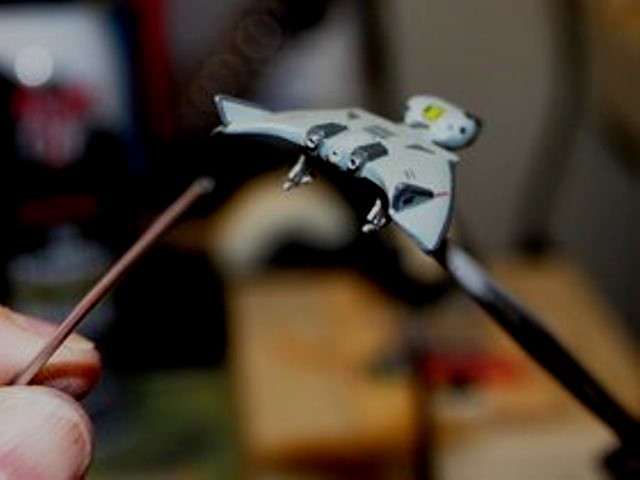
Spent some more time on the scoutship yesterday. I wanted to jazz up the stern of the ship a little by adding engine bells so I took some 1/16" diameter aluminum tubing and cut off about a half inch length to fit in my dremel's chuck. Then I spun it while shaping it with my pointy scribing tool and needle file. I ended up with two 1/16" long or so tapered engine bells which I sawed off using my miter saw and glued on top of the original kit exhaust openings:
 Scout Ship Engine Bells by trekriffic, on Flickr
 Scout Ship Engine Bells by trekriffic, on Flickr
It's a nice little improvement don't you think?
Moving on...
The PE grills had some small gaps around their edges where I glued them to the shroud plastic so I filled them with AVES.
Once the AVES dries I brushed on some Tamiya silver leaf around the edges and let dry.
Decalling went well with some minor tweaks needed to get some of the stern decals to fit. I used Micro Set under the decals to snug them down followed by Micro SOL on top:
 IMG_2668 by trekriffic, on Flickr
 Stern Impulse Engines by trekriffic, on Flickr
 IMG_2561 by trekriffic, on Flickr
 IMG_2543 by trekriffic, on Flickr
One nice thing was the uppermost decal on the stern had a squarish spot right in the middle that I could punch out and fit right over the red stern light in the top center of the stern plate.
Serendipity to be sure and it looks great IMO.
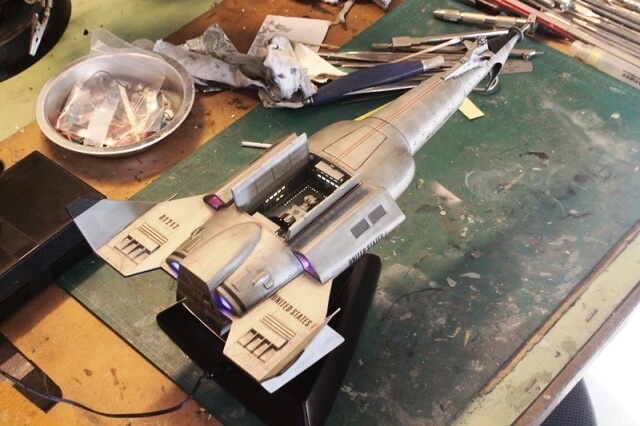
The wings got the "UNITED STATES" decals starboard side on top and port side on the bottom. The number "8121" can be seen fuzzily on the opposite wing surfaces top and bottom. I went with this number as an homage to Matt Jefferies who base born on 8-12-21.
I had to modify the red stripes framing the launch bay, shortening the ones front and back and using the excess to extend the stripes on the sides of the bay opening. Nothing I'm sure you guys haven't had to do from time to time.
Today I'll finish up the decalling and let dry overnight.
Then I'll seal the decals with Glosscote followed by a shot of Dullcote. Then I'll do a little weathering.
After that, more Dullcote to seal and, if it's too flat, I'll hit her with Krylon clear Matte spray which is more like a Testors satin finish to my eye.
Later on today or tomorrow I'll add the crew figures to the bay.
I'm thinking of using a clear water based craft glue made by Elmer's to glue their feet to the floor of the bay rather than CA.
Lastly, I'll dab the windows with Future to make them glossy again.
Then it'll be time for finished pics.
Thanks for reading!
Spent some more time on the scoutship yesterday. I wanted to jazz up the stern of the ship a little by adding engine bells so I took some 1/16" diameter aluminum tubing and cut off about a half inch length to fit in my dremel's chuck. Then I spun it while shaping it with my pointy scribing tool and needle file. I ended up with two 1/16" long or so tapered engine bells which I sawed off using my miter saw and glued on top of the original kit exhaust openings:
Scout Ship Engine Bells by trekriffic, on FlickrScout Ship Engine Bells by trekriffic, on FlickrIt's a nice little improvement don't you think?
Moving on...
The PE grills had some small gaps around their edges where I glued them to the shroud plastic so I filled them with AVES.
Once the AVES dries I brushed on some Tamiya silver leaf around the edges and let dry.
Decalling went well with some minor tweaks needed to get some of the stern decals to fit. I used Micro Set under the decals to snug them down followed by Micro SOL on top:
IMG_2668 by trekriffic, on FlickrStern Impulse Engines by trekriffic, on FlickrIMG_2561 by trekriffic, on FlickrIMG_2543 by trekriffic, on FlickrOne nice thing was the uppermost decal on the stern had a squarish spot right in the middle that I could punch out and fit right over the red stern light in the top center of the stern plate.
Serendipity to be sure and it looks great IMO.
The wings got the "UNITED STATES" decals starboard side on top and port side on the bottom. The number "8121" can be seen fuzzily on the opposite wing surfaces top and bottom. I went with this number as an homage to Matt Jefferies who base born on 8-12-21.
I had to modify the red stripes framing the launch bay, shortening the ones front and back and using the excess to extend the stripes on the sides of the bay opening. Nothing I'm sure you guys haven't had to do from time to time.
Today I'll finish up the decalling and let dry overnight.
Then I'll seal the decals with Glosscote followed by a shot of Dullcote. Then I'll do a little weathering.
After that, more Dullcote to seal and, if it's too flat, I'll hit her with Krylon clear Matte spray which is more like a Testors satin finish to my eye.
Later on today or tomorrow I'll add the crew figures to the bay.
I'm thinking of using a clear water based craft glue made by Elmer's to glue their feet to the floor of the bay rather than CA.
Lastly, I'll dab the windows with Future to make them glossy again.
Then it'll be time for finished pics.
Thanks for reading!
Last edited:
Grumpy Popeye
Sr Member
Re: Leif Ericson Galactic Cruiser
Gorgeous! It`s been a treat following your progress!
Gorgeous! It`s been a treat following your progress!
trekriffic
Sr Member
Re: Leif Ericson Galactic Cruiser
Today's pics...
Space hoops...
Cadet takes a foul shot playing half-court basketball in the open bay under the stars:
 IMG_2553 by trekriffic, on Flickr
 IMG_2550 by trekriffic, on Flickr
 IMG_2551 by trekriffic, on Flickr
 IMG_2552 by trekriffic, on Flickr
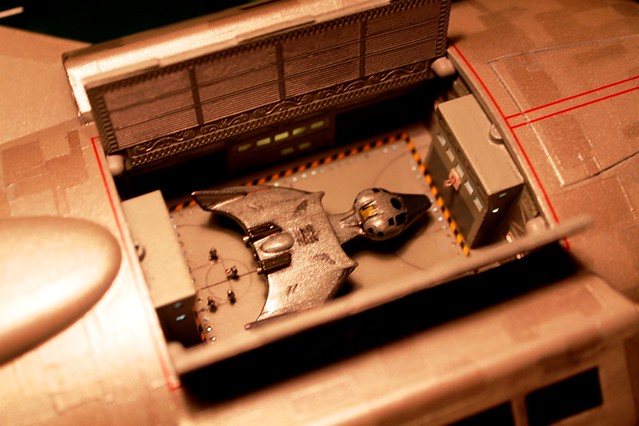
With VEGA scout ship:
 IMG_2555 by trekriffic, on Flickr
 IMG_2554 by trekriffic, on Flickr
The VEGA vacates the bay for departmental league games.
It has also, on occasion, rescued overzealous players who underestimated the strength of their jumps and left the bay entirely on overzealous dunk attempts! After three such incidents the Captain issued an order that "Space Jams" would only be allowed with the doors closed...
Today's pics...
Space hoops...
Cadet takes a foul shot playing half-court basketball in the open bay under the stars:
IMG_2553 by trekriffic, on FlickrIMG_2550 by trekriffic, on FlickrIMG_2551 by trekriffic, on FlickrIMG_2552 by trekriffic, on FlickrWith VEGA scout ship:
IMG_2555 by trekriffic, on FlickrIMG_2554 by trekriffic, on FlickrThe VEGA vacates the bay for departmental league games.
It has also, on occasion, rescued overzealous players who underestimated the strength of their jumps and left the bay entirely on overzealous dunk attempts! After three such incidents the Captain issued an order that "Space Jams" would only be allowed with the doors closed...
Last edited:
Werewolf33
New Member
Re: Leif Ericson Galactic Cruiser
You know, I am a sculptor and people say to me how do you have the patience to do this work, but I have to say my hat is off to you sir, the amount of patience and fine detail work you put into this model is amazing, you have done a beautiful job on it. I definitely wish I had your patience, because I love making models, but to make them so beautifully is a definite skill. Awesome work.
You know, I am a sculptor and people say to me how do you have the patience to do this work, but I have to say my hat is off to you sir, the amount of patience and fine detail work you put into this model is amazing, you have done a beautiful job on it. I definitely wish I had your patience, because I love making models, but to make them so beautifully is a definite skill. Awesome work.
moonlightdrive2
Well-Known Member
Re: Leif Ericson Galactic Cruiser
What a fantastic project and thread! Thanks for taking the time to share the great info and pics !!
Dave
What a fantastic project and thread! Thanks for taking the time to share the great info and pics !!
Dave
Similar threads
- Replies
- 90
- Views
- 13,855
- Replies
- 312
- Views
- 50,690
- Replies
- 4
- Views
- 3,001
- Replies
- 17
- Views
- 3,490