Making Loki (Thor: The Dark World)

Silhouette

New Member
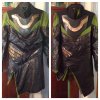
I've always been a bit intimidated to post here on the RPF, but over the last three years or so, costuming has become a huge thing for me, and Loki costumes my personal pet projects. I'm incredibly proud of the work and research I put into them, so I thought I could get over my lingering anxiety and, hey, show what I've done.

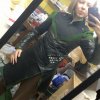
There are a loooot of WIP photos and steps, so I'm going to try to break it down. (Keep in mind this version is not yet complete at the time of this first posting, but it was wearable enough for a convention, heh.)

Technically, the Loki process started three years ago, and since then I've been updating and tweaking things; I remade the tunic about six months ago, and finally bullied myself into remaking the coat and armour over the past few months, as well, after realising how much my skills have improved since the first try.

IMG_2918.jpg IMG_2916.jpg

tumblr_oaa7uxrvwE1rcgyvmo1_1280.jpg


MATERIALS

My first costume was made from thin lambskin leather and a green linen-rayon blend from Joann Fabrics. It was nice, and it worked, but this time I wanted to really go for accuracy with the materials.

  • black and brown goatskin leather, slightly thicker, that will hold up more
  • veg-tan leather for the shoulders
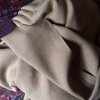
  • wool crepe, originally brown, and then hand-dyed about five times, for the green lining and accents
  • black worbla for the armour pieces (sooo much nicer than regular worbla!)
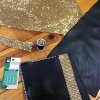
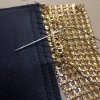
  • aluminum spider-mesh in gold for the coat-tail and armour accents
  • about 10 gazillion zipper stops (actually well over 3,000 at this point; I still have to order more, ha!)

1.jpg 2.jpg

More to come!


IMG_2918.jpg


IMG_2916.jpg


1.jpg


2.jpg


tumblr_oaa7uxrvwE1rcgyvmo1_1280.jpg
 
Last edited by a moderator:
Your costume looks fantastic.
The effort you've put into this shows in the photos that compliment it.

Great great way to introduce yourself here.
 
MATERIALS (cont.)

Leather

I went to my local (and when I say local, I mean 1.5 hours away...) Tandy Leather for Loki this time. I lucked out in managing to time it around Black Friday, so there were a lot of sales going on, and I snagged three black designer goatskin leather hides for the coat remake, and one dark brown lambskin for the patterned leather. The tunic was done earlier, with another black lambskin. The leather is all garment weight, lovely and supple (because Loki's coat-tails do flow and fold, and are not stiff like your typical vinyl or faux-leather) but not so thin that it would end up wrinkling and wearing through, as happened in my first costume with very thin lambskin.

1.jpg
(First tunic vs. remake; you can see how worn the first got after 2+ years of wear!
This was also before I replaced the green linen parts with the wool.)

The veg-tan leather was also from Tandy, I believe around a 2 oz. weight.

2.jpg

Wool

Now, the "Loki green", as I call it, is a hard colour to find. Almost impossible; it's an odd hue that changes in different lighting and is kind of an exact middle between a blue-green and a yellow-green, without being overly bright. After many hours of searching over many months for a fabric that would replicate it, I finally resigned myself to dyeing the fabric by hand. I started looking for a wool that had the right texture, and would go from there.

Loki_DarkW.jpg

(Seriously, look at how the green changes from light to shadow. Craziness!)


The wool I really lucked out on. Wool crepe is the perfect texture as far as I can tell, and a local store had 100% wool for about $6/yd. It was tan in colour, but I was okay with that; I've done enough fabric dyeing that the prospect of stripping the colour and redoing it wasn't all that intimidating.

3.jpg

I'm used to dyeing fabric on the stovetop, in a pot. Unfortunately, I had four yards of wool to dye evenly, and that was not going to be possible on the stove. I therefore got a little creative and ended up doing a dye bath in my bathtub! I duct-taped a tarp to keep the dye from turning the tub green.

I stripped the brown as much as I could with Dharma colour remover. Since wools react much better with acid dyes and take and retain the dye better, I added a bottle of white vinegar to the bath. Smelled a little funny, but it worked! I used a combination of regular RIT dyes in Dark Green, Kelly Green, and Lemon Yellow.

It did take about four or five tries to get the colour right, but it was well worth it!


4.jpg5.jpg6.jpg77.jpg

Next up--backtracking a little to explain how I went about doing the tunic!
 
Last edited:
PATTERNED LEATHER

Both in the Avengers and the Dark World, Loki's costumes feature a dark brown patterned leather. Upon closer inspection, it is a repeat of the triquetra symbol, which appears to be stamped or etched (I'm guessing the latter) onto the leather.

Tom-Hiddleston-The-Avengers-Loki-2.jpg View attachment triquetra.png

I'm assuming this was probably custom-done for the films; I have yet to come across any leather with this pattern. Since stamping or tooling such thing garment leather is difficult or close to impossible, I did a little research and opted for embossing--that is, making my own custom stamp and using watermark ink and embossing powder to replicate the design. So I carved a little stamp out of rubber linoleum, got some Versamark watermark ink, and... stamped. A lot. You then sprinkle the embossing powder over the design (I used black), and heat it with a heat gun or hairdryer, which melts the powder into a solid design.

11.jpg 12.jpg

Yes, it was tedious. Especially on the front coat tails. But the overall effect is really, really nice.

13.jpg 14.jpg

(Note: I am, at the moment, looking into having the current patterned pieces laser etched with the design. I'm lucky enough to know someone who does it, and I'll let you all know how it turns out!)


TUNIC

Sleeves

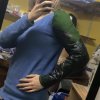
The sleeves, as the tunic is now, are the only parts that have survived of the original construction (mainly because I think I did them well, and I had no desire to do all 20+ pieces again if I didn't have to. All I did recently was replace the green linen portions with the dyed green wool.

Everything was patterned in muslin first, marked, and then cut out of the leather/wool/etc. The base sleeve shape is a black linen-rayon blend, which I originally chose because I assumed the costume would be very warm to wear and I should have a little bit of breathability. I was right. :p

In the pattern, I ended up making a slightly strange sleeve shape, so that the underarm seam is not centered but offset, to account for the criss-crossing and make it appear as seamless as possible. I was setting the sleeves anyway, so it didn't end up changing much. I do admit that I ended up using at least as much glue (E6000) on these sleeves as I did stitching; I would find a better way to do that if I were to remake them, but I'm not planning on it, so there you are, heh.)

8.jpg 9.jpg 10.jpg

(Pattern; original sleeve; sleeve updated with green wool)

There is also a single diagonal line of mesh in the sleeves of the Dark World version; I hand-sewed in a row of that on each sleeve.

thor-the-dark-world-loki.jpg 15.jpg

And there is a sleeve!

16.jpg
 
Last edited:
Wow, your attention to detail is amazing! I don't know if I would have the patience for this costume, as gorgeous as it is. 20 pieces in each sleeve alone? All that stamping? Just awesome work!
 
Looks amazing. The embossing must have taken forever. The effect is certainly worth it though.
 
Tunic body

(The chronology of the tunic is slightly skewed all over the place, as I remade it once and then modified it again by replacing all the green portions.)

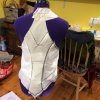
I started out, as with all the patterning, with a muslin mock-up:

17.jpg

The base tunic underneath the leather, like on the sleeves, is a black linen from Joann's. I then cut out all my leather pieces (which is still scary because real leather and I really don't want to mess this up!) and started laying them out. The top green pieces I designed so that they are more like flaps rather than sewn down all the way, so that when the breastplace is put on, they flip up over it to create the nice diagonal there.


23.jpg 18.jpg
(Excuse the white splotches; those are from the armour scales of the first make)

One of the tricky things about Loki's costumes is that there are very, very few visible stitching lines (topstitching). Seams, yes. Actual visible stitching, no. So I spent a lot of time trying to figure out how to replicate that without resorting to a ton of glue as I did the first time around.

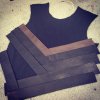
The leather criss-crossing pieces are all folded in half so that they can remain slightly open from each other at the top. To sew them, I laid them down one by one opened up, sewed along the inside layer, then flipped them down again and sewed both layers down at the base of each strip. This seam would later be covered by the next overlapping piece, so that never shows. (For the pieces that do not get overlapped by the next piece down, I did end up resorting to a little glue as well as stitching.) I also went along the sides and armhole edges to tack everything in place.

19.jpg

The "skirt" panels of the tunic are two separate layers in leather and wool; the wool is doubled, but with the seam along the very edge and pressed flat so that it is barely visible and appears, for all intents and purposes, to be one layer with no stitching whatsoever. The two sides of the skirt are two different lengths and meet together in the back, where the whole tunic closes with a separating zipper.

20.jpg

After all that, I then attached the collar (also black linen and lined in green wool, and pressed to open slightly at the throat), and then set the sleeves into the armholes. I was surprised to find that only took two tries; setting sleeves is usually a pain for me, and all the layers here certainly didn't make that easy!

(The dots you see here near the shoulders and at the base of the V shape are magnets, glued on, which keep the breastplate in place.)

21.jpg22.jpg


24.jpg

The zipper stops here were already in place from earlier, but yep, I clamped a bunch of those on by hand with a pair of pliers. And then proceeded to replace them with ones a size larger to match the remake of the coat. It never ends!

And that's the tunic done!

Feel free to shoot me any questions if I haven't elaborated on anything you're curious about! :)
 
Coat

The coat I essentially drafted from scratch as well, since there are no patterns even close to it, and it involves a lot of fiddling with layers to get it to lay right along with the shoulders, which in my costume are separate pieces. So I started with the muslin again--drawing, cutting, fitting, refitting, starting over, etc. Pattern drafting for me is not exactly an intuitive process, even if it does work, so it involves a lot of trial and error to get the proportions right and the lines sitting where I want them to.

The sides of the coat were very interesting to pattern. The pieces do some funny overlappy things there, and I had to remember to leave space in the overlap to accomodate the armour that would come over the front of the coat later, as the pieces actually side INTO the side seam from the armhole down.

26.jpg 27.jpg 28.jpg 29.jpg

For the coat leather, I was lucky enough to snag some designer goatskin hides at Tandy Leather right around the Black Friday sales, so I got a really good deal. Plus, they were quite big, so I only ended up needing the three that I got. (But, pro tip! I patterned the coat roughly beforehand and brought the pieces with me to Tandy so I could find hides that would would with all the pieces, as hides are all different sizes and shapes. So that helped a lot.)

The thing about finding a leather, faux or genuine, for Loki, is that his coat is not stiff; it does drape, which is why I never wanted to use any sort of vinyl. However, it's a matter of finding a balance between something soft enough to drape and yet sturdy enough that it doesn't wrinkle and stay that way!

30.jpg

Then it was time to start laying out pieces and cutting into that beautiful leather!

And let me just say, I love the look of clean leather seams so much. I started with the back, and for the majority of the coat I used a combination of regular seams and then a lot of topstiching where I could see it in the costume, and where folding seam allowances would have made for too much bulk.

31.jpg 36.jpg

For the front two pieces of the coat, because of the lapels, I ended up using Wonder Web, a fusible webbing, to stick the leather and the green wool lining portions together. I would not recommend this for the entire coat, as it does add some stiffness, but it helped to keep the pieces clean and holding their place without any stitching around the edges, which is really important for a costume where you hardly ever see the actual stitching.

I did cut the front two lapels symmetrically, but only so that I would be able to trim them down later to the appropriate asymmetry (the left lapel becomes significantly narrower and more rounded at the corner in the final costume).

32.jpg 33.jpg

And since the leather was often too thick to stick pins through (or would show the pin marks), I used duct tape! You can sort of see where the stitch lines are on the sides; I tried to keep in mind where the zipper stops would be and make my lines very close to there, parallel, but keep in mind that there did have to be enough 'flap' on the edges so that the stops would have something to clamp onto! And the duct tape held the top side piece in place where the armour would later be inserted and glued. After getting the overlaps where I wanted them, I did a tight zig-zag stitch all around the armhole to keep everything secure and finish the edge.

35.jpg 46.jpg 34.jpg

The coat-tails are also a combination of leather outside, green wool lining. Six altogether: two back ones with straight hems parallel to the floor, two side ones with diagonal hems, and two fronts also with diagonal hems, but made with the dark brown patterned leather instead of the plain black.

I very lightly interfaced the wool for the tails, and instead of fusing them together (which would make them too stiff for my taste), I did a tight zig-zag stitch all around the edges, essentially locking them together without any stitching showing at all, as the zig-zag would be covered later by the zipper stop edging.

37.jpg 38.jpg 39.jpg

I patterened and made the coat-tails whole, but of course, they are technically two pieces each because of the metal mesh bands that cut through them. So, I measured carefully and cut right through them as well, leaving enough to turn up to avoid raw edges where the mesh would be. I topstitched those edges first to make sure they wouldn't go anywhere, cut out my strips of the metal mesh, and then started the very tedious process of hand-sewing the mesh in. It took a long time, but the clean look was well worth it. I used a heavy button thread (black for the four, brown for the front two).

40.jpg 41.jpg 42.jpg 43.jpg 44.jpg

Pinning on the first coat tail started to make the whole thing come together. It was a really awesome moment.

45.jpg

Next up: A detour into the laser etching!
 
Last edited:
I am so mad at myself for not discovering this earlier. My goodness you have been an amazing help! Thank you for all of your help and info! I LOVE the way you etched the pattern into the material! I've been wracking my brain for weeks trying to figure out how to do that!
 
This is so beautiful!! I've been looking all over for a helpful advice all over!
How did you get the pattern laser etched? I'm still trying to figure it out!
 
its so beautiful!
how long did it take?
Friend of mine would be so envious
is there any chance of uploading PDF docs for patterns?
 
Back
Top