Mass Effect Femshep N7 Armor Build

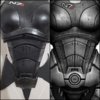
The left option will make you arms look longer because there is no break in the pattern and run vertical, the right option will make them look shorter because of those ribs and less use of color. Personally I like the one on the right, but keep that in mind that colors do play tricks on the eyes. Same concept of vertical stripes or horizontal stripes on a shirt; one makes you look wider, the other thinner.
 
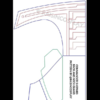
Neck and back pattern attached. To print, open in Adobe Acrobat Reader and click Print>Poster>Tile Scale 100%>Print

1566346001265.png
 

Attachments

  • Commander_Neck_Guard_and_Back_Pattern_RAISINCOSPLAY.pdf
    464.5 KB · Views: 211
Sorry I haven't been posting here very much. I took a break from this build to focus on school and my main sharing platform for cosplay is my Instagram @raisincosplay. If you want to stay up to date with this build, please follow me there!

Anyway, I was inspired by the Yaya Han foam dowels at Joann. They had a cool texture on them from the extrusion, so I decided to replace the trim at the bottom of the breastplate with two layers of them for a more spacesuity look! I think it looks much better now and I'm way happier with it. I was really unhappy with the bottom trim before making this change.

PicsArt_01-09-05.26.18.jpg
 
Last edited:
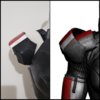
Here are also a couple of comparison photos from my progress so far. I finished the abs and belt buckle as well as made the hip thingies out of the pinhole vinyl. Again, more info on this on my IG. I finished and weathered the pauldrons with advice from the SheProp group. It now has the carbon fiber and N7 stripe.

PicsArt_01-04-02.25.34.jpgPicsArt_01-04-01.47.05.jpg
 
It's been a long time since I've worked on this costume, but over the past two weeks I finished building the M-6 Carnifex! Would ya'll be interested in seeing those process photos?

I remixed JessTheMullet's model and 3D printed it with my new Creality Ender 3 V2. It took a lot of sanding and priming and trying lots of painting techniques to get it right. I feel like I swatched a dozen colors! Even getting the red for the decals right took a couple tries, but in the end my trusty Plaid Flag Red was the winner. (It's also the red I used for the N7 stripe).

Doing the pebble leather texture on the handles was the most frustrating. I messed up twice and had to scrape it all off which was a nightmare! I almost considered throwing them away and reprinting them all together but in the end patience persevered.

PicsArt_10-24-10.19.25.jpg
 
Here is how I got the pebble leather texture on the handles (tip from Punished Props)! With that textured paint, it comes out very hard and fast so I had to mist it back and forth from a far distance. The first two tries ended in bumpy gooey disasters. And for the Plasti Dip, i definitely had to "preheat" the can by putting it in hot water for a minute (tip from Kamui Cosplay) to get a light even coat so that it wouldn't erase the texture.

PicsArt_10-24-10.16.52.jpg
 
That looks pretty cool! I would scratch up the markings a little unless you want it to look factory new.
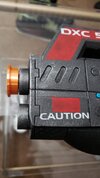
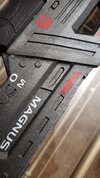
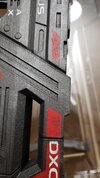
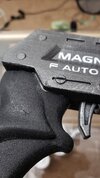
I find that many cosplayers over-weather their props. Perhaps I am an under-weatherer haha. I might rub down the reds a little more, but I'm happy with the weathering I did on mine. I wanted it to look "used" but not abused. I feel like a soldier would take good care of her weapons. Here are some close-ups of the weathering. When I stenciled on the decals, I tried to make it look a little splotchy and I did a dark wash on the whole thing.

20201025_222411.jpg20201025_222424.jpg20201025_222450.jpg20201025_222457.jpg
 
Last edited:
Back
Top