You are using an out of date browser. It may not display this or other websites correctly.
You should upgrade or use an alternative browser.
You should upgrade or use an alternative browser.
My Newbery TARDIS build (Tom Baker era)
- Thread starter Whovian
- Start date

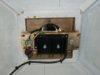
While the lantern with the 360 degree Fresnel lens I got off eBay is 'technically larger that the one (ones) used on the Newbery box, I think it will look just fine.
Here's a shot of the lantern on a 48"x48" piece of 3/4" plywood. This will be the 'real' roof, and the slightly sloped facade roof with the lantern will be mounted on top of it.
Here's a shot of the lantern on a 48"x48" piece of 3/4" plywood. This will be the 'real' roof, and the slightly sloped facade roof with the lantern will be mounted on top of it.
And now, after much rain delay, and vacation delay, my cunning plan for the corners...
I added 4" to each corner by building essentially a cap, using the same construction techniques as the corner posts themselves. I bought a doweling jig at a local woodworking store (trust me, spend the money and get a good one made in the USA, instead of a crap one made in China like the first one I tried).
A couple 3/8" dowels one each side of the cap just to line the pieces up properly... a good metal corner brace for strength... and the caps were in place. After that, I used a belt sander to smooth out the joint area... some wood fill in the joints and visible screw holes... and once it's dry I'll hand sand it smooth. When it's all done, no one will even know there are caps on the posts. Unless they look from the inside, or read this thread")
The pictures don't show the 1/4 round molding, as I have not added it to the caps yet.
I added 4" to each corner by building essentially a cap, using the same construction techniques as the corner posts themselves. I bought a doweling jig at a local woodworking store (trust me, spend the money and get a good one made in the USA, instead of a crap one made in China like the first one I tried).
A couple 3/8" dowels one each side of the cap just to line the pieces up properly... a good metal corner brace for strength... and the caps were in place. After that, I used a belt sander to smooth out the joint area... some wood fill in the joints and visible screw holes... and once it's dry I'll hand sand it smooth. When it's all done, no one will even know there are caps on the posts. Unless they look from the inside, or read this thread
The pictures don't show the 1/4 round molding, as I have not added it to the caps yet.
I even managed to get the main 3/4" plywood flat roof temporarily nailed into place. After vacation (yes, another one ) I'll use the same type of metal corner brackets I used on the base (to secure the posts) to secure this 1st roof. The sloped roof will be built later, placed on top, and secured from underneath with screws.
) I'll use the same type of metal corner brackets I used on the base (to secure the posts) to secure this 1st roof. The sloped roof will be built later, placed on top, and secured from underneath with screws.Guri
Sr Member
It's looking good! I feel really dumb, but when you called your son a 'fellow' it just now occurred to me that your screen name here has to do with Dr. Who. haha!
Have you been covering it up in the rain? and also, I'm not sure if you said, but what do you plan to put in it or how will you use it?
Have you been covering it up in the rain? and also, I'm not sure if you said, but what do you plan to put in it or how will you use it?
It's looking good! I feel really dumb, but when you called your son a 'fellow' it just now occurred to me that your screen name here has to do with Dr. Who. haha!
Have you been covering it up in the rain? and also, I'm not sure if you said, but what do you plan to put in it or how will you use it?
I have a large blue (of course) tarp over it. Even so, the neighbors hvac contractor was working on her a/c unit and asked her if I was building a TARDIS. It's that recognizable, even under a tarp
thanks. I'm hoping to finish the sanding of the caps and put the sign boxes back up before vacation next week.Such a great build, looks brilliant so far
greatwazoo42
Master Member
WOW! That is coming along perfectly!!!
Next, I painted. Now, I tried about 12 different shades of blue until I found one I was happy with. It's called Sapphire Sparkle, from Home Depot. I used the Behr Ultra, paint and primer, even though I already primed, as it seemed to cover the best in the testing I did.
It was very bright out today, so it looks much lighter in the pictures than it is in real life. The attached pictures are from a single coat. I'll add a second coat later, more for weather protection than color or coverage.
It was very bright out today, so it looks much lighter in the pictures than it is in real life. The attached pictures are from a single coat. I'll add a second coat later, more for weather protection than color or coverage.
I painted the lamp as well, but I'll save that for the next update. I decided to make the sloped roof section as a separate piece, which I'll slide into place when completed and attach from underneath with screws. I got the box that holds the lamp completed, as well as the outer frame. Figured out the slope angle and cut the framing on the table saw.
I'll complete the skeleton for the sloped roof in the next day or two and post pictures before I cut the sheeting and complete the assembly.
I'll complete the skeleton for the sloped roof in the next day or two and post pictures before I cut the sheeting and complete the assembly.
thanks... wont be too much longer I hopeLooks great. Looking forward to see it when its done.
Similar threads
- Replies
- 31
- Views
- 2,283
- Replies
- 4
- Views
- 367
- Replies
- 14
- Views
- 2,637
- Replies
- 3
- Views
- 1,105
- Replies
- 41
- Views
- 2,625