superjedi
Sr Member
Hi all,
I've been having so much fun working on this helmet that I forgot to post some in-progress pics, so this post is a little long.
FROM FEB 10th
I've always liked the different looking helmets used by the Rebel Alliance, especially the different designs for the pilots. I ordered a Y-Wing helmet kit from Richie's Armor about 3 weeks ago, and it got here yesterday.
Great looking kit, and he got it out to me nice and quick!

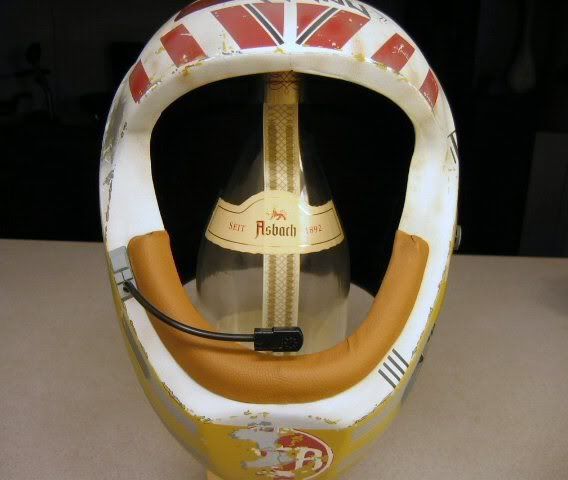
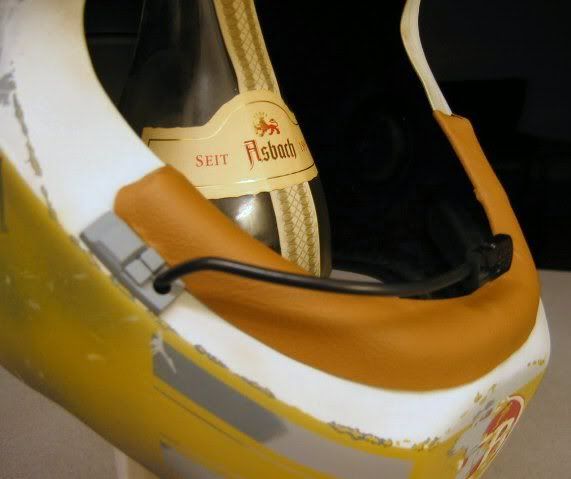
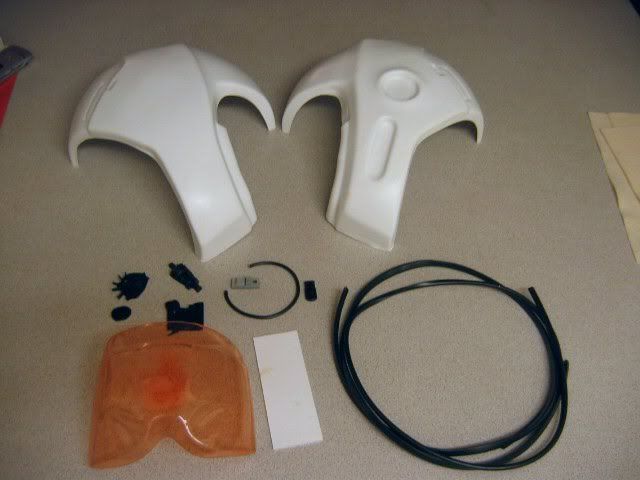
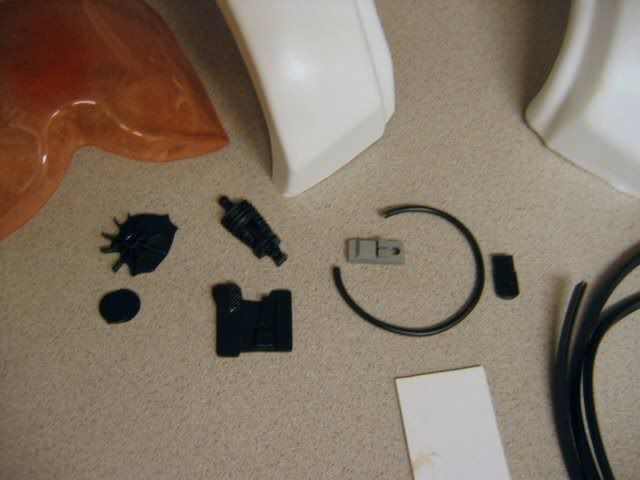
The kit consists of 2 vac-formed styrene shells (left and right), a clear tinted visor, 2 strips of black edging, and several small greeblies for detailing. It even includes a length of flexible coated wire to make the microphone boom.
 Here's the contents of the kit.
Here's a tighter shot of the resin detail bits. No trimming had been done on these for this shot. These are "as received."
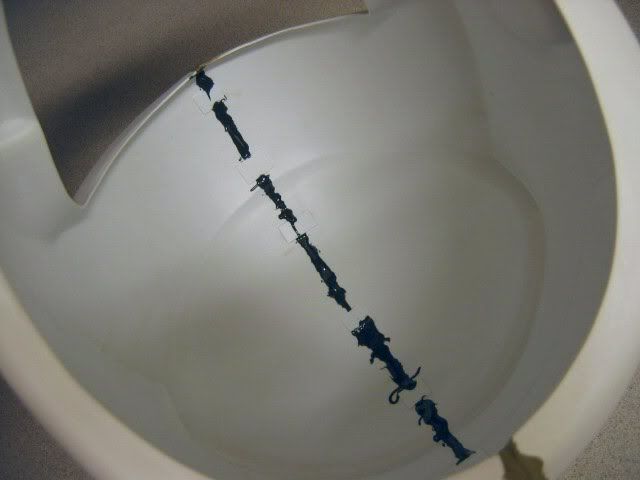
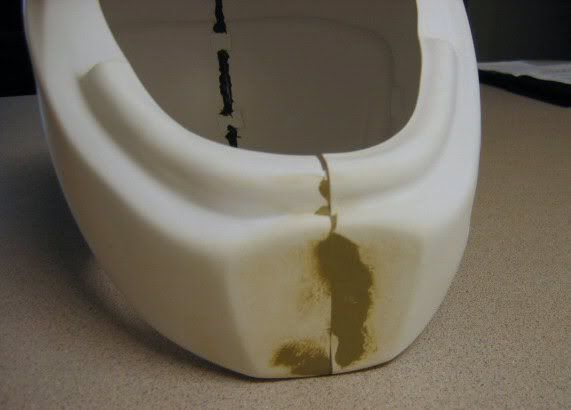
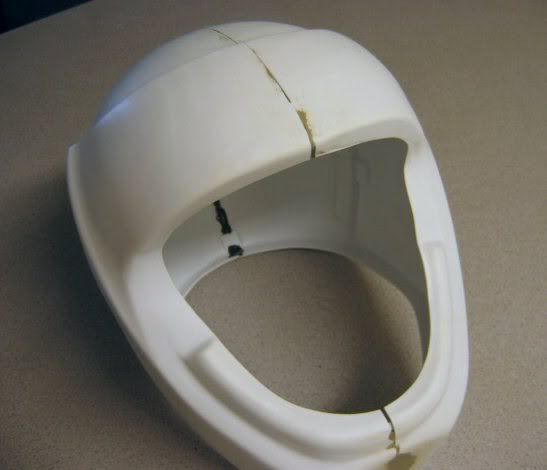
Construction of the main helmet was very straightforward. I cut several small tabs from extra styrene, and after lining up the 2 shells, superglued them in place. I just did that to keep everything aligned while I got my JB Kwik ready. Then I applied that all along the inside of the seam. I worked it in small section cuz that stuff kicks pretty fast!
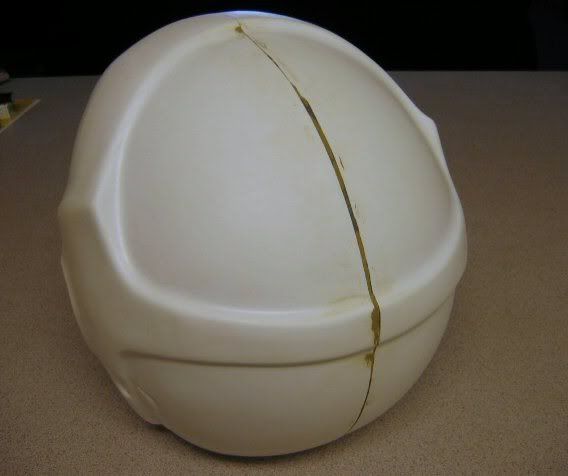
Once the JB Kwik had dried, I went back along the outside of the seam and puttied it. The stuff I use is similar to 1-part Bondo. I bought it while I was stationed in Germany and I've had this tube for over 4 years. It's still going strong! It dries pretty fast and sands to a really smooth finish.
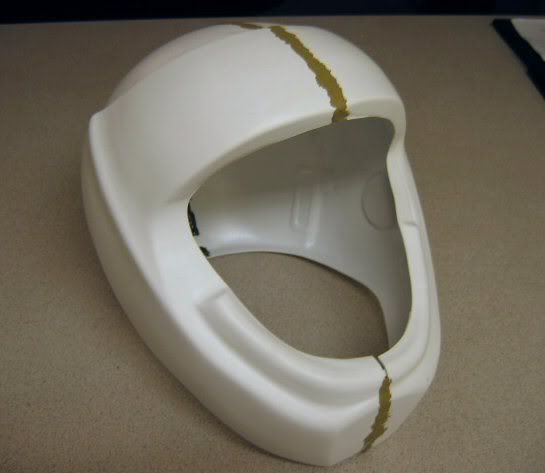
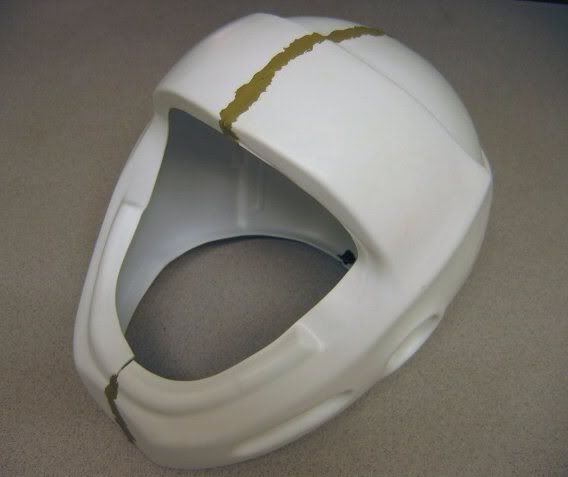
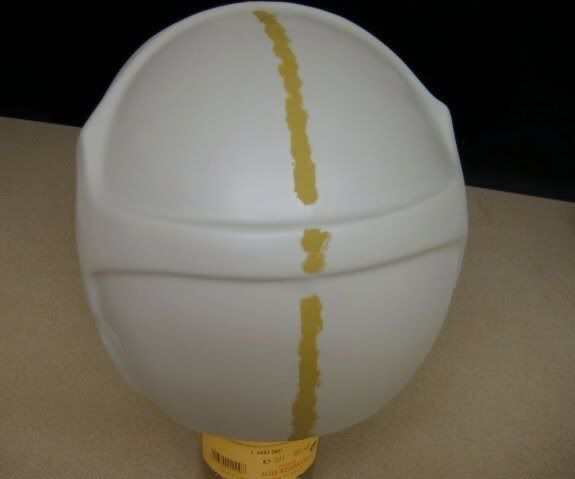
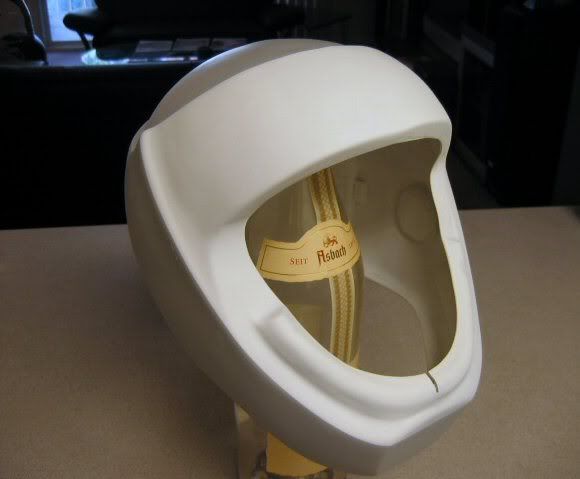
I applied some extra putty to the chin area, which was kind of "sunk" where the 2 halves came together. I built it up to a flatter surface, taking some extra care to blend it in well. Here it is after sanding.
I'm off to the hobby shop in a little bit to grab some primer, and then I'll see how the putty looks. If it needs touch ups, I'll do that later tonight.
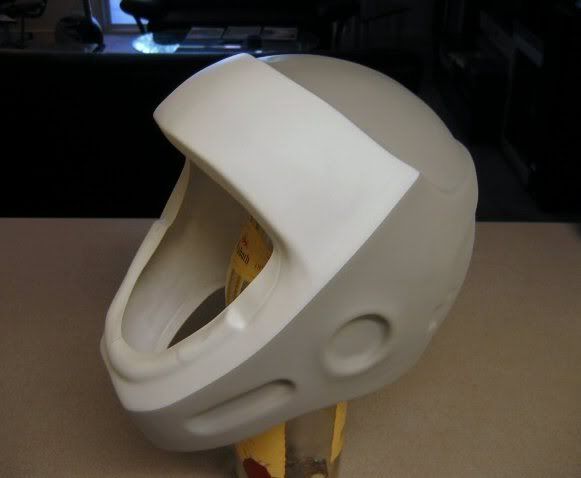
Got some Tamiya primer on the helmet, and after it dried I found that I did have to go back and re-putty the seams. Oh well. So now it's gray with puttied seams! Oh the progress is just staggering!

I'll resand and reprime tomorrow. Then I'll have to test some colors as I'm trying to replicate a specific screen-used helmet from ROTJ.
UPDATE: Feb 12th
Got the first color on. It's. . . white!
I masked off the area I wanted to paint and used Floquil Reefer White. I just misted it on with 2 or 3 light coats to get a "dirty white" appearance. The entire helmet is going to be pretty heavily weathered, so I don't want my base colors to be really pure.
The little split in the top of the chin area doesn't matter as that rounded detail will be covered by some brown vinyl when the painting is all done. It's supposed to look like padding.
UPDATE #2: Feb 12th
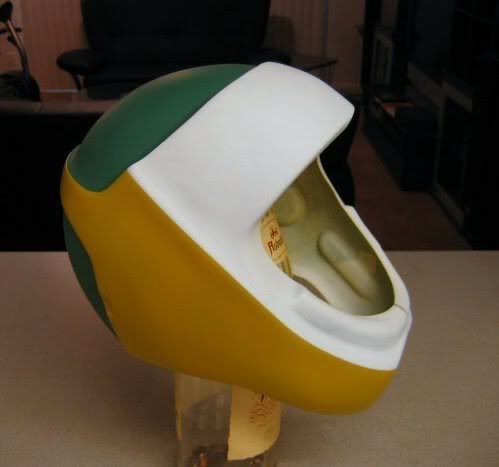
Had some more time and the white was dry, so I sprayed the second major color.
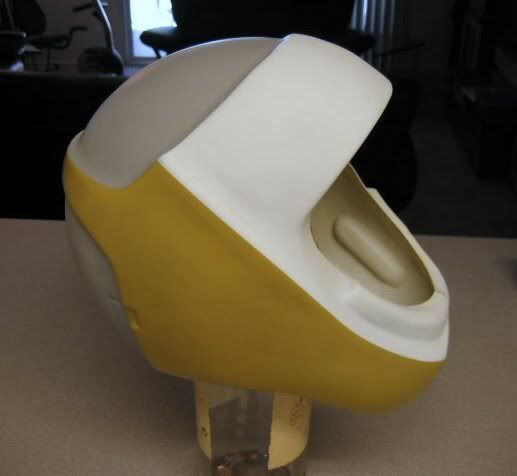
Tomorrow the last major color will go on the 2 slightly inset panels on the top/back, and then I'll start on the markings.
UPDATE: Feb 13th
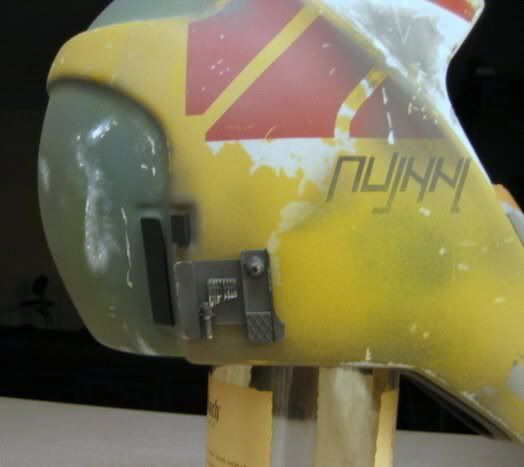
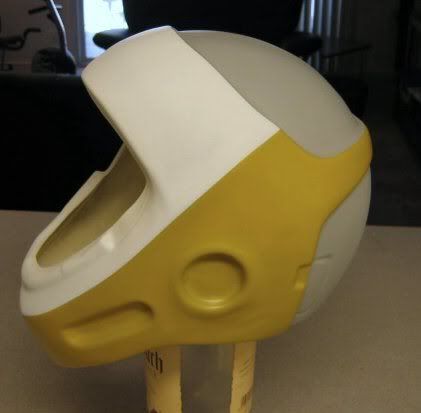
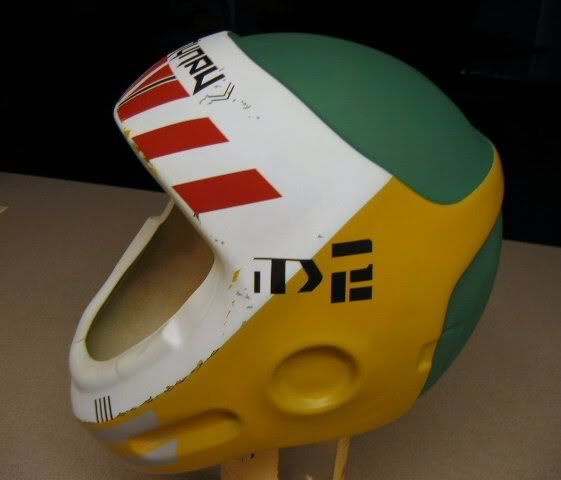
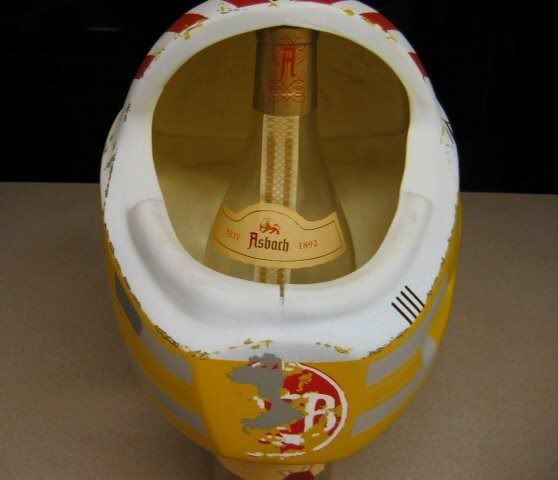
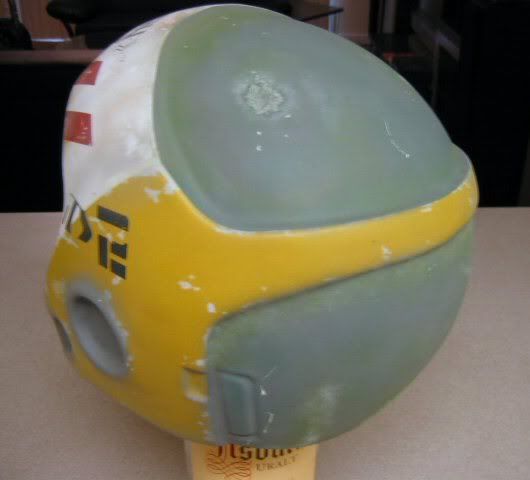
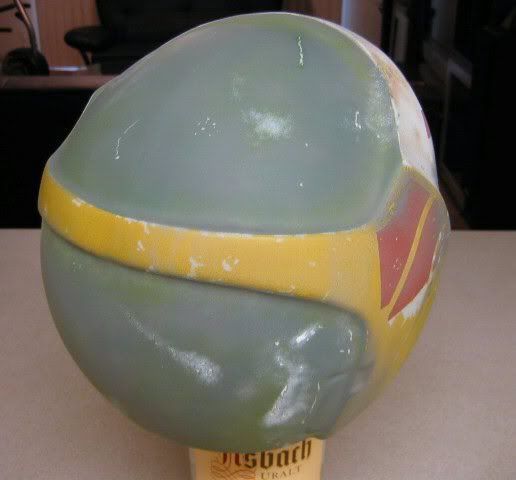
OK, got the last major color on the back panels. I used Floquil Dark Green for these areas.

Next will be some more complex masking for some red and gray markings.
UPDATE #2: Feb 13th
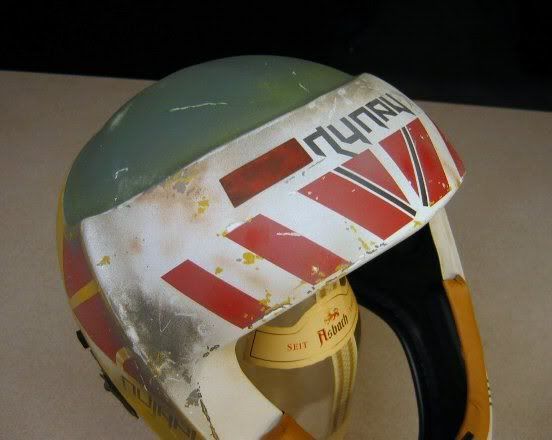
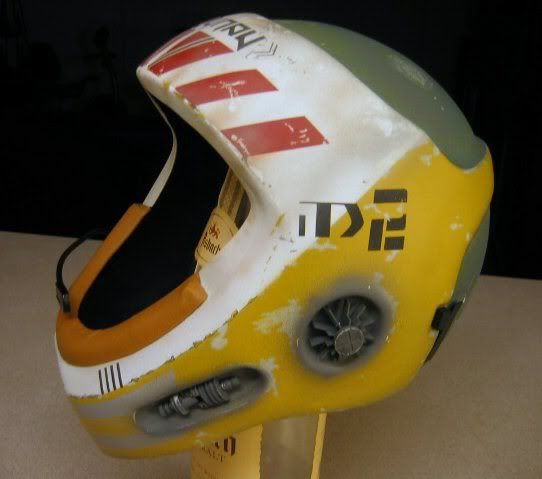
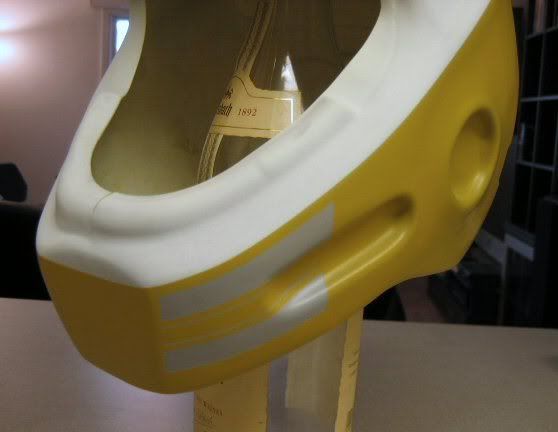
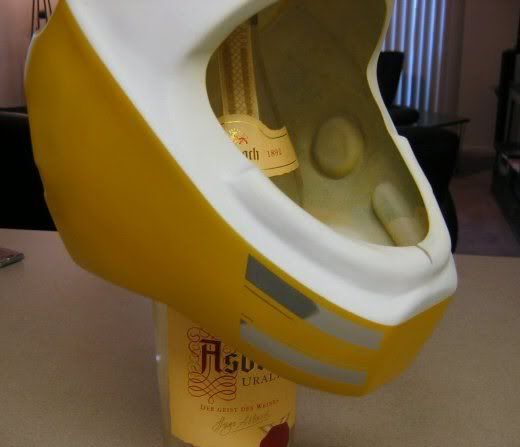
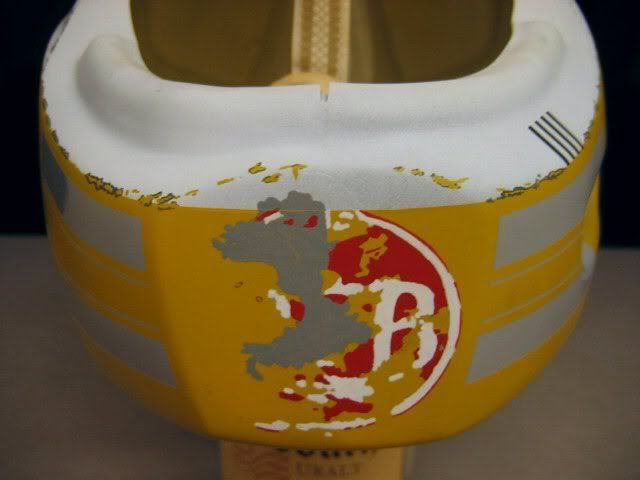
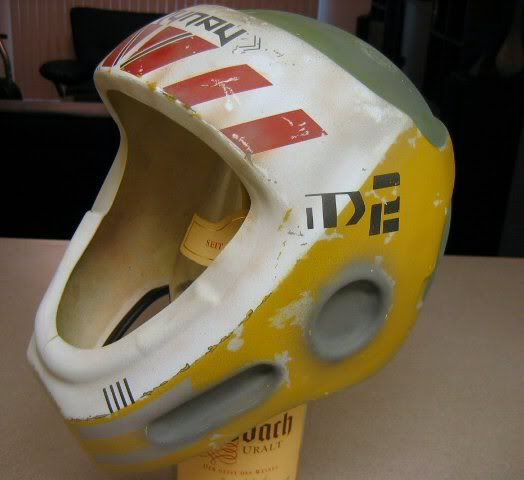
Started some of the markings. First ones are the gray stripes along the jaw line. If you look at pics of the real helmet, you can see on the right side there's a section that's darker gray. I added some darker gray while everything was still masked off.
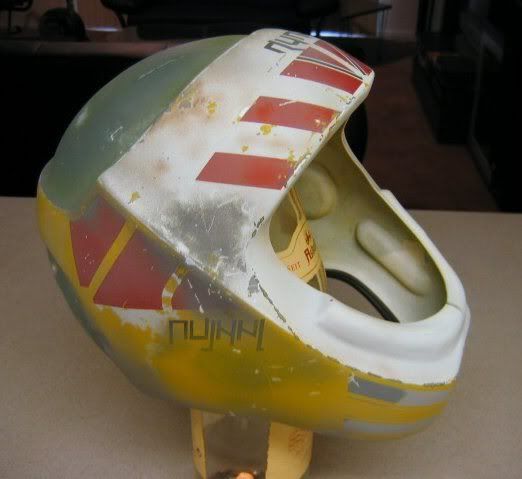
The real helmet is extremely dirty. Once I get all my base colors on, I'll go back and add all the weathering and scorching and chipping. You know, the fun stuff!

UPDATE #3: Feb 13th
OK, I can't stop. . .
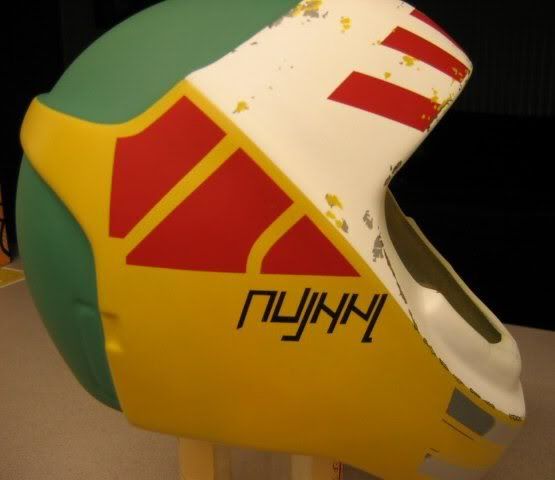
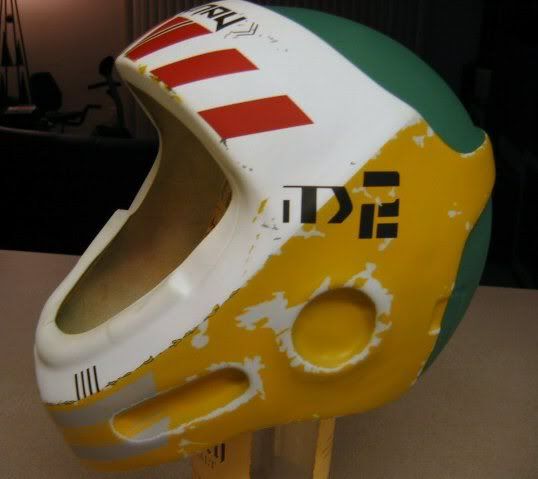
I added the first set of red markings to the right 'temple' area. I'm hitting these areas with primer first so I'll get an even red tone no matter what color is beneath it. I'm using Floquil Caboose Red for my markings.

Please keep in mind that as I'm doing this paint job, it's necessary to slightly alter the shape/positions of some of these markings, as the proportions of the RA kit are slightly different than the screen-used helmet. I'm trying to keep the overall proportions/spacing of the markings as close as I can.
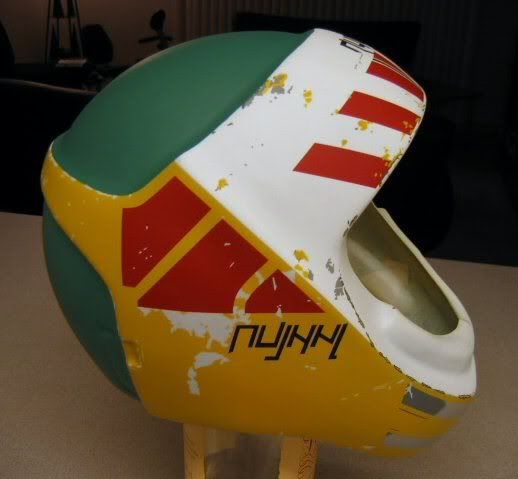
Next will be the red stripes over the forehead area.
UPDATE #4: Feb 13th
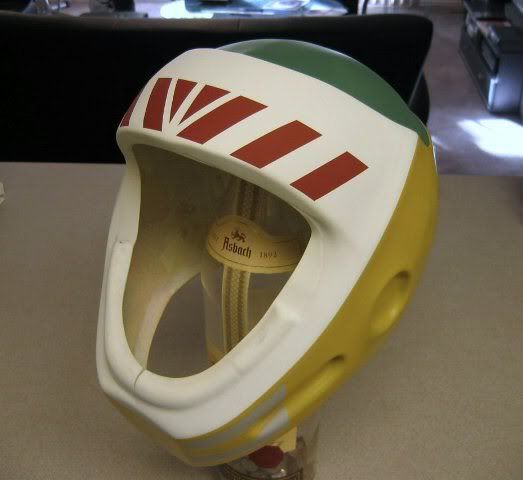
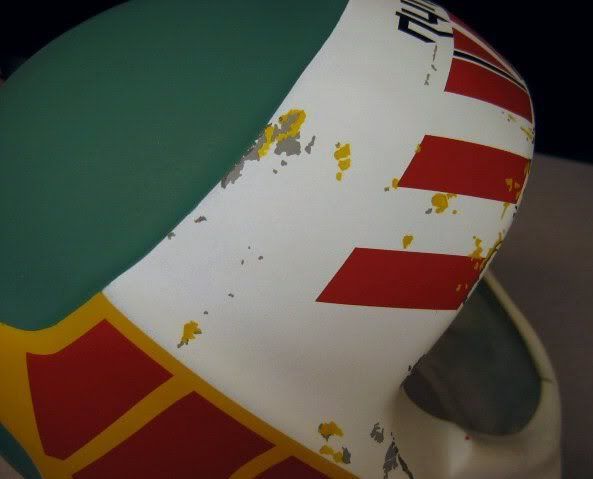
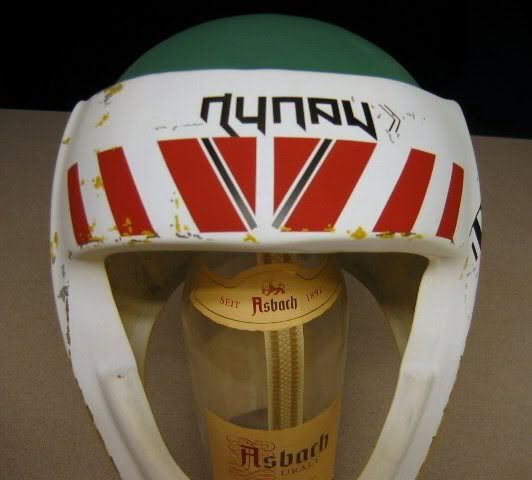
Whew! OK, this will be it for today. I got the forehead stripes on. Again, I masked everything off, then hit it with Tamiya primer, waited a while, then sprayed on the Floquil Caboose Red.
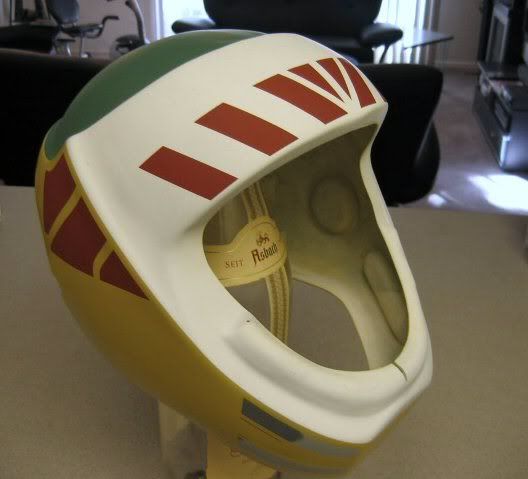
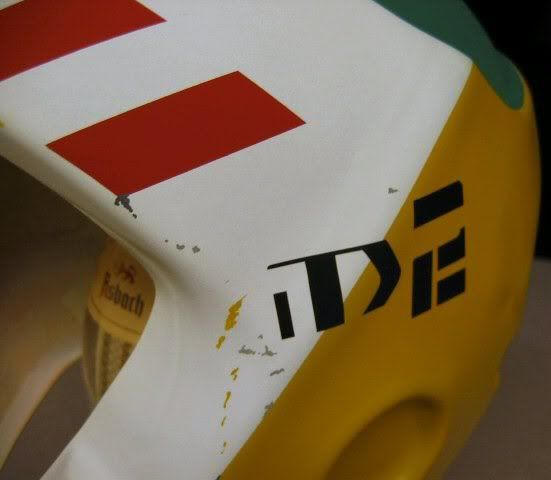
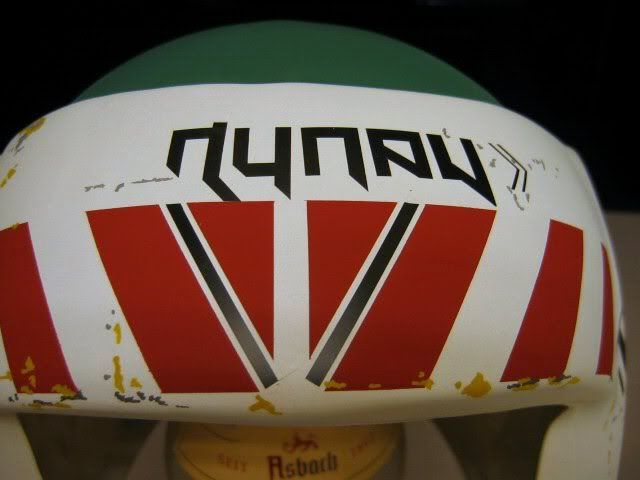
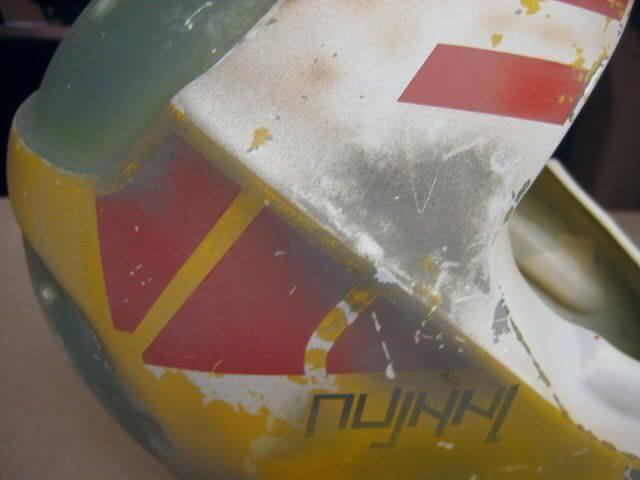
Tomorrow I'll start on the weird script on different parts of the helmet, then the basic painting will be done!
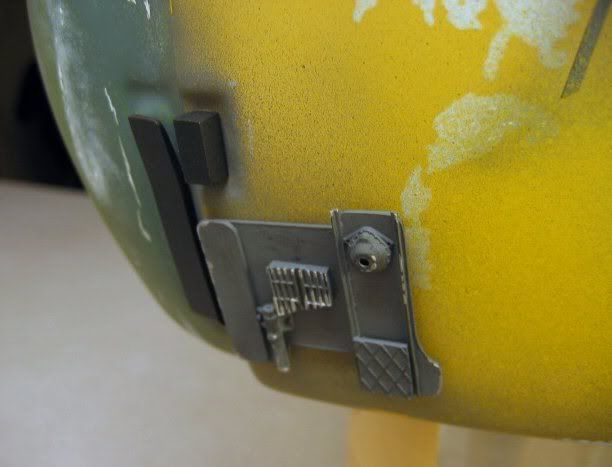
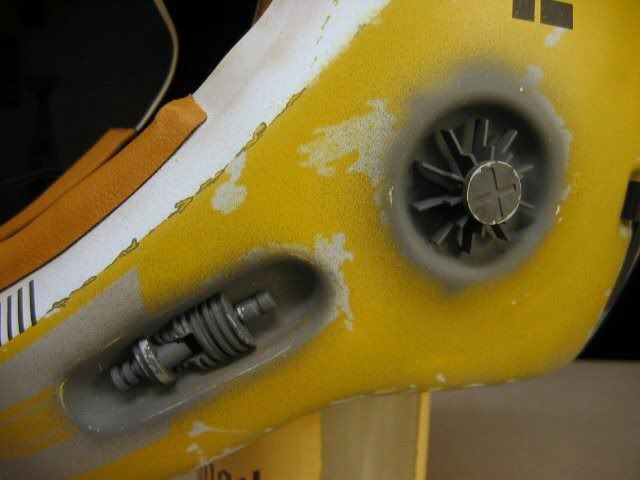
I've already primered the greeblies. They'll receive their basic color coat (very dark gray) then they'll be attached for the weathering phase.
I've been having so much fun working on this helmet that I forgot to post some in-progress pics, so this post is a little long.
FROM FEB 10th
I've always liked the different looking helmets used by the Rebel Alliance, especially the different designs for the pilots. I ordered a Y-Wing helmet kit from Richie's Armor about 3 weeks ago, and it got here yesterday.
Great looking kit, and he got it out to me nice and quick!
The kit consists of 2 vac-formed styrene shells (left and right), a clear tinted visor, 2 strips of black edging, and several small greeblies for detailing. It even includes a length of flexible coated wire to make the microphone boom.
Here's a tighter shot of the resin detail bits. No trimming had been done on these for this shot. These are "as received."
Construction of the main helmet was very straightforward. I cut several small tabs from extra styrene, and after lining up the 2 shells, superglued them in place. I just did that to keep everything aligned while I got my JB Kwik ready. Then I applied that all along the inside of the seam. I worked it in small section cuz that stuff kicks pretty fast!
Once the JB Kwik had dried, I went back along the outside of the seam and puttied it. The stuff I use is similar to 1-part Bondo. I bought it while I was stationed in Germany and I've had this tube for over 4 years. It's still going strong! It dries pretty fast and sands to a really smooth finish.
I applied some extra putty to the chin area, which was kind of "sunk" where the 2 halves came together. I built it up to a flatter surface, taking some extra care to blend it in well. Here it is after sanding.
I'm off to the hobby shop in a little bit to grab some primer, and then I'll see how the putty looks. If it needs touch ups, I'll do that later tonight.
Got some Tamiya primer on the helmet, and after it dried I found that I did have to go back and re-putty the seams. Oh well. So now it's gray with puttied seams! Oh the progress is just staggering!
I'll resand and reprime tomorrow. Then I'll have to test some colors as I'm trying to replicate a specific screen-used helmet from ROTJ.
UPDATE: Feb 12th
Got the first color on. It's. . . white!
I masked off the area I wanted to paint and used Floquil Reefer White. I just misted it on with 2 or 3 light coats to get a "dirty white" appearance. The entire helmet is going to be pretty heavily weathered, so I don't want my base colors to be really pure.
The little split in the top of the chin area doesn't matter as that rounded detail will be covered by some brown vinyl when the painting is all done. It's supposed to look like padding.
UPDATE #2: Feb 12th
Had some more time and the white was dry, so I sprayed the second major color.
Tomorrow the last major color will go on the 2 slightly inset panels on the top/back, and then I'll start on the markings.
UPDATE: Feb 13th
OK, got the last major color on the back panels. I used Floquil Dark Green for these areas.
Next will be some more complex masking for some red and gray markings.
UPDATE #2: Feb 13th
Started some of the markings. First ones are the gray stripes along the jaw line. If you look at pics of the real helmet, you can see on the right side there's a section that's darker gray. I added some darker gray while everything was still masked off.
The real helmet is extremely dirty. Once I get all my base colors on, I'll go back and add all the weathering and scorching and chipping. You know, the fun stuff!
UPDATE #3: Feb 13th
OK, I can't stop. . .
I added the first set of red markings to the right 'temple' area. I'm hitting these areas with primer first so I'll get an even red tone no matter what color is beneath it. I'm using Floquil Caboose Red for my markings.
Please keep in mind that as I'm doing this paint job, it's necessary to slightly alter the shape/positions of some of these markings, as the proportions of the RA kit are slightly different than the screen-used helmet. I'm trying to keep the overall proportions/spacing of the markings as close as I can.
Next will be the red stripes over the forehead area.
UPDATE #4: Feb 13th
Whew! OK, this will be it for today. I got the forehead stripes on. Again, I masked everything off, then hit it with Tamiya primer, waited a while, then sprayed on the Floquil Caboose Red.
Tomorrow I'll start on the weird script on different parts of the helmet, then the basic painting will be done!

")