Official Star Trek Phaser Thread

Hey all! Question for this thread, and if this question was answered in the thread already, I'm sorry, I must have missed it when I read through.

I am doing a boomerang phaser build, and I'm just curious about the black paint on the nozzle and around the buttons. What is the consensus on the finish? I've see it with gloss black, satin black, and matte black. And looking back at First Contact, I can't really tell myself.

Based on what I've seen in Voyager, DS9 and First Contact, the emitter is satin-gloss. The area around the buttons is matt.

boomerang.png


You can see the reflection of the light on the emitter here.
 
Question for all: I notice on my Wand Phaser that the numbers are rubbing off the "ten-turn" dial. How would I go about replacing the dial with an after-party without screwing up the electronics, and does anyone have a recommendation for a vendor? Thanks.
 
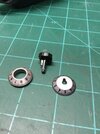
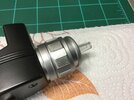
I was able to "gently" pull up on the black cap and replace with a more accurate dial. One that has that step below the switch that Wand left out.
 

Attachments

  • image.jpeg
    image.jpeg
    1.2 MB · Views: 130
I was able to "gently" pull up on the black cap and replace with a more accurate dial. One that has that step below the switch that Wand left out.
So, it's doable? Can you tell me (maybe by PM!) who you got the dial through?

Was the original just friction-installed? Did it come out easy? Did you have to glue your replacement?
 
It's definitely doable. I upgraded a couple of phasers. There's actually quite a number of changes you can do to increase the accuracy of the Wand phaser. Don't get me wrong, it's great out of the box. But there are things that, when upgraded/changed kick it up a notch.

You will notice that key hole in the original part. I used that original piece, trimmed down and glued to the interior of the new piece. Then it was pretty straightforward to reattach.

I picked up a few of the 10 turns many years ago from different resources. Not sure who is selling today.
I wondered how you did that! Thanks for the info! Did you simply slot the knurl back in through the "key", and does the shaft lock back into place in the phaser without glue to hold it? (All the electronics still working fine, I assume?)

I've seen some of the disassembly pictures. I'm no prude when it comes to taking things apart, but it looks a little daunting. Is getting the P2 hull back together easy? I have decent modelling skills but zero soldering skills (you'll probably laugh, but if I try to solder anything I usually ruin it.)

Do you know is there anyone who does an "upgrade package" if you mail them the phaser, and how much would it cost? I worry I'd ruin it.
 
I'm pretty sure I used a little glue to reattach the knob.

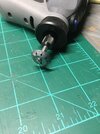
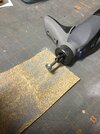
To cut down the original piece I attached to my dremmel and the sanded at medium speed, being careful not to over sand. Then I had a round part I could glue into the new ten turn.

I also don't solder.. And while I did take apart the P1 I did not need to open up the P2.

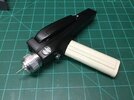
I upgraded the P1 with aluminum side rails, brass emitter, replaced the meter decal, added the crispy to the site and repainted. Also added the red Swarovski Crystal. I also dry brushed a little brass to the setting wheel. The originals were brass, painted silver. Over time the silver would rub off exposing the brass below. I wanted to replicate that look.
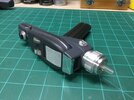
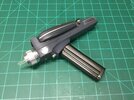
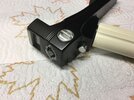
For the P2 I replaced the emitter, top metal cap, reduced the size of the side knob and replaced that knob, replaced the ten turn and repainted.

Replaced the handle.

Lastly I added a spacer between the handle and the P2 body to replicate the twist turn connection.

Everything still works... Go figure.

I'm not aware of anyone currently offering complete upgrade packages or offering an upgrade service. You may want to post in the want to buy section.

Here's a few pics...
 

Attachments

  • image.jpeg
    image.jpeg
    2.4 MB · Views: 223
  • image.jpeg
    image.jpeg
    2.5 MB · Views: 222
  • image.jpeg
    image.jpeg
    1.2 MB · Views: 239
  • image.jpeg
    image.jpeg
    1.6 MB · Views: 187
  • image.jpeg
    image.jpeg
    1.5 MB · Views: 201
  • image.jpeg
    image.jpeg
    1.4 MB · Views: 188
  • image.jpeg
    image.jpeg
    1.7 MB · Views: 185
  • image.jpeg
    image.jpeg
    2.2 MB · Views: 207
Last edited:
FWIW, I inquired with the people who sell the crispy, emitter, crystal, knob, etc and they told me the parts don't fit a Wand phaser, that they're designed/sized for the Art Asylum etc replicas. Now, I don't know how accurate that really is (you'd think all "accurate" phasers would be about the same size) but it did discourage me from buying any upgrade parts for my Wand phaser......
 
FWIW, I inquired with the people who sell the crispy, emitter, crystal, knob, etc and they told me the parts don't fit a Wand phaser, that they're designed/sized for the Art Asylum etc replicas. Now, I don't know how accurate that really is (you'd think all "accurate" phasers would be about the same size) but it did discourage me from buying any upgrade parts for my Wand phaser......
Yes, I did my diligence on that. You can see that the parts are AA/DD specific. Although as our chap above says, it looks like he did get his Ten Turn dial to fit with a little ingenuity.

You'd think ONE "Enterprising" person out there would offer this service for the Wand phasers. If there was a 3-D printed central "key" for the Ten-Turn dial that would fit/glue inside the existing AA/DD dial replacement, even that would be a huge help.
 
Wouldn't it be great if Wand offered upgrade kits. A basic replica for "good enough" consumers, and then an "ultimate" edition (naturally priced higher) for the nerdy rivet-counters wanting a more-exacting replica. Since Wand has all the communicator and phaser (and tricorder) plans, they're in a unique position of being able to provide accurate upgrade parts 100% designed for compatibility. In absence of that, I'm not comfortable disassembling my Wand products for part replacements which aren't necessarily sized correctly for the Wand replicas. If I'm replacing one inaccurate part with a different inaccurate part then I might as well keep the OEM part. That's just my thought about it. If suitable parts exist for (accurately) upgrading the Wand replicas, it would be helpful having a "sources" list, say stuck in the first post of a Wand communicator/phaser accurizing thread.
 
I'm pretty sure I used a little glue to reattach the knob.

To cut down the original piece I attached to my dremmel and the sanded at medium speed, being careful not to over sand. Then I had a round part I could glue into the new ten turn.

I also don't solder.. And while I did take apart the P1 I did not need to open up the P2.

I upgraded the P1 with aluminum side rails, brass emitter, replaced the meter decal, added the crispy to the site and repainted. Also added the red Swarovski Crystal. I also dry brushed a little brass to the setting wheel. The originals were brass, painted silver. Over time the silver would rub off exposing the brass below. I wanted to replicate that look.
For the P2 I replaced the emitter, top metal cap, reduced the size of the side knob and replaced that knob, replaced the ten turn and repainted.

Replaced the handle.

Lastly I added a spacer between the handle and the P2 body to replicate the twist turn connection.

Everything still works... Go figure.

I'm not aware of anyone currently offering complete upgrade packages or offering an upgrade service. You may want to post in the want to buy section.

Here's a few pics...
Yes, I did my diligence on that. You can see that the parts are AA/DD specific. Although as our chap above says, it looks like he did get his Ten Turn dial to fit with a little ingenuity.

You'd think ONE "Enterprising" person out there would offer this service for the Wand phasers. If there was a 3-D printed central "key" for the Ten-Turn dial that would fit/glue inside the existing AA/DD dial replacement, even that would be a huge help.
Where did the
I'm pretty sure I used a little glue to reattach the knob.

To cut down the original piece I attached to my dremmel and the sanded at medium speed, being careful not to over sand. Then I had a round part I could glue into the new ten turn.

I also don't solder.. And while I did take apart the P1 I did not need to open up the P2.

I upgraded the P1 with aluminum side rails, brass emitter, replaced the meter decal, added the crispy to the site and repainted. Also added the red Swarovski Crystal. I also dry brushed a little brass to the setting wheel. The originals were brass, painted silver. Over time the silver would rub off exposing the brass below. I wanted to replicate that look.
For the P2 I replaced the emitter, top metal cap, reduced the size of the side knob and replaced that knob, replaced the ten turn and repainted.

Replaced the handle.

Lastly I added a spacer between the handle and the P2 body to replicate the twist turn connection.

Everything still works... Go figure.

I'm not aware of anyone currently offering complete upgrade packages or offering an upgrade service. You may want to post in the want to buy section.

Here's a few pics...
Isn't there an issue with the white plastic washer on the Wand? I can see that it's a "lubricant" disc. And the metal lip that sticks out of the bottom of the Ten-Turn I guess is riding up above the washer instead of being flush with the body. (I guess the washer would have to be removed, and maybe a bit of the "strip" holding on either side. Is that not doable?)

*Edit: having looked at pictures of the actual prop, while I guess that was probably Wah's original intent, I was surprised to see that the Ten Turn DOES actually "float" above the "strip spine" as you did it on your phaser. Well!!!
 
Last edited:
I'm pretty sure I used a little glue to reattach the knob.

To cut down the original piece I attached to my dremmel and the sanded at medium speed, being careful not to over sand. Then I had a round part I could glue into the new ten turn.

I also don't solder.. And while I did take apart the P1 I did not need to open up the P2.

I upgraded the P1 with aluminum side rails, brass emitter, replaced the meter decal, added the crispy to the site and repainted. Also added the red Swarovski Crystal. I also dry brushed a little brass to the setting wheel. The originals were brass, painted silver. Over time the silver would rub off exposing the brass below. I wanted to replicate that look.
For the P2 I replaced the emitter, top metal cap, reduced the size of the side knob and replaced that knob, replaced the ten turn and repainted.

Replaced the handle.

Lastly I added a spacer between the handle and the P2 body to replicate the twist turn connection.

Everything still works... Go figure.

I'm not aware of anyone currently offering complete upgrade packages or offering an upgrade service. You may want to post in the want to buy section.

Here's a few pics...
That's all pretty amazing. How did you replace the emitter without opening it up? Is the P1 difficult to get into?
Washer is loose. I kept but painted.
Silvered, on the edges?
 
I painted the white washer under the ten turn grey... Same as the P2 body color
 

Attachments

  • image.jpeg
    image.jpeg
    1.5 MB · Views: 85
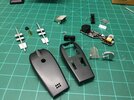
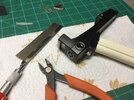
The P1 can be taken apart if you are very careful. I used a dulled x-acto to pry apart the shells. I started at the back and worked my way around.
Now I will tell you a friend attempted and broke the shells. The factory glued some shells very well and others not so much so be warned. You can absolutely break the shells. Even if you are careful.

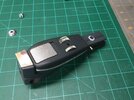
Here's a pic of the P1 I took apart.
 

Attachments

  • image.jpeg
    image.jpeg
    2.5 MB · Views: 120
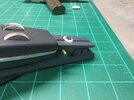
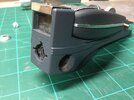
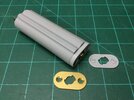
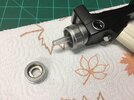
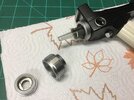
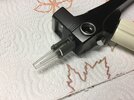
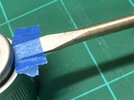
The emitter on the P2 can be removed. It is actually pretty easy. You just have to be careful not to scratch up the metal. I wrapped some tape around a screwdriver tip then you gently pry up the outer ring. After that the other pieces come right off.

Now I lost the emitter function, it's a new emitter and will not extend but the trade off with the aluminum part was well worth it.
 

Attachments

  • image.jpeg
    image.jpeg
    2 MB · Views: 156
  • image.jpeg
    image.jpeg
    1.9 MB · Views: 133
  • image.jpeg
    image.jpeg
    1.9 MB · Views: 132
  • image.jpeg
    image.jpeg
    1.7 MB · Views: 121
  • image.jpeg
    image.jpeg
    2.2 MB · Views: 115
  • image.jpeg
    image.jpeg
    1.2 MB · Views: 112
  • image.jpeg
    image.jpeg
    1.9 MB · Views: 125
  • image.jpeg
    image.jpeg
    2.2 MB · Views: 147
The P1 can be taken apart if you are very careful. I used a dulled x-acto to pry apart the shells. I started at the back and worked my way around.
Now I will tell you a friend attempted and broke the shells. The factory glued some shells very well and others not so much so be warned. You can absolutely break the shells. Even if you are careful.

Here's a pic of the P1 I took apart.
Interesting. Thanks for that. It looks a bit nerve-racking, even though I'd love to replace the display.

If I drilled a hole in the P1 to accommodate a blue crown crystal between the dial and display, without taking the P1 apart, how much play is there beneath the upper case and whatever's beneath? I could just see myself drilling into a circuit board and destroying the thing.
 
I actually made several mods to a Wand p1 without taking it apart, including adding the blue watch crown. I carefully and slowly drilled the hole and as soon as I made it through the shell stopped.
 
Interesting. Thanks for that. It looks a bit nerve-racking, even though I'd love to replace the display.

If I drilled a hole in the P1 to accommodate a blue crown crystal between the dial and display, without taking the P1 apart, how much play is there beneath the upper case and whatever's beneath? I could just see myself drilling into a circuit board and destroying the thing.
What I did was remove as much of the peg on the bottom of the watch crown and then only had to make a very small depression on the P1 to fit what was left with a small knife. By doing it this way you don't have to drill all the way through the P1 and risk messing anything up.
 
Back
Top