Thor's Hammer - The Mini-Mjolnir Project

Sinned

Well-Known Member
RPF PREMIUM MEMBER
I know, this has been done, and done, and done again. But, nothing like doing something yourself, and I wanted something with a personal touch... so here we go with another!

This started as a project I wanted to do for my daughter, for Christmas, but with this year's Secret Santa, it was going to work great for my recipient as well. Why make one, when you can make two?!

There are a lot of 3D-printable models out there, so wasn't worth starting from scratch there. I found one I liked on Thingiverse, which would serve as a suitable base. The model had a design on one face, and wording already there on the other, as well as some other glyphs. I didn't want any of that, especially the wording, since "he" would be replaced with "she" in this instance. But, it was the only one I found which had a shaft for the handle, which went all the way through the head. This is important, because the final hammer would have some heft to it. It also had some handle pieces, but I didn't care to use those.

Mjolnir-01_zpsj1bvr0ov.png

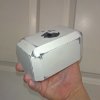
The hammer head was actually 4 separate pieces: main body, 2 end caps, and a round cap for the top.

Next decision was scale. I started out printing it at full scale, and ran into... issues. Stupid me, didn't ensure things were adhering properly, and I ran off for the weekend, while my printer did its thing. In this instance, however, its thing was an epic print fail.

Mjolnir-00_zpsigwz2vfp.jpg

Following this disaster, I decided to scale things down to 50%. I started to worry about final weight, plus smaller was just going to be easier, given my time-frame.

I tried several prints with the main body laying on its side, but was never happy with the results; the angled sides were just too inconsistent, even with support. So, I tried flipping it on end, and that worked beautifully. After the final prints were ready for the body, and end caps, they were epoxied together with 1-minute epoxy.
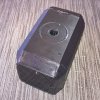
Mjolnir-02_zpsqpcywai2.jpg

From here, the real work started.
 
The printed shape was great as a base, but the gaps weren't perfect, the sides weren't perfect, and of course, there were all the designs to fill in. I tried some new bondo with this project, as I found some Evercoat to try.

supplies-evercoat-formula27_zpsfdd3cvlh.jpg

This stuff laid down really well, and sanded nicely. The only problem with it is that both the filler, and hardener are white (or white-ish). This made it extremely hard to tell when you had the two parts mixed well enough. Other than that though, I really liked it.

I think I went through 4 iterations of filling, and sanding, on each hammer, until I had it looking good.

Mjolnir-03_zpswcengzhl.jpg Mjolnir-04_zpszl4z1oag.jpg

Once satisfied with the surface, a couple of holes were drilled in the top, which accommodate some pegs on the top cap, as well as providing a way to fill the hammer with sand, when everything was done.

Mjolnir-05_zpsi7rs3dg2.jpg Mjolnir-06_zpsa0egps4f.jpg

Once that was all set, it was time for a few coats of primer. I've really been liking 3M/Bondo Hot Rod Black lately.

supplies-bondo-black-filler-primer_zpst6vfbh5e.jpg Mjolnir-07_zpsenvuugpp.jpg

Brief interlude, to work on the handle.
 
For the handle, I knew I wasn't going to be able to replicate the angular/segmented look, so had a reasonable plan in mind.

My dad is much more skilled on the lathe, than I, so I discussed a simple design for the handle with him. I approximated the length, and diameter of the main shaft, and only had a specific dimension for the section which would insert into the hammer itself. The only other stipulation was that the hand grip would be covered with leather. Other than that, I sent him a few example pictures, and he set to work designing, and making the handle. Awesome results.

The handle was coated with XTC-3D, to erase the wood grain, prior to molding. Also the top section was fine-tuned, for a good fit in the printed part.

supplies-xtc-3d_zpsvtefpzt9.jpg Mjolnir-08_zpsabusd5jx.jpg

After a good bit of sanding, the handle was primed with the same primer, and then molded with Rebound 25. Bit of a waste, using it for a block mold, but time constraints, and I didn't have enough of a more appropriate type. The handles were cast with Smooth-Cast 65D. Probably not the best choice either, but it's what I have on hand.

Mjolnir-11_zps6xafg5nb.jpg Mjolnir-13_zpsnxpppymw.jpg Mjolnir-15_zpsz7g359kc.jpg

These were cleaned up, and holes filled with Apoxie Sculpt. Following that, a few coats of black primer again. This time though, the black is really important. The hammer head will be getting a metal coating, but the metal pieces on the handle are going to be painted. For the proper end look I wanted, the the sequence went:

black primer
gloss clear coat (rattle can)
Alclad II - Chrome (airbrushed)

supplies-krylon-crystal-clear-gloss_zps4zofnbbu.jpg supplies-alclad.ii.chrome_zpstb31kykg.jpg

You don't always want to spray Lacquer over Acrylic, but this worked okay. The finished look is a bit more of a black chrome, but it all ties together well, in the end. I didn't take a picture of the finished handle alone, so here's one, which skips ahead a bit:

Mjolnir-20_zpsthijcza3.jpg

To cover the handle, I wanted to use real, braided leather. I'd never tried this before, so picked up the best book I could find, and did some learning. At first, I thought I wanted to use the Spanish Hitch, but that took a while to get right, and was really time-consuming. I also didn't quite like the look of it. Looking a bit more, I decide the Corn Cob pattern would be closer to the segmented handle look. As it turned out, that was just as hard to learn, and took just as long. Haha!

When doing the handles for real, I found that it really helped to have a pair of little jewelers pliers for doing the braiding. It kept things nice and tight, while making it much easier to lace the ends through.

tools-encyclopedia-of-rawhide-and-leather-braiding_zpsltcz4ege.jpg tools-jewlers-pliers_zpsnajplsf1.jpg
Mjolnir-16_zpshw3rhcww.jpg Mjolnir-17_zpswce1dilz.jpg
 
Last edited:
Back to the head of the hammer. I wanted these to have a real metal surface, which could be polished. I've had a metal coating I wanted to use for another project, and this was a good chance to try it out. It's a 3-part metallic coating. Somewhat like an epoxy, I think.

supplies-sulpt-nouveau-silver-C_zpscvk6jkhj.jpg

This stuff works really well, but is a bit of a pain to work with. It's best done sprayed on, but that requires a special sprayer, so I stuck with brushes. When mixing small amounts, you really have to do it by weight, so that was some interesting fractional gram measurement.

I'd use this stuff again for sure, but only on surfaces like these. Anything intricate would be pretty tough to work with. Although, it might be fine, if only doing a few coats, and not worried about sharp corners/edges.

With all the sharp corners, I knew it needed several coats. The recommendation is 2 - 4, and I went with 8. This still ended up not being enough, but was pretty good. Doing it again, I would have gone with at least another 4. I was able to get 4 coats on each, with a single mixed batch. By the time a coat was brushed on one, it would be dry enough for the next coat, once the other hammer was coated. However, towards the end, I found that some thicker streaks began to build up. This was a combination of the mixed material thickening, and just the fact that I was using a brush.

Mjolnir-09_zpsxvymjvyi.jpg Mjolnir-10_zpsftztzohm.jpg

Once that cured for a day, and was assisted some with a heat gun, it was ready for sanding, and polishing. Turns out, this stuff is really hard, once it's fully cured (and squishy/sticky when not fully). That made the ridges all the more problematic. It took a lot of sanding, to get things evened back out. Wish I'd done another 4 coats, brushing the material in the other direction. But anyway, sanding/polishing went like this:

240 - on random orbit sander
240 / 800 - final touch-up, by hand
000 steel wool
0000 steel wool
Mothers aluminum polish

supplies-mothers-polish_zpsrhiqrlv4.jpg

It's hard to see in most of the pictures, but it really shined up well. But had to be careful not to work through the corners. (again, wish I'd done more coats!) The end result is pretty awesome though. Looks like solid metal, and is even cool to the touch.

Once they were all shined up, it was time for final assembly, and sand. I learned a couple of things in this process:

lace the handle, PRIOR to attaching it to the hammer head
attach the handle to the head, PRIOR to filling with sand

The handle was secured in the head with 5-minute epoxy. A little extra was added at the top, and bottom, to ensure a good seal between the hammer, and the handle. This helps prevent any sand leaking out.

To fill the heads, I picked up some generic "play sand". I thought about using steel, or lead shot, but decided that would be too heavy for both the 3D printed head, and the plastic handle. I also couldn't find a funnel with a small enough neck, so improvised one out of a plastic, disposable eyedropper, which I usually use for paint. The sand was poured in, to completely fill the void. In the end, it weighs a little over 2 pounds.

Mjolnir-18_zpsssivku40.jpg Mjolnir-19_zpsmn567kue.jpg

Once that was complete, the round top cap (which also got the metal coating treatment), was epoxied on, to fill the holes, and finish off the look of the top.

Finally, an acrylic plaque was made, to attach to the hammer. This was cut and etched by laser. Leaving the protective coating on the acrylic provided a perfect paint mask, for painting the etched surface. Just to make sure no paint got on the edges, the front was framed with tape, and then silver paint was airbrushed over the letters. Once dry, the protective paper is removed, and the lettering is perfect. One was done in blue acrylic, and another in black. I ended up liking the black better, I think.

Mjolnir-21_zpsfg2ojee9.jpg

And that was it! All in all, a basic shape, but I like the classic look. Hopefully some useful information here for process, and materials.

Candy cane, for scale.

mjolnir-side_zpsdsnoph88.jpg mjolnir_01_zpsnqly1ehu.jpg
mjolnir_02_zpsvmxcboaf.jpg mjolnir-handle_zpsv8hv0ayk.jpg
 
Last edited:
Beautiful work, and excellent write up along with it, as per usual!

I love the metallic finish you got here. Definitely going to have to try that product in the future!
 
Back
Top