Zvezda SD: Devastator, need photo tips

Toadmeister

Sr Member
Calling my Zvezda SD build complete. I substituted several aftermarket parts to make it look (morso) like Darth Vader's Devastator from ANH. I decided on a few key items to achieve this look such:
-The very distinct battleship-like turrets
- Sensor array standing upright on bridge
- A couple quad-laser cannons on the port and starboard recesses
- axial defense turrets on top
- main Engine bell flaps
- toed--out sheild domes on the bridge
- Distinctivebridge face
- tractor beam projectors

Getting every detail accurate by re-modeling and scratchbuilding every facet just wasn't in the cards for me and I decided this was enough to make it distinct :)

Also included the Tantive IV in the main hanger bay. I did NOT fiber-optic the daylights out of this kit as I knew I'd never finish it if I did! I added flickering 9V LEDs for the main engines and some subtle lighting for the hanger bay. This is roughly also how ILM did the original Devastator model for ANH! I hadn't realized this until I did some research. Yes, the original SD we see in the opening of ANH did NOT have lighted windows or the 4 smaller sub-engines lighted!

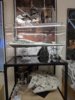
Some early test shots with my phone camera
IMG_20190705_133543.jpg
MVIMG_20190705_133538.jpg
IMG_20190707_184331.jpg
IMG_20190707_184335.jpg
IMG_20190707_184551.jpg
IMG_20190707_184604.jpg
IMG_20190707_184538.jpg
IMG_20190707_184620.jpg
IMG_20190707_184714.jpg
 
Last edited:
So question here for the RPF hive:. Suggestions on display and photography.

I'm thinking this needs a dark starfield background. Other than poking holes and in black construction paper, what else would you recommend?

Also lighting. I'm expecting I'll need multiple light sources from 3 different angles. Roughly above, below and a front light. The triangle-shape of the SD is somewhat unique.

Protective case, certainly I could get a custom one made for more $ than I spent on the kit! In one photo you can see my Bandaid PG acrylic case, it is literally mm to small for the SD! Always looking for suggestions here to protect my work.

Anyone make nameplates for a display?
 
Painting notes:

Although I'm pleased with the overall color, a mix of Archive X Antique White and 1975 SP lettering grey, I never have screwed up a paint job on a model so bad!

I put on a dark grey primer, which was too dark and had to use too much paint (thickness obscuring detail) to get it back to the shade I wanted. Was fustrated at one point and did a second light grey primer, just more paint thickness....

I started painting in the Sub-Zero of winter in my garage. Too cold and paint doesn't behave well. Took the spring off and resumed this summer while I had a week off recovering from surgery. Guess what? Too HOT and HUMID! HAD Airbrush problems up the wazoo, moisture in the compressor air, dirt, dust problems of every kind. Everything I could do wrong I did. Not complaining about the Archive X paint itself, it is a fine quality product.

The end result was a rough and thick painted model. Not apparent in pictures from 1 foot or more away but upon closer inspection it is obvious....

One little win IMHO was using Payne's grey oil washes in the detail. Just subtly enough to help detail pop out without getting to dark. I did some lighter dry-brushing too. These added a nice texture and variation to an otherwise monochromatic surface.
 
Some quick background and lighting experiments. A slight improvement, although both these models represent ships seen in ANH not ESB!
IMG_20190707_193820.jpg
IMG_20190707_193749.jpg
 
From a model build and paint standpoint I’d do a few things different:
- No exterior primer. I used the dark grey sorta to help make the hull opaque from any interior lighting. The same effect can be achieved easily painting dark the inside of the large hull. I don’t think the Zvezda plastic needs a primer if washed in simple dish soap and water.
- Use a light grey spray can for the overall hull color! Finding the right shade can be tricky but it’s too large a surface for a small hobby airbrush. I used a Badger 360 with a bottle jar and siphon, up to an ounce at a time! I’d runout of paint fast and be scrambling to mix more...lots of fumbling and mistakes resulted. Mucho Inconsistency. I had weather issues in the garage; cold, humidity, dirt, dust.... spray bomb just keeps it quick and simple. Smaller parts and sub assemblies could be best airbrushed.
- Main landing gear bay, I’d use the kit supplied version and drill out some holes for lighting and scratch build the interior bulkheads bays in the front. The resin part I used was a good product, however just a bit of risky work to cut the hull and get it in.
- I used a LED light strip to light the main hanger and it did a weak job. Also soldering wires to it was a PITA. Fiber optics work better and I’d do that next time.
- 3mm main Engine LEDs look nice and were easy to install, but I’d use bigger and brighter LED bulbs here if I did it again.
 
Things I’m happy with:
- Overall color and shading mentioned earlier. It’s a very light grey/off white with character.
- That I did Vader’s Devestator! It’s unique and a lot of research was put into getting those little special details. This depicts a moment on-screen capturing the Tantive IV. This finished product would be fun side-by-side compared to a ESB Avenger with the Flacon on its back and garbage chute. I will probably do that version some day.
- Those aftermarket gun turrets are wicked cool and so very distinctive.
- simple and effective clear plastic tripod stand
- Sensor array standing upright on bridge. Used small wires pins to hold it sturdy in place rather than gluing it. Holds much better and securely this way, otherwise a stiff breeze could knock it off. I did the same with the larger gun turrets.
 
Another build note. I spent some coin purchasing a resin control tower that is more accurate to the ANH Devastator. Was really a marvelous peice! Problem, the oily residue on the resin could NOT be removed after several applications, drove me nuts. I tried a black primer as a last resort but that won't cure on the oily surface :(

Interesting note, this ANH Devastator tower is about 20% smaller in size then the Avengers tower.
 
Last edited:
That looks fantastic. Love the other display as well with the Falcon and X-wing

A starry backdrop would be very cool.

The main technique I have seen for that is black backing with holes that is back lit and set on an angle where the top is further forward than the bottom. The reason being is that the backdrop will reflect less light out and tend to stay darker looking when lit from mostly overhead sources than it would if set at a 90°.

As far as the black backing, construction paper might be ok, but may fade over time? Black Velvet is often used since it tends to reflect less, but than again, it collects dust. Maybe something more stiff that could be painted, but not too thick that it is difficult drilling holes?
 
or do something like this to your walls and ceiling

 
or do something like this to your walls and ceiling


That looks almost as painful as doing the entire SD with fiber optics ;)
 
That looks fantastic. Love the other display as well with the Falcon and X-wing

A starry backdrop would be very cool.

The main technique I have seen for that is black backing with holes that is back lit and set on an angle where the top is further forward than the bottom. The reason being is that the backdrop will reflect less light out and tend to stay darker looking when lit from mostly overhead sources than it would if set at a 90°.

As far as the black backing, construction paper might be ok, but may fade over time? Black Velvet is often used since it tends to reflect less, but than again, it collects dust. Maybe something more stiff that could be painted, but not too thick that it is difficult drilling holes?

Black velvet if you please
 
Well I’m certainly happy to see someone else doing a Devastator conversion as well.
Nice work sir!
I have to ask where did you find that beautiful clear tripod base? It’s the nicest one I’ve seen yet?
 
I love the reconfigured display! (I guess I missed it when you first posted)

Also, where did you get the case?
Got case off eBay, see pic.

Note it barely doesn't fit! I am just pushing into the sides of the case. If it were ,1cm bigger diagonally it would be perfect, but for the price this case is a bargain.

I use the identical case for my Bandai PG Falcon and that has plenty of room.
Screenshot_20191205-133841.jpg
 
This thread is more than 4 years old.

Your message may be considered spam for the following reasons:

  1. This thread hasn't been active in some time. A new post in this thread might not contribute constructively to this discussion after so long.
If you wish to reply despite these issues, check the box below before replying.
Be aware that malicious compliance may result in more severe penalties.
Back
Top