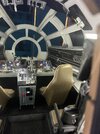
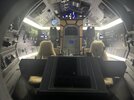
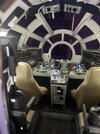
Hey everyone, So I've been in the shadows for a while since I've returned to the project. I just wanted to give a major update to what's happening with the electronics. With the cockpit getting it's skin finally, the last oppertunity to easily upgrade electronics is here. Since I was last involved with the project my skills with electronics have greatly improved. So I've begun the process of doing a major overhaul with the lighting and interactivity.
LED control:
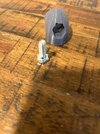
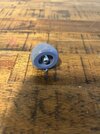
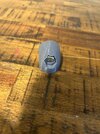
I knew we needed individual LED control, I knew it was going to be a giant pain in the ass. So I embarked on a deep dive of what needed to be created to make sure this was done right. First off, each LED has a pre-installed resistor, this makes it so each LED takes about 18mA of power at 12v a whopping 15+ amps of 12v current. If we ran the cockpit at 12V power it would be blindingly too bright on the inside as well as causing an already bad heat problem to get worse. So I decided long ago that we'd run these LEDs at 5V and for the most part that's been reliable. At 5V each LED takes approx 5mA of current which is safe. So I went about looking for a device that would let us control this many LEDs as individually as possible. putting dozens of arduinos in place wouldn't be logical, thankfully there's already a device for adding extra output pins to a micro-controller and that's a shift register. I chose the TPIC6B595 by Texas Instruments, it was developed originally for controlling large 7 segment numerical displays like in stadiums and airports. Each of the 8 outputs per chip can power 150mA constant or 500mA peak which is *amazing* for a tiny little IC. The TPIC6B595 can also be daisy chained together as many as I want. I found them in bulk too which is nice. But a chip alone isn't the only piece of the puzzle. I needed a board that would allow me to interface the chip with the pre-existing LED wiring throughout the cockpit. This does mean we'll have to cut out our already completed power distribution but this arguably will yield a cleaner result. So I designed a board with a 16 pin socket, every odd pin Is V+ and every even pin is an output from the IC. This makes wiring as easy as lining up 8 LED wires together in a row, I use aluminum foil tape as a sticky holder for this, then slide the connector on and crimp down with a specialty ribbon cable crimp tool. I had the board designed and ordered 200 of them in about a week. Some of the parts for wiring are still on order and coming in this week. I have enough parts for 90 boards and more if needed.
After the board was designed, I began soldering some of them up to create a test board for our programmer.
This board lets us design the code to begin to animate things.
This leads us to the project's first GitHub!
HFuller's Github TPIC6B595 project
The LEDs now will have a "boot up" sequence when the microprocessors are powered on, then, periodically code can be applied to specific LEDs for either blinking, blink speed, random blinking, etc. The code also has an amazing troubleshooting function like incrementing a single LED and making it blink to locate and identify which LED in the string is what ID#
Switch Control and sound:
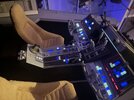
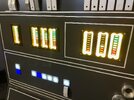
The cockpit has 345 switches, I've always hated that they do nothing, well, not entirely nothing, we've had about 20 or 30 wired to banks of LEDs but that's *boring* lol so I wanted a way for us to not only allow all of the switches to function but make them do something interactable.
But taking that many switches and feeding them into a microcontroller that typically only has 14 pins or so is hard to quantify. That's where I'm looking at another IC board to expand the GPIO of the arduinos. I found a chip and I'll talk more when they come in, but it adds 16 inputs and can be chained 8 deep for a total of 128 pins per bus. I ordered 24 boards for a grand total of 384 GPIO expansion. Each switch gets wired to a ground bus and the outputs of the switches will be soldered to ribbon cables leading to the microprocessors.
What do do with the switches? I've decided to make each switch play a random sound effect from our sound board. (more on that later) thinking of beeps, clicks, hisses and other spaceship sounds sampled from the movies.
Sound Board:
I finally was able to get one of the long backordered Robersonic's Tsunami boards, this board is a polyphonic multi-output soundboard that can be controlled with serial or just dry contact to one of it's 16 input pins. The Tsunami has 6 discrete channels of audio output allowing us to route sounds to different speakers. I'll deep dive on that later.
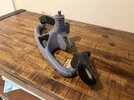
Door Control:
Still in progress, we've upgraded from a small sparkfun stepper motor driver to a more powerful stepper driver more capable of handling the NEMA23 motor that one of our engineers designed into the door opening and closing mechanism. Programming for that later.
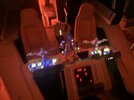
Radar Scope/Nav Computer:
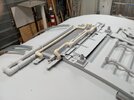
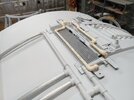
Some of these photos have been shared already, it's a string of dense neopixels I designed into a laser cut light pipe to create the iconic look.
Console:
The console will no longer be the singular source of sound and be as stand-alone as It was before. It will now interact and communicate with the main cockpit with a serial bus.
Power, Automation and Safety:
The power system is getting rebuilt from the ground up, a 8 bank relay system will allow sequential powering up of the cockpit's sub-panels and systems. Fuses on all of the power lines out to the various systems will now be protected. Discussion is in place for overheating protection. But there will be multiple fans that guide the hot air between panels up and out. A small window AC unit is slated for being built into a cargo crate and greeblied up to pipe some cold air into the cockpit because it gets *WARM*
Main control board:
I'm designing one main control board behind one of the hallway panels. The heart of the system Is a Raspberry Pi 3 on a DIN rail mounted breakout board. This will control the various subsystems mentioned above. This is all leading us to ultimately the most interactive and animated prop replicas in a private collection ever made.
- Dianna V.
 372958BD-C9CD-45A8-B212-8C2155F98997.jpeg88.4 KB · Views: 226
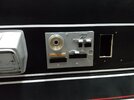 98965258-A6F7-46E0-B3B3-6DAAC2415C1C.jpeg56.8 KB · Views: 219
 B068FBE0-1779-458F-8269-6C39D824B5BA.jpeg103.2 KB · Views: 204
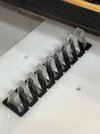 9BFFB3F4-BAAC-44F7-9C29-7BCF37505D50.jpeg51.6 KB · Views: 194
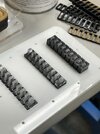 C2B5136E-29A8-4473-AF8A-7057F5A2CE6D.jpeg71.3 KB · Views: 194
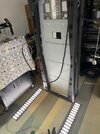 4C91D54A-790D-4036-8C7E-A9A3578D8298.jpeg78.8 KB · Views: 194
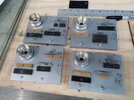 CB196F9C-8BFB-46DE-8AEF-BC23C5C2062C.jpeg86.4 KB · Views: 191
 30E888DC-A236-4461-AB76-81A58C5E402B.jpeg70.5 KB · Views: 214