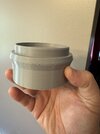
5' Falcon base hull building

My take on the HO Brick 101. I've only seen a couple of photos of this mythical stuff and I'm sure the vacuformed plastic wasn't this perfectly uniform, but like I said, until I find this particular unicorn out in the wild, this will have to make due.

View attachment 1801644

If you are still looking for the brick pattern, here is a link to one of the many pages of brick textured sheet from the Plastruct website:


Their website is awful, but they have page after page of vacuformed textured styrene sheet in many scales. It is most likely where it was originally sourced from by the OG model builders. We had tons of the stuff around the modelshop when I was there in the 90's and 00's.

Below are a few brick styles that seemed close to what you want, but there are many others if these dont work.

91601 (PS-87) maybe 1/87 scale? HO?
91604 (PS-90) smaller
91606 (PS-92) even smaller
91611 (PS-97) also smaller
 
Perfect right off the printer. Thanks!

IMG_5172.jpeg
 
Slow progress on this build over the past couple of weeks. When I started assembling the FDM 3D printed frame, I discovered that some of the parts didn't print symmetrically. I couldn't figure out what had happened until I realized that, at some point over the past couple of months, the Z axis frame (that the print head goes up and down on), became out of square. So as the print got taller, the print head was shifting ever slightly forward. This caused all the prints I'd done over the past month-ish to be slightly lopsided. So I've had to re-square the print frame and reprint several parts. This isn't a thing that can happen with resin printers, so it never occurred to me to check my FDM printer once in a while.

Anyway, beyond that, I've started working on the cockpit cone and this is my take on the forward window panel. It's a bit of a tricky shape.
1715475802015.png
forward_windows_model_trans.png


I based the outer dimension on the Bandai kit, then used aspect ratio corrected photos of the filming model to give me the inner dimensions. I also checked those with the Bandai kit and feel I arrived at a happy medium. I think it looks pretty close but I may still tweak it as I go.

The damage around the lower portion, I'd considered modelling into the part, but I decided to do it with a Dremel once the part is printed.

If someone wants to have a play with it, I've attached the stl.
 

Attachments

  • forward_windows.stl
    196.2 KB · Views: 14

Your message may be considered spam for the following reasons:

If you wish to reply despite these issues, check the box below before replying.
Be aware that malicious compliance may result in more severe penalties.
Back
Top