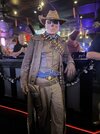
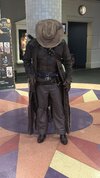
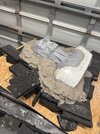
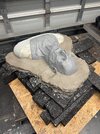
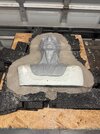
Cooper Howard - AKA The Ghoul full cosplay outfit build

Really well done! Did you get the inhaler on Etsy? I’ve got one in order… along with extra viles… that entire tin is perfect!
Yeah I couldn't find any files for the TV show version and so when I saw that one I decided that would be the quickest way to knock it out ... I'm quite happy with the way the tin turned out, it tends to also make a difference at Con cosplay costume contests when you get a judge who really knows a particular universe ...o
 
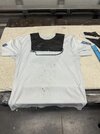
coat is now complete. altered the bottom rips & tears to make it less uniform and added the button hole in the back. the reason for that is I noticed while wearing the bandolier/rifle sling it had a tendency to ride up while moving around. my solution was to add lead weight to the bottom of the bandolier which would continually pull down on it. of course we don't want that to show which means it needs to be on the inside so I needed to pass the string through teh coat so the weight would not be see. I probably could have just cut a slit in teh coat but decided to make it more durable by sewing in a button hole ...
Also managed to finally find the screen accurate version of the stuff in his tin that hold the anti ghoul vials with the help of an Etsy seller who is making the inhaler for me as well as screen accurate vials. The ones I have are not correct ...
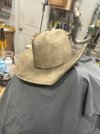
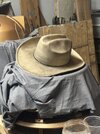
With those out of the way the only things left are to weather the cowboy hat, add the correct band & find someone to sew the pants for me using the material & pattern I have. This will let me focus all my remaining time between now & MegaCon in Feb on creating the mask - which I'm sure I'm need every bit of it ... lol

Ok, so I'm about to start the deconstruction of my coat. I re-read what you posted; but would you mind taking me through some of the details? I've seen the rip don't cut mantra obviously; I've got an exacto, a rough handsaw, sandpaper etc... Did you just start the rip with a cut and then pull? More interested in feedback on technique and not wanting my own trial and error if I can help it! I have some wood blocks I plan to use underneath as I work on the coat...
 
My process was as follows:
I first took a pair of scissors and made a cut at the bottom, then I carefully just torn up the coat until 8 got to the desired length. I varied both the distance between and length of the tears. I then went back with scissors and made some cuts along where I torn the coat so they wouldn't all be to linear.. next I took a wire brush and raked along th3 edges of th3 tears to make look even more torn up. Once I was happy with that I got some beeswax I had for when making wooden bowls and cutting boards, etc and rubbed that in to some of the tears and edges which help give it that weathered stringy look you see in th3 show when he's ou5 walking through the waste land. Lastly I go5 out some reference images and my leather paints and using a sponge created all those tan, yellow patches and streaks since on the prop coat ... that was it
 
My process was as follows:
I first took a pair of scissors and made a cut at the bottom, then I carefully just torn up the coat until 8 got to the desired length. I varied both the distance between and length of the tears. I then went back with scissors and made some cuts along where I torn the coat so they wouldn't all be to linear.. next I took a wire brush and raked along th3 edges of th3 tears to make look even more torn up. Once I was happy with that I got some beeswax I had for when making wooden bowls and cutting boards, etc and rubbed that in to some of the tears and edges which help give it that weathered stringy look you see in th3 show when he's ou5 walking through the waste land. Lastly I go5 out some reference images and my leather paints and using a sponge created all those tan, yellow patches and streaks since on the prop coat ... that was itThanks, that helps… I’ll let you know how it goes!
 
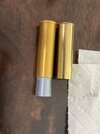
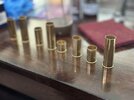
Ok so here’s another tip; while I got the 3D bullets for the bandolier, and was thinking more and more about painting them… the idea came into my head about why not use real brass shells? So a little research and sizing I settled on some 20 guage brass hulls. They are a perfect diameter and all I had to do was use my dremel to cut them to match. Rather than destroy the original glued bullets to get the tops I’m having a new set sent to me. I’ll be able to paint them separately and then attach them to the brass hulls. Brilliant?! You tell me.
 

Attachments

  • IMG_9214.jpeg
    IMG_9214.jpeg
    1.3 MB · Views: 33
  • IMG_9211.jpeg
    IMG_9211.jpeg
    1.4 MB · Views: 29
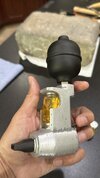
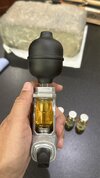
And my ghoul inhaler arrived today, could not be happier!
 

Attachments

  • IMG_9204.jpeg
    IMG_9204.jpeg
    1.7 MB · Views: 30
  • IMG_9203.jpeg
    IMG_9203.jpeg
    1.6 MB · Views: 30
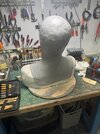
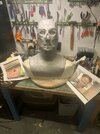
Finally found a hat with the right base color and did the first weathering pass. Also, I've started what is the primary motivator for taking on this outfit - sculpting, molding and pouring my first silicon mask. First day today was just blocking out getting a base layer of clay on my life cast. Not too bad considering I've never done anything like this before. Time to sign up for some Stan Winston online courses before going any further. For $14.99 you get access to 3 videos for 1 month so I'm going to do the sculpting class, fiberglass mother mold class and the pouring a silicon mask class. Depending on how long sculpting takes I may need a 2nd month to complete the molding and silicon pour.
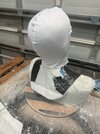
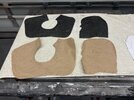
My power mask also came in so I cut out some patterns to make a power mesh hook which will go inside the mold and the silicon mask will be poured over the top of it. I had this leftover ski mask type hood from my Dalek, I wear a black one so you can't see me through the black mesh in the neck, which made a good model. There won't be any eye or mouth holes in the power mesh. Once the mask is poured I'll cut out any mesh around where the mouth and eye holes will be
 

Attachments

  • IMG_0283.jpeg
    IMG_0283.jpeg
    559.7 KB · Views: 32
  • IMG_0282.jpeg
    IMG_0282.jpeg
    574.3 KB · Views: 29
  • IMG_0284.jpeg
    IMG_0284.jpeg
    504.7 KB · Views: 28
  • IMG_0285.jpeg
    IMG_0285.jpeg
    627.9 KB · Views: 35
  • IMG_3628.jpeg
    IMG_3628.jpeg
    3.1 MB · Views: 28
  • IMG_3629.jpeg
    IMG_3629.jpeg
    2.9 MB · Views: 31
  • IMG_3631.jpeg
    IMG_3631.jpeg
    2.6 MB · Views: 27
  • IMG_3632.jpeg
    IMG_3632.jpeg
    4.9 MB · Views: 30
Last edited:
Day 2 of the sculpt ... some of the basic large forms have been added. Still not sure what I'm doing but I'm just trying to follow along with the Stan Winston 'Basic Sculpting with clay' class and trust in the process ...
 

Attachments

  • IMG_0286.jpeg
    IMG_0286.jpeg
    571.2 KB · Views: 27
Well, here's day 3 of my sculpting adventure ... doesn't look like a ton of progress but when it's literally the first tim3 you've ever sculpted anything, progress is measured in days ... also I can only sculpt for about 3 hrs at a time before I can't concentrate anymore but luckily I still have plenty of time.
I'm getting close to the correct eye forms and just blocked out the initial ear shapes. The mouth is a little better but still has a ways to go and I'm leaving the neck until last although I may start blocking out the large forms tomorrow.
I also just realized I'm not looking at the profile enough while sculpting to see how that looks ...I'm just looking face on to ensure symmetry
 

Attachments

  • IMG_3644.jpeg
    IMG_3644.jpeg
    1.9 MB · Views: 25
  • IMG_3643.jpeg
    IMG_3643.jpeg
    2 MB · Views: 22
  • IMG_3642.jpeg
    IMG_3642.jpeg
    2.3 MB · Views: 22
Day 4 of my sculpting adventure .. there's an interesting phenomena going on ... when I quit for the day and look at the sculpt I'm reasonably happy with my progress. But then an hour or so later when I go to post here and I look at photos it's like "hmmm .. that doesn't look very good ...". In either case we'll just keep trudging on.
 

Attachments

  • IMG_3646.jpeg
    IMG_3646.jpeg
    2.5 MB · Views: 25
  • IMG_3648.jpeg
    IMG_3648.jpeg
    2.2 MB · Views: 27
Day 5 ... corrected some symmetry issues and stared to add and refine secondary forms so progress is going to slow down. Also need to go learn how to add wrinkles. Went to the local Smooth-on distributor to discuss materials for making the mother mold. Going the UltraCal 30 and plaster bandages method will certainly be a lot cheaper but I'm not 100% convinced to go that route. I suspect after pricing out how much platinum silicon I'll need that will convince me but we'll see. Still likely a few weeks away before I need to go there but I did pick up a box of Wed clay for making the clay wall since I'll need that no matter which method I use.
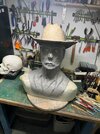
sculpture looks much better when I put a cowboy hat on him ... lol. Also got a technique to try for adding his wrinkled skin look, I'll post how it works if it comes out ok
 

Attachments

  • IMG_3650.jpeg
    IMG_3650.jpeg
    2.3 MB · Views: 31
  • IMG_3651.jpeg
    IMG_3651.jpeg
    2.9 MB · Views: 26
Last edited:
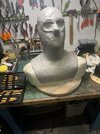
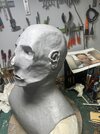
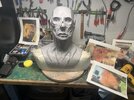
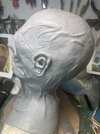
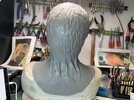
Been sidelined recovering from hernia surgery but finally able to sit and focus for a while so was back to sculpting ... making more progress. I reworked the eyebrow sections making them more level, reworked the mouth as well making the lips a little fuller. Also started adding wrinkling to the back of the head as well as those deep crevices in the cheeks revealing tenons below the skin. I'm now working on the detail forms trying to replicate that ' lumpy cottage cheese' look from the reference photos. Haven't found anything specific on how to do that so if there are any sculpting experts out there that can point me in the right direction please let me know ...
At times I really like it and other times I look at it and go " boy that's pretty ugly - and not in a good way ... lol. I also know that a good pain5 job will do wondering as well so I'm counting on my airbrush skills to help as well. I think some of the lines and wrinkles are probably too sharp and need to be softened which may help the overall look as well. I'm hoping I will be able to start making the mold no later than Christmas so I need to keeping work before time gets away from me ...
 

Attachments

  • IMG_0381.jpeg
    IMG_0381.jpeg
    529.1 KB · Views: 18
  • IMG_0374.jpeg
    IMG_0374.jpeg
    407 KB · Views: 18
  • IMG_0375.jpeg
    IMG_0375.jpeg
    363.3 KB · Views: 15
  • IMG_0373.jpeg
    IMG_0373.jpeg
    364.5 KB · Views: 20
Last edited:
Ok so here’s another tip; while I got the 3D bullets for the bandolier, and was thinking more and more about painting them… the idea came into my head about why not use real brass shells? So a little research and sizing I settled on some 20 guage brass hulls. They are a perfect diameter and all I had to do was use my dremel to cut them to match. Rather than destroy the original glued bullets to get the tops I’m having a new set sent to me. I’ll be able to paint them separately and then attach them to the brass hulls. Brilliant?! You tell me.
Great idea! Where did you get your bullets from?
 
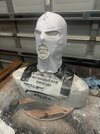
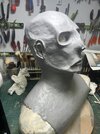
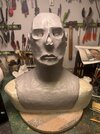
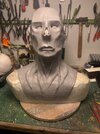
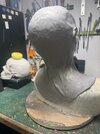
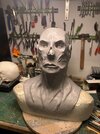
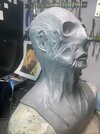
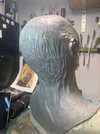
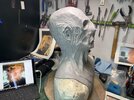
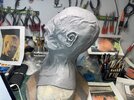
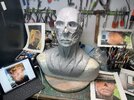
Ok, I think I'm done .... sculpting that is. I'm sure I could continue to work on this for weeks but I'm not sure it would amo7nt t9 much given my current skill level. also, molding and eventually pouring a silicon mas' is going to take time, and then there's patching, cleaning up the mask and painting I still need to do. I'll let it sit for a day or two while I talk with Smooth-on about some of the things I need but I doubt I'll do anything more than some quick touch ups.
 

Attachments

  • IMG_3736.jpeg
    IMG_3736.jpeg
    4 MB · Views: 14
  • IMG_3734.jpeg
    IMG_3734.jpeg
    3.7 MB · Views: 10
  • IMG_3735.jpeg
    IMG_3735.jpeg
    3.3 MB · Views: 13
  • IMG_3733.jpeg
    IMG_3733.jpeg
    4.8 MB · Views: 13
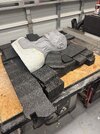
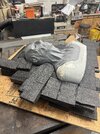
Called Smooth-On 2 days ago and chatted with tech support to ensure I had the big picture straight as far as using the proper materials and then d3 died to call the local Smooth-On distributor her3 before jumping in my car as they are about an hou4 away in Orlando. I visited them last month to get some basic insights and buy a fe2 things like the wedd clay which I knew I'd need no matter what direction I went for the mother mold. They were getting ready to move on Dec 9th to a ne2 facility so I wanted to be sure they were all moved in. Good thing I called, they currently not allowed to have walk ins yet ... the county hasn't approved their facility ... they will ship stuff but no in person yet. I don't want to pay shipping so I decided to wait. If they don5 open to walks in soon I'll have no choice but to do an on line order but I was really hoping to go in person, bring my clay sculpt with me and have a f8nal discussion.
Since completing my 2 Dalek Arduino based system upgrades I've discovered that I needed to redesign my dome rotation system so I've been keeping plenty busy with that this week so it's not like I'm idle ... also I figured I should get out of the shop so I went bass fishing today, haven't been able to use my boat in 2 months so it was good to do that. Tomorrow will be back to the grind trying to finish this dome rotation redo so that I can just focus on The Ghoul between now and Feb ...
 
Back
Top