DL-44 Denix C96 - Still services to make them more accurate?

Thanks man. Many people before me paved this road we all walk along. So many great artists and references to draw from. Ur doing an outstanding job for ur 1st attempt that’s for sure! It’s all trial error.. that part never ends ;)

After using aluminum black polish it with “steel wool 0000” if ur not already. Thats the secret imho. Just go back and forth between the two until u get the darkness and shine u desire. But steel wool is the secret ingredient to make AB work as it should. Otherwise it just looks blotchy..
I’ll have another go at aluminum black tomorrow. I poured AB in a bag and put the part in. It got very black, very quick. And I did gently rub it with 0000. The finish came off. The third time I tried to apply it while using 0000. Like I did with the super blue. Tomorrow, I will probably try applying it by hand.

The AB results I’ve seen on other dl-44s seems to vary. Some look like they were painted. Some are very blotchy. And the rare few look like they are semi-transparent. That’s what I was hoping for given the effort I put into smoothing this out. I’m not expecting it to look accurate.
 
Sounds like ur well on ur way. Honestly just keep rinse and repeat until it’s how u want it. Best thing about these props is u honestly can’t really mess it up.. plus it always looks just a little bit better on the shelf when ur the one doing the dirty work.
 
Last edited:
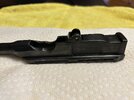
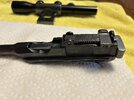
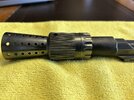
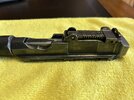
I did another coat of super blue on the denix upper today. I am excited about how well it turned out. It almost looks like an old gun…minus the weathering. I’ll let that cure and hit the edges with sand paper tomorrow. It’s going to match up nicely with the 1909 Mauser sight I’m using.
 

Attachments

  • IMG_2357.jpeg
    IMG_2357.jpeg
    2.6 MB · Views: 58
  • IMG_2358.jpeg
    IMG_2358.jpeg
    2.8 MB · Views: 56
Last edited:
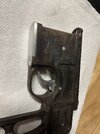
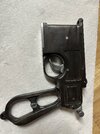
In today’s edition of trial and error, it was mostly error. I applied aluminum black to the denix receiver and it didn’t react with any of the aluminum I added…not the mag plate or the rod I filled the pin holes with. Looks like I’ll be sanding again and painting it. From my reading here, it sounds like paint doesn’t adhere well to the denix. Any recommendations on primer and paint? I’m a model builder and typically use tamiya spray paints.

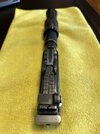
I used some 0000 steel wool on the aluminum black . I like the look of it. Could use more coats. Maybe I can paint the plate and hole patches and blend them to match.
 

Attachments

  • IMG_2372.jpeg
    IMG_2372.jpeg
    1.8 MB · Views: 55
  • IMG_2374.jpeg
    IMG_2374.jpeg
    2.1 MB · Views: 50
Last edited:
I have had mixed results with Aluminum Black on aluminium. I think the aluminium needs to have been freshly sanded to expose raw unoxidised metal for the Black to really take.
 
Good for everyone who figured out how to use birchwood casey aluminum black. I am not on that list. I started working on the aluminum bull barrel sleeve. Did one coat by hand with cotton applicator. It was blotchy and less than half covered. The next day, I tried to add a layer. Did not adhere and cover the piece better. So I sanded it all off and immediately went back to applying the AB directly to the surface. It covered better but still blotchy. I used tamiya weathering to salvage it. I’m done with AB.

Which also means I stripped the lower completely. I already have 1 coat of super blue on the lower. Second coat will be later today or tomorrow. I will paint and weather the aluminum on the lower to match.

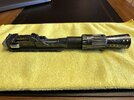
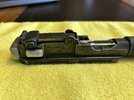
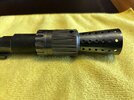
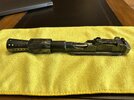
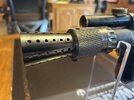
But I can share one milestone. The upper is complete and assembled. Yay! I added a thin strip of rubber between the denix barrel and sleeve. There is no wiggling. It’s solid.
 

Attachments

  • IMG_2383.jpeg
    IMG_2383.jpeg
    3.4 MB · Views: 65
  • IMG_2384.jpeg
    IMG_2384.jpeg
    2.9 MB · Views: 72
  • IMG_2385.jpeg
    IMG_2385.jpeg
    3.1 MB · Views: 54
  • IMG_2386.jpeg
    IMG_2386.jpeg
    3.3 MB · Views: 53
  • IMG_2387.jpeg
    IMG_2387.jpeg
    3.1 MB · Views: 54
  • IMG_2388.jpeg
    IMG_2388.jpeg
    2.9 MB · Views: 48
  • IMG_2389.jpeg
    IMG_2389.jpeg
    1.7 MB · Views: 66
Last edited:
That patina looks awesome, I like it a lot
Thank you. It’s hard to take pictures that show the finish well. It’s reflecting the yellow microfiber cloth. But it is what I wanted. It has variation in color and transparency.
 
I finished the second coat of super blue on the denix receiver. I’ll let the oil soak in until tomorrow and then start weathering it. And try to paint the aluminum on it that didn’t blue.

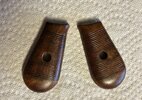
I have been trying different stains with the denix wood grips. Seems like everything (even walnut stain) came out reddish. So I did a wash over the grips and then a semi gloss polyurethane coat. Pretty happy with them now. They look darker in person. Some scraping and sanding and they should look the part.
 

Attachments

  • IMG_2394.jpeg
    IMG_2394.jpeg
    2.6 MB · Views: 35
Last edited:
Everything is starting to come together. The receiver is weathered. The grips have been epoxied on (They moved too much with just the screw holding them). The plugs on the denix pin holes are all painted and close to invisible. The only task left on the main gun is painting the mag plate.
IMG_2400.jpeg
IMG_2401.jpeg
IMG_2403.jpeg
IMG_2405.jpeg
 
Thanks guys. I’ll be honest. I started this thread looking for a service to help deal with the shortcomings of the denix. I’m glad I had to do it myself. It’s turning out better than I expected.

There are still some challenges left with the scope. I need to manually make a paint mask for the aluminum bar. Have to blacken the brass parts. And the biggest challenge: weathering the anodized aluminum scope. I failed with aluminum black. I am hoping to weather it without stripping it.
 
I tore tamiya masking tape for the scope bar using production dl-44 pics as a reference. I painted the bar with Rustoleum high heat enamel. I recommend using this paint. I did some chipping after the paint and it adhered well to the bare aluminum. I used super blue on the scope knurled nuts. Then weathered them with files and sandpaper. Just noticed I need to darken the ends of the scope bolts. The last big task is weathering the brand new looking aluminum scope and brass parts.
IMG_2424.jpeg
 
Last edited:
I started this thread looking for a service to help deal with the shortcomings of the denix.
I’m glad I had to do it myself. It’s turning out better than I expected.
Anytime anyone reaches out for a commission build one of the 1st things I always try to convince them is just this.

100% do it urself.. simply because the satisfaction one receives from looking at a prop they, themselves created.. sitting on their shelf is so very, very much worth it!! :)

Congrats on what you are accomplishing here. This is what the RPF is all about. Great progress my man. Keep it up!!
 
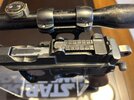
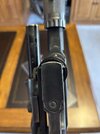
I’m done for tonight. Made the scope crusty and rusty. The last part to work on is the top of the scope dial. Have to decide if I want to spray paint it and chip paint off or just use a black wash on it. The finish line is close
IMG_2432.jpeg
IMG_2434.jpeg

IMG_2435.jpeg
IMG_2436.jpeg
IMG_2437.jpeg
 
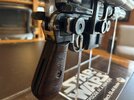
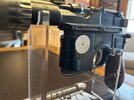
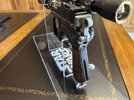
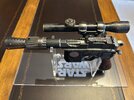
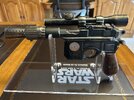
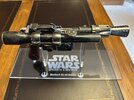
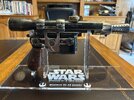
I should have just painted the scope wheel before posting my last message. Two months and two days after receiving the Denix and parts, my Han Solo blaster is complete. Thanks to everyone for the encouragement and all the reference material on the RPF.

I am very pleased with the finished product. If you are thinking about building a Denix based kit, I recommend going for it. The end results are worth it! Tomorrow I’m going to post some pictures of all the tools and supplies I used for any future builders out there.
 

Attachments

  • IMG_2457.jpeg
    IMG_2457.jpeg
    2.2 MB · Views: 26
  • IMG_2455.jpeg
    IMG_2455.jpeg
    2.1 MB · Views: 26
  • IMG_2454.jpeg
    IMG_2454.jpeg
    2.1 MB · Views: 22
  • IMG_2453.jpeg
    IMG_2453.jpeg
    2.2 MB · Views: 22
  • IMG_2448.jpeg
    IMG_2448.jpeg
    2.3 MB · Views: 22
  • IMG_2447.jpeg
    IMG_2447.jpeg
    2.4 MB · Views: 21
  • IMG_2446.jpeg
    IMG_2446.jpeg
    2.4 MB · Views: 22
  • IMG_2445.jpeg
    IMG_2445.jpeg
    2.4 MB · Views: 24
  • IMG_2444.jpeg
    IMG_2444.jpeg
    2.7 MB · Views: 22
  • IMG_2450.jpeg
    IMG_2450.jpeg
    1.3 MB · Views: 25
Last edited:
Back
Top