warpsled
New Member
Yes, I've got enough to do another build. Let me know if you're still on the hunt.Does anyone have spare rivets
Yes, I've got enough to do another build. Let me know if you're still on the hunt.Does anyone have spare rivets
The spare rivets have gone to help out another build.Yes, I've got enough to do another build. Let me know if you're still on the hunt.
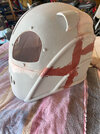
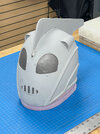
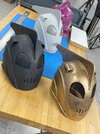
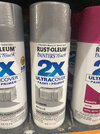
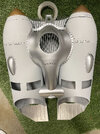
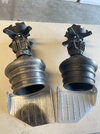
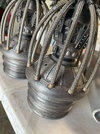
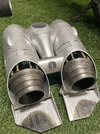
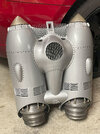
I get that, finding all the other parts is hard. Spent hours look for the braided line lol. I did just find 5/16" braided hose on ebay for cheap. It's 25 FEET - Spectre Performance 19125 Stainless Steel Flex 5/32" Vacuum Line Hose. From Spark Surplus just incase the link stops working.What's funny about this build is that the printed parts were the "somewhat" ez part. Rounding up all the hardware and doing the detailed finish work is what really dragged me down once I tried to finish it. No doubt the body work took some hours to do, and I could have spent double making it super perfect, but I had to look past a couple things and keep plowing forward. Now I need to get the jacket and backpack on order to make this whole thing the real deal.
Probably in your spam inbox. I tested and it works. Try different email ?Would LOVE to print this beautiful model but I don't receive the email when I try to download it
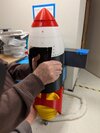
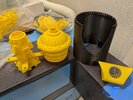
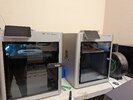
Nice work. If you ping me after the new year I will send you a version of the fins with holesBeen watching this one for a while, picked up a Bambu X1C earlier in the year and it's proven such a solid printer that I picked up a second one during their labor day sale. After getting a few other projects printed I decided to add a jet pack to the list.
Got the files and ordered the parts from gnolivos, and have started feeding the models to my X1C's. After a several days of printing I've got a (McDonald's color-themed) left rocket assembly and much of the central assembly printed. The results are outstanding.
View attachment 1890068View attachment 1890066View attachment 1890067
Printing a few of the vent pieces on my FormLabs Form2 resin printer; results have been hit or miss, though I think that's just due to needing to do some 'regular maintenance' on it. The parts that have printed properly look great.
Gnolivos - if you were to do any future revisions to the model, I'd like to request that the small fins that mount to the condenser ring have a version with holes instead of the pins modeled in. I would have liked to have printed them with the flat side down but the amount of support material needed resulted into on congealed piece. A single properly-sized rod that could be batch-printed to pin them after placing could work with that.. I'm attempting to print them inverted and will see how those results come out when I get back to my office on Monday.
Thanks, will give that a try. Apologies on not responding earlier, past couple of weeks got busy between holidays, work, travel and being ill.@flaagan
Attached is a version of the fins with holes. Heep in mind you cannot create a hole deeper than abput 1/25 mm on these or it would protrude the sidewalls.
Follow up on this. First test with the pin-less fins resulted in divots along the sides where the holes are, like the material sunk in or the wall was too thin. Going to look a bit more into this. I may also look into resin printing the original style fins. Going to give me a good excuse to consider getting a new resin printer.Thanks, will give that a try. Apologies on not responding earlier, past couple of weeks got busy between holidays, work, travel and being ill.
I'm currently reprinting the central hull part, when I first did it apparently the supports bonded too well with the rivet flanges that run around the sides to attach to the rocket housings. When I went to take the supports off the flange broke right off with it. Doing it in a different orientation, solid infill, and a different support setup. Fingers crossed that it'll work right this time. Otherwise things have been printing well.
