You are using an out of date browser. It may not display this or other websites correctly.
You should upgrade or use an alternative browser.
You should upgrade or use an alternative browser.
Spaceship from Concept Art -WIP Scratch Build- UFP RV Montgomery Scott
- Thread starter Carlb
- Start date
JimmyB
Member
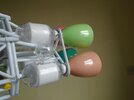
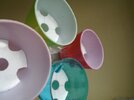
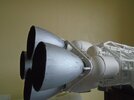
plastic wine glasses are also a good source of engine bells, and they are very cheap to,
I cleared my local B&M of those a few months ago. E14 candle bulbs are a good shape, too.
joberg
Legendary Member
If you want fairly big engine bells, I have a egg cooker (plastic) that you can buy at a store, specializing in cooking implements. It's 5" in circumference and 3"1/2 in height. That would be a fairly large Star DestroyerI always love how Easter Eggs make the best engine bells.
Always thought it would be a cool project to find the super large ones, and basically scale a whole star destroyer around them.
JediMichael
Master Member
I wonder the size this would make?If you want fairly big engine bells, I have a egg cooker (plastic) that you can buy at a store, specializing in cooking implements. It's 5" in circumference and 3"1/2 in height. That would be a fairly large Star Destroyer
15, maybe 20 feet long? More?
joberg
Legendary Member
I usually get mine from the Dollar StoreAppreciate the comments everyone...
I also hastily bought a bag of assorted "toy eggs" at a thrift store which turned out to be.... a bust.
Not a single egg was the same size as any others!
Millenniumf
Sr Member
Hey, at least you have some engine bells for future starships! Also, you could totally make a tramp ship with a bunch of disparate engines cobbled together to make a single propulsion unit as a later build. 
Carlb
Well-Known Member
The stern of the ship is difficult to see in the artists drawing, especially the details.
I tried to recreate the general look of the art work.

I don't want to build on top of an "in-place" carcass, so each .04" (1mm) styrene section will be one complete panel (or plate), and then glued directly on to the hexagon bulkheads.
All 8 sections for the stern are 99% scratch, any colorful objects are from "elsewhere".
Top panel

(2) Upper slope side

(2) Vertical Side
Most areas I prefer to use "florist wire" for piping... instead of styrene. It's easier, at least for me, to get reliable (& repairable) bends with a pair of needle-nose pliers.. Readily available locally in several usable sizes, and cheaper too.

(2) Lower slope side

Bottom panel. This is actually 4 separate smaller panels that I built a few months ago as a test, then brought together.
Piping interconnects them.

These plates will get their primer when they are attached to the hexagon carcass... which will begin immediately.
Till next time...
I tried to recreate the general look of the art work.
I don't want to build on top of an "in-place" carcass, so each .04" (1mm) styrene section will be one complete panel (or plate), and then glued directly on to the hexagon bulkheads.
All 8 sections for the stern are 99% scratch, any colorful objects are from "elsewhere".
Top panel
(2) Upper slope side
(2) Vertical Side
Most areas I prefer to use "florist wire" for piping... instead of styrene. It's easier, at least for me, to get reliable (& repairable) bends with a pair of needle-nose pliers.. Readily available locally in several usable sizes, and cheaper too.
(2) Lower slope side
Bottom panel. This is actually 4 separate smaller panels that I built a few months ago as a test, then brought together.
Piping interconnects them.
These plates will get their primer when they are attached to the hexagon carcass... which will begin immediately.
Till next time...
CosmicQuest
Active Member
I love your panels! I'm saving these photos to my idea log. Don't be surprised if you see some of these panel ideas pop up in one of my buildsThe stern of the ship is difficult to see in the artists drawing, especially the details.
I tried to recreate the general look of the art work.
View attachment 1814308
I don't want to build on top of an "in-place" carcass, so each .04" (1mm) styrene section will be one complete panel (or plate), and then glued directly on to the hexagon bulkheads.
All 8 sections for the stern are 99% scratch, any colorful objects are from "elsewhere".
Top panel
View attachment 1814309
(2) Upper slope side
View attachment 1814310
(2) Vertical Side
Most areas I prefer to use "florist wire" for piping... instead of styrene. It's easier, at least for me, to get reliable (& repairable) bends with a pair of needle-nose pliers.. Readily available locally in several usable sizes, and cheaper too.
View attachment 1814311
(2) Lower slope side
View attachment 1814312
Bottom panel. This is actually 4 separate smaller panels that I built a few months ago as a test, then brought together.
Piping interconnects them.
View attachment 1814313
These plates will get their primer when they are attached to the hexagon carcass... which will begin immediately.
Till next time...
yuumi2891103
Master Member
I love and impressed by this detailing. It is well concidered about arrangement and ballance.
kermet
Sr Member
Wow how did you hide those eggs my Friend
JediMichael
Master Member
This pic was just a google image....but, if I did need to hide something like that....might have to dig a hole and bury them. Maybe throw up in a tree.Wow how did you hide those eggs my Friend
Similar threads
- Replies
- 10
- Views
- 1,398


