WHOA! Love the fan box! Everything is coming together! 
You are using an out of date browser. It may not display this or other websites correctly.
You should upgrade or use an alternative browser.
You should upgrade or use an alternative browser.
Star Wars movie set den build
- Thread starter Amazing DJ
- Start date
Amazing DJ
Well-Known Member
It's Labor Day and I am laboring on the gutter light blinders some more. This is the first of 2 corners. DONE.

Check the inset with the movie still. I think I accomplished the basic shape of the light with the blinders hanging down. It didn't cost much to build mine.

I attach these little black blinders with a hot glue gun. They are pretty strong when assembled. I can hold onto one and pick up a whole 4-foot light section without breaking off. The attachment goes pretty quick, as I use a spacer to measure out the next location, and the hot glue dries so fast. Oops, I just ran out of blinders. Gotta go get some more raw materials to laboriously make 44 more. That will take 88 half sections, requiring 176 angled jigsaw cuts.
Just for fun, here's a bonus shot of the Millennium Falcon-inspired desk...

Check the inset with the movie still. I think I accomplished the basic shape of the light with the blinders hanging down. It didn't cost much to build mine.
I attach these little black blinders with a hot glue gun. They are pretty strong when assembled. I can hold onto one and pick up a whole 4-foot light section without breaking off. The attachment goes pretty quick, as I use a spacer to measure out the next location, and the hot glue dries so fast. Oops, I just ran out of blinders. Gotta go get some more raw materials to laboriously make 44 more. That will take 88 half sections, requiring 176 angled jigsaw cuts.
Just for fun, here's a bonus shot of the Millennium Falcon-inspired desk...
Attachments
Last edited:
Demonmaker
New Member
/drool /jealous
smashing work
smashing work
Amazing DJ
Well-Known Member
The other day, someone saw my room photos and said it was "Star Trek". Ohhhh what an insult.  I have just the thing to make it more Star Wars-y. Need to add an iconic set piece that screams "Star Wars!"
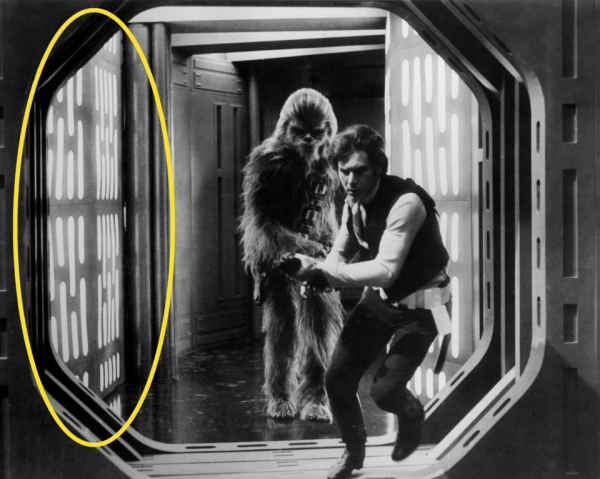
So the design process has begun. There will be two of these panels on opposite sides of the room. Eff James T. Kirk!
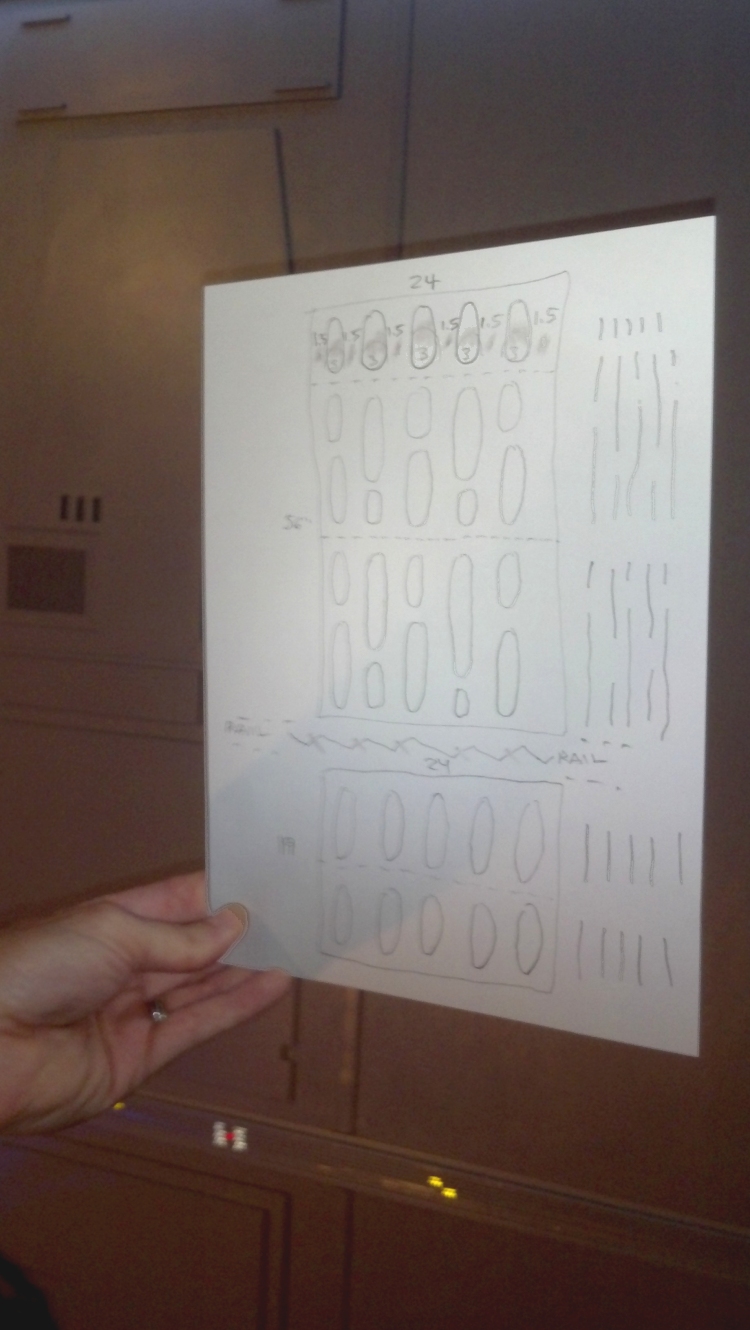
(Deviously laughing) Ha ha ha! Mwaa haa haa! This should look pretty great when finished.
So the design process has begun. There will be two of these panels on opposite sides of the room. Eff James T. Kirk!
(Deviously laughing) Ha ha ha! Mwaa haa haa! This should look pretty great when finished.
Attachments
Amazing DJ
Well-Known Member
Testing piece #1. It's white. It glows, it reflects. Temporarily, I've attached it to the wall.
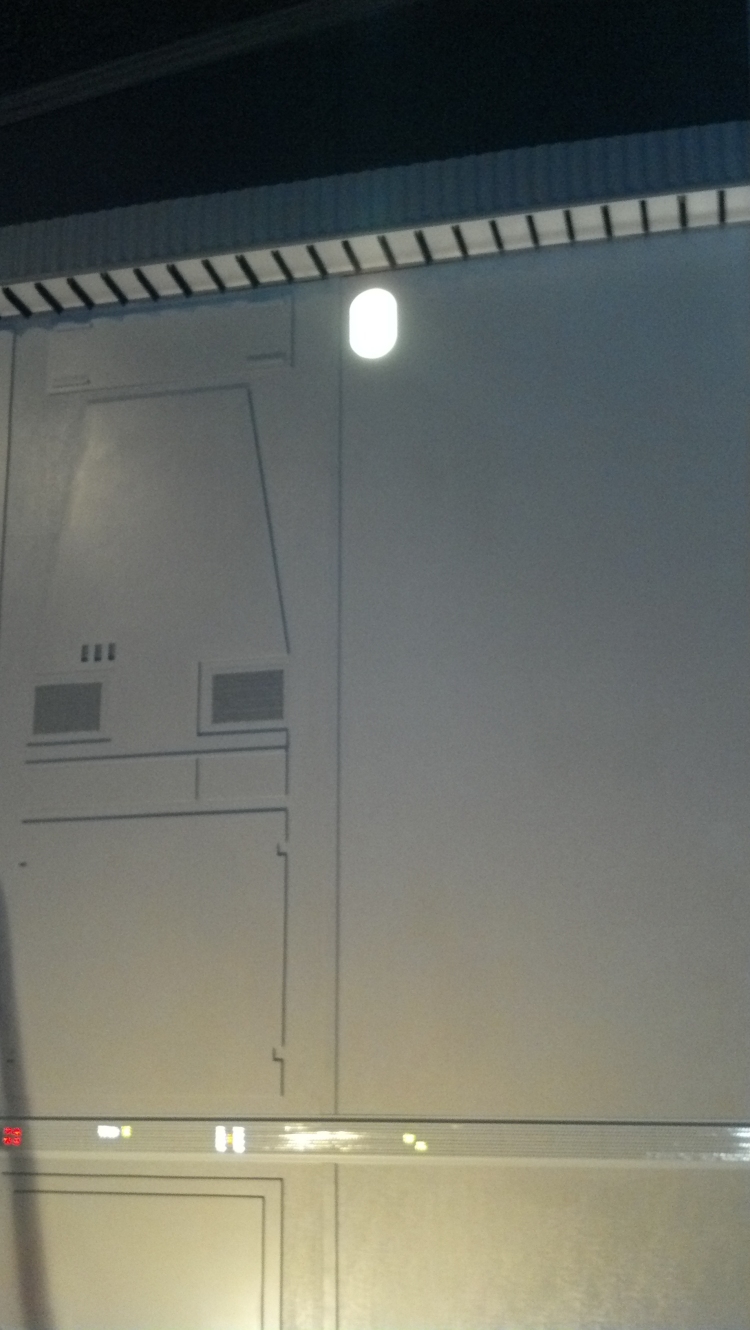
This is industrial stuff. It is RST-WT-0003 White Reflective Safety Tape in a 3" wide roll. It has a paper peel-off backing. I have 60 feet of this tape. It will be applied to panels that will be attached to the wall. Below, some pieces are laying on one of the panels.
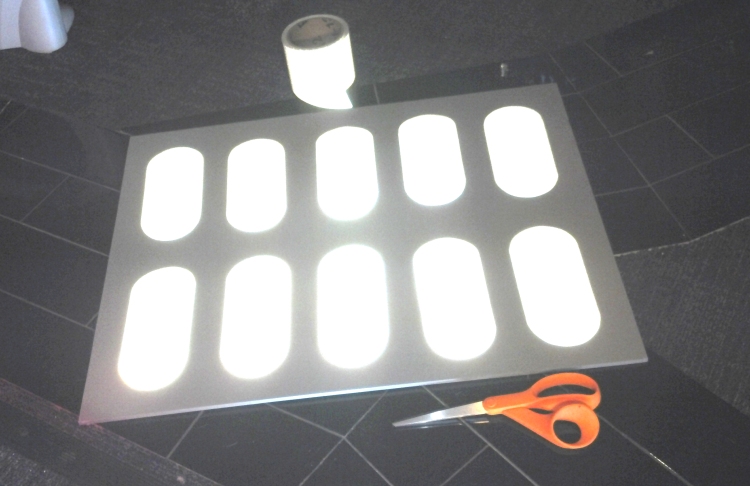
Man, these suckers are bright!
Now I'm off to paint 4 gray panels, and cut 70 pieces of this tape. Hopefully, I can cut each piece with perfectly rounded ends.
You know what? I'd like to get some Star Wars costumers over here when this project is done, sometime next year. Wouldn't that be fun, posing for some photos?
This is industrial stuff. It is RST-WT-0003 White Reflective Safety Tape in a 3" wide roll. It has a paper peel-off backing. I have 60 feet of this tape. It will be applied to panels that will be attached to the wall. Below, some pieces are laying on one of the panels.
Man, these suckers are bright!
Now I'm off to paint 4 gray panels, and cut 70 pieces of this tape. Hopefully, I can cut each piece with perfectly rounded ends.
You know what? I'd like to get some Star Wars costumers over here when this project is done, sometime next year. Wouldn't that be fun, posing for some photos?
Attachments
Last edited:
HEY NOW! I love the reflective tape idea. That might work on the temporary barlights I've created for the MF cockpit. You're a genius! 
Room is looking great. The pic with the single reflective tape is picture perfect. You've nailed it!
Room is looking great. The pic with the single reflective tape is picture perfect. You've nailed it!
Amazing DJ
Well-Known Member
Great build:thumbsup
please more images & films!
Okay, will do! I'm really enjoying The RPF. Glad I found it. Somehow, my thread is up to 14 pages. I'll make every post have a picture of SOMEthing. Tonight I had an hour to put the first row of "lights" onto a gray panel. The panel is propped up against the wall to see how it looks.
In normal light, this reflective white tape has a slight glow to it. With a camera flash, the reflection of the tape is so bright, many of the pics "blind" the camera so the background of the pic will look totally "black" by contrast. This photo turned out "normal".
You can also see how my "gutter lights" turned out at the room corner. I'd like to see someone incorporate this "gutter light" idea into a home theater. They were easy to build, no harder than putting up a set of fancy curtain rods. :rolleyes
Attachments
Amazing DJ
Well-Known Member
HEY NOW! I love the reflective tape idea. That might work on the temporary barlights I've created for the MF cockpit. You're a genius!
Room is looking great. The pic with the single reflective tape is picture perfect. You've nailed it!
Hey, thanks. I have more progress on my den. After gluing these 2 panels to the wall today, I couldn't wait to post a pic!
Now, that screams "Star Wars"! Hopefully, no one will confuse my project with Star Trek again. Effing Spock n Kirk. Bleah! :devil
Attachments
Looks absolutely awe-inspiring.
Demonmaker
New Member
Hey, thanks. I have more progress on my den. After gluing these 2 panels to the wall today, I couldn't wait to post a pic!
Now, that screams "Star Wars"! Hopefully, no one will confuse my project with Star Trek again. Effing Spock n Kirk. Bleah! :devil
Dedication at it's best.
SWEET! That turned out really nice! Did you cut everything by hand?
DeathFromADesk
Active Member
This is at least 73.6 different types of awesome.
Amazing DJ
Well-Known Member
Here's 2 new things I haven't shown you yet. This is the other side of the room. Tonight I put up another bright "oval panel".
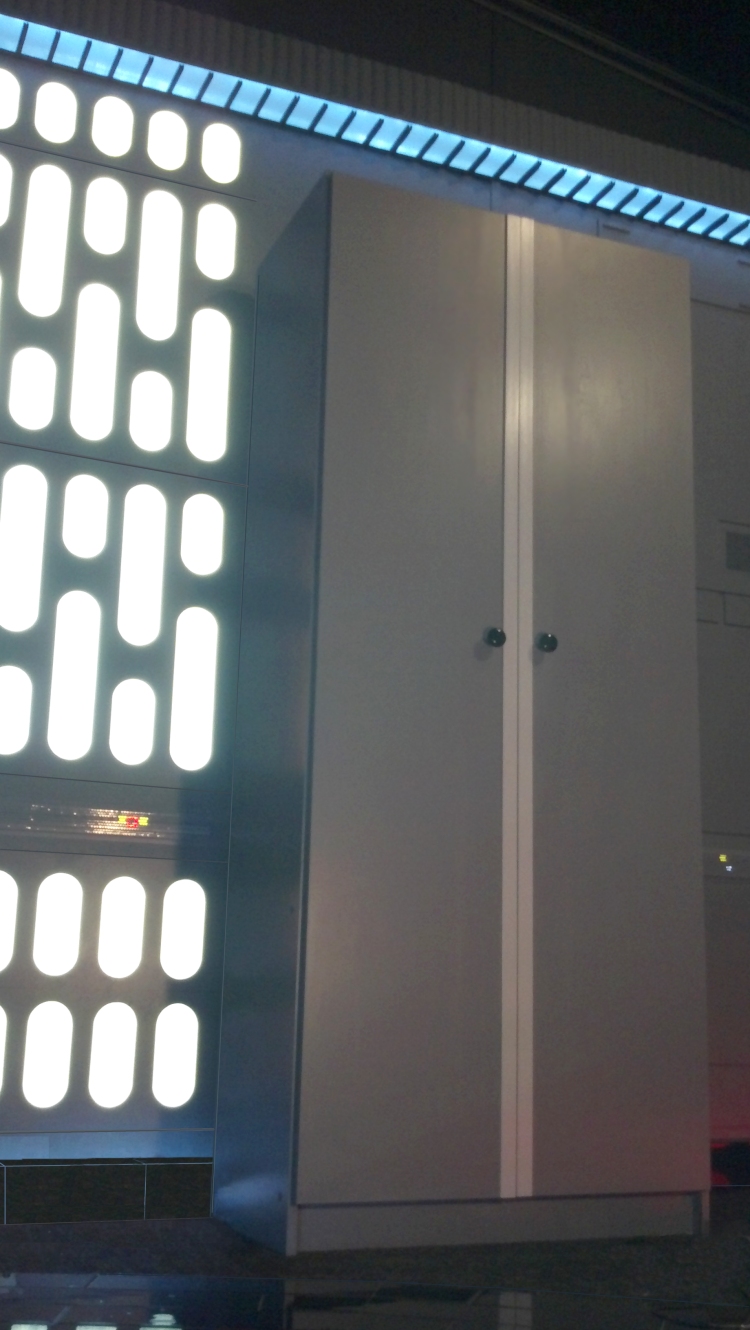
The 2nd new thing is the storage cabinet. I've started decorating it in the same style as the split door which is on the opposite side of the room. I think I should trim out the very bottom of that cabinet in an unusual way. I have this weird-looking plastic thing...
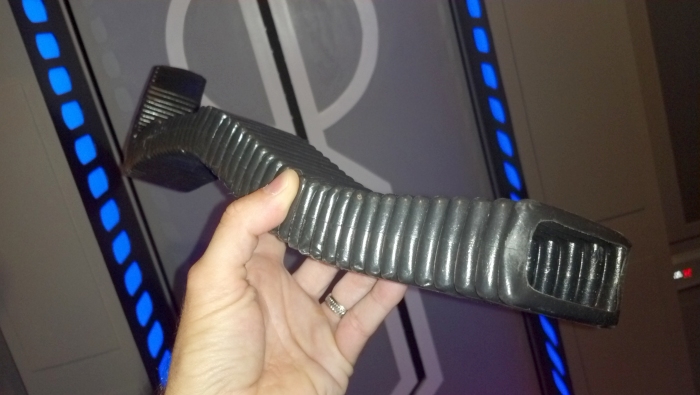
It is the flexible corrugated plastic thing that goes on the back of an office chair. I've connected two pieces of it to make a long piece. It bends, of course, but doesn't stay flat when you let go of it. I can't decide how to attach it to the cabinet bottom. This thing is hollow and I need to stick the backside of the corrugation to the cabinet. The plastic is hollow, so I don't know where I'd put any fasteners. Got any ideas?
The 2nd new thing is the storage cabinet. I've started decorating it in the same style as the split door which is on the opposite side of the room. I think I should trim out the very bottom of that cabinet in an unusual way. I have this weird-looking plastic thing...
It is the flexible corrugated plastic thing that goes on the back of an office chair. I've connected two pieces of it to make a long piece. It bends, of course, but doesn't stay flat when you let go of it. I can't decide how to attach it to the cabinet bottom. This thing is hollow and I need to stick the backside of the corrugation to the cabinet. The plastic is hollow, so I don't know where I'd put any fasteners. Got any ideas?
Attachments
Similar threads
- Replies
- 312
- Views
- 50,633
- Replies
- 327
- Views
- 52,438
- Replies
- 367
- Views
- 53,787
- Replies
- 47
- Views
- 7,998


