You are using an out of date browser. It may not display this or other websites correctly.
You should upgrade or use an alternative browser.
You should upgrade or use an alternative browser.
Star Wars Themed Photo Backdrop / Set Piece build...
- Thread starter Indy Magnoli
- Start date
Yeah, we simplified it by going with only one row of blocks, instead of three. The PVA glue and coat of primer hardens the surface a bit, but they're still just styrofoam. We don't expect a lot of wear on the blocks (Vader will be guarding the door most of the time). ")
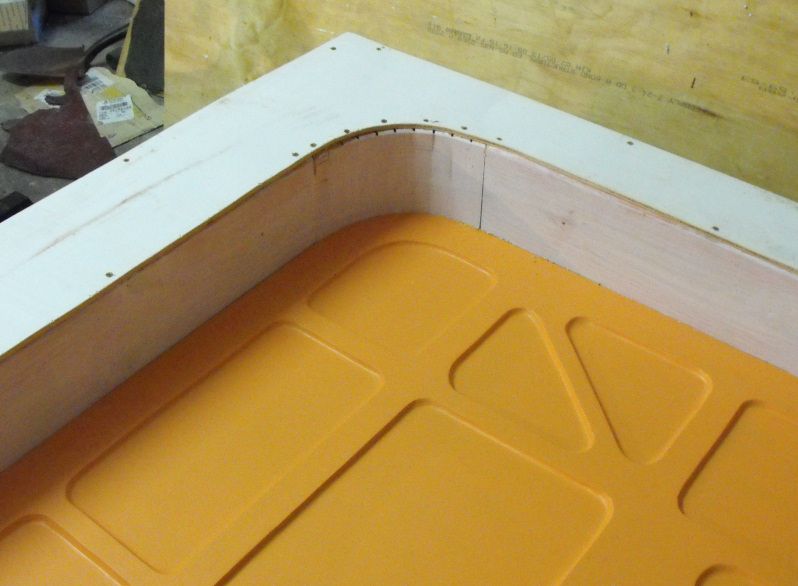
Finished the curved corners and set the front panel on:
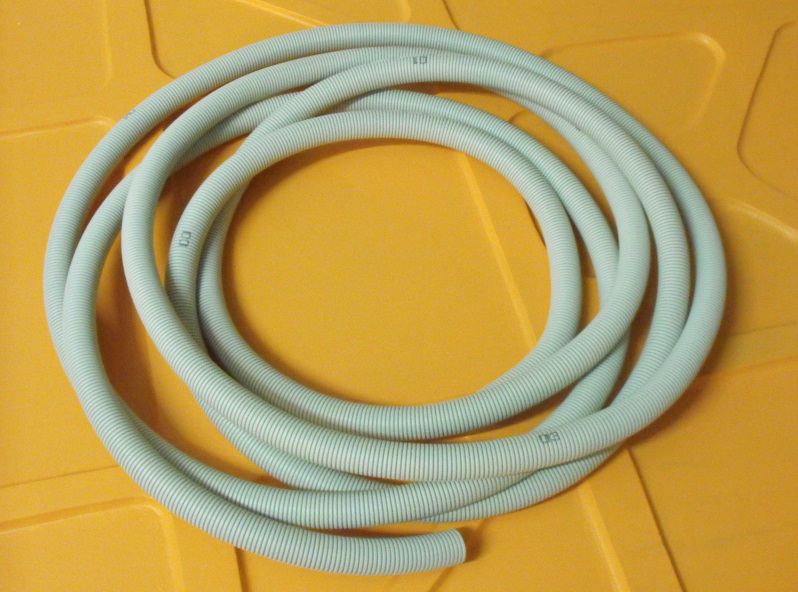
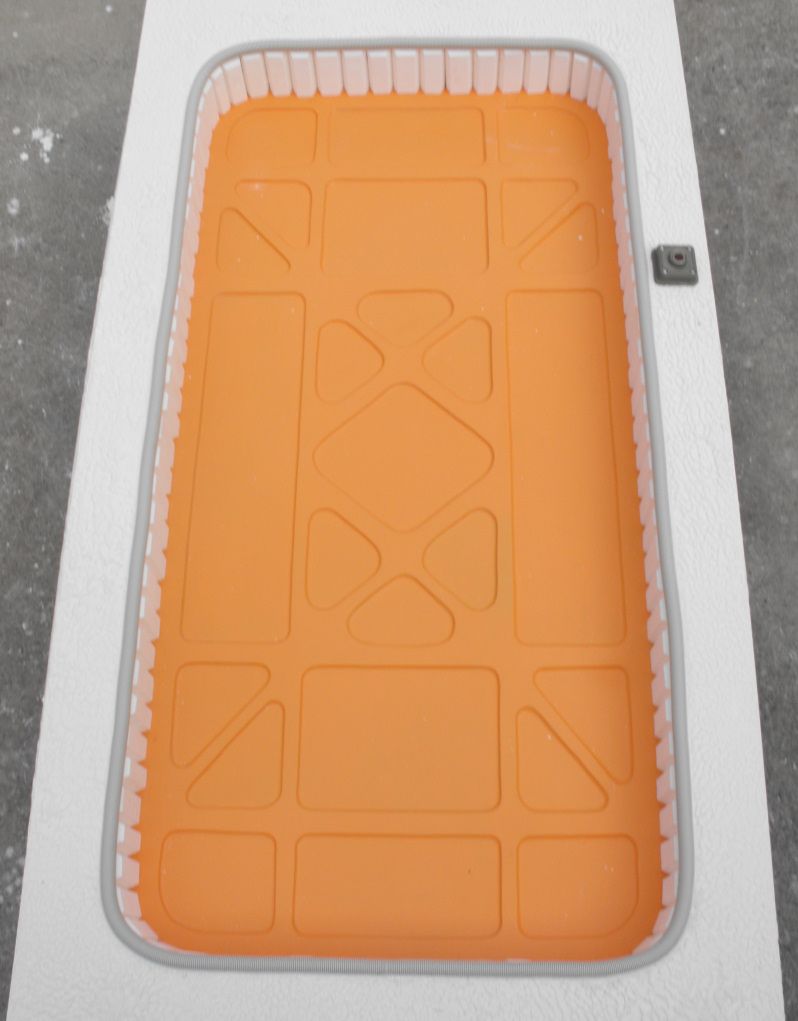
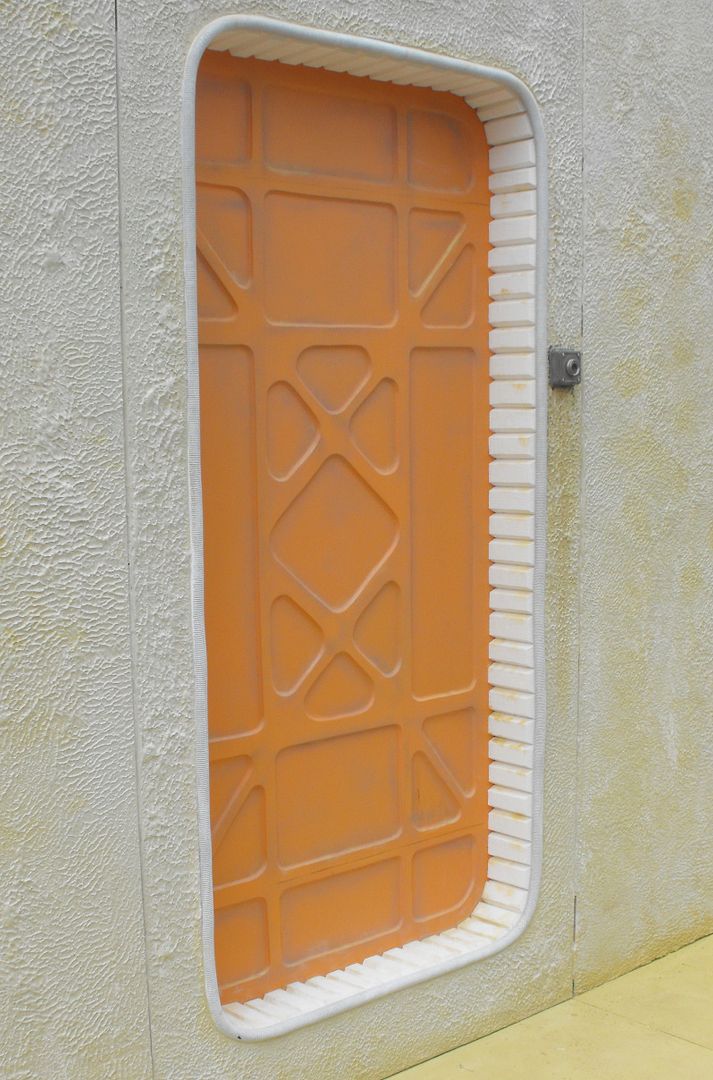
Bought some hose to use as the edging for the door:
Finished the curved corners and set the front panel on:
Bought some hose to use as the edging for the door:
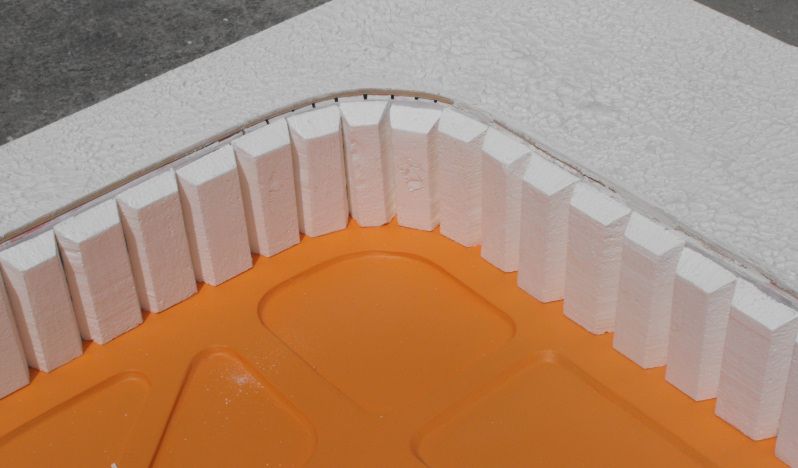
Plaster and blocks added:
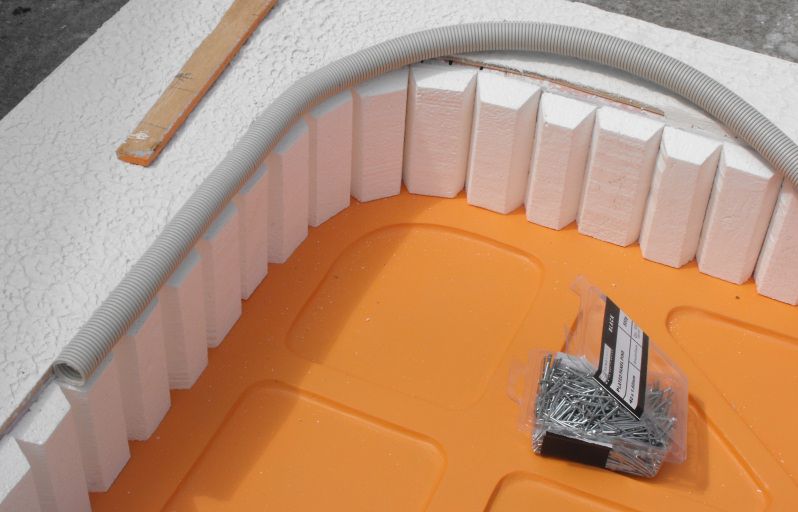
Adding the hose:
Hose finished, added the button... just need to paint the hose white... then distressing!
Adding the hose:
Hose finished, added the button... just need to paint the hose white... then distressing!
Last edited:
Wow, that came out awesome. I loved themed projects like this.
Can't wait to see what else is in store for this one.
Can't wait to see what else is in store for this one.
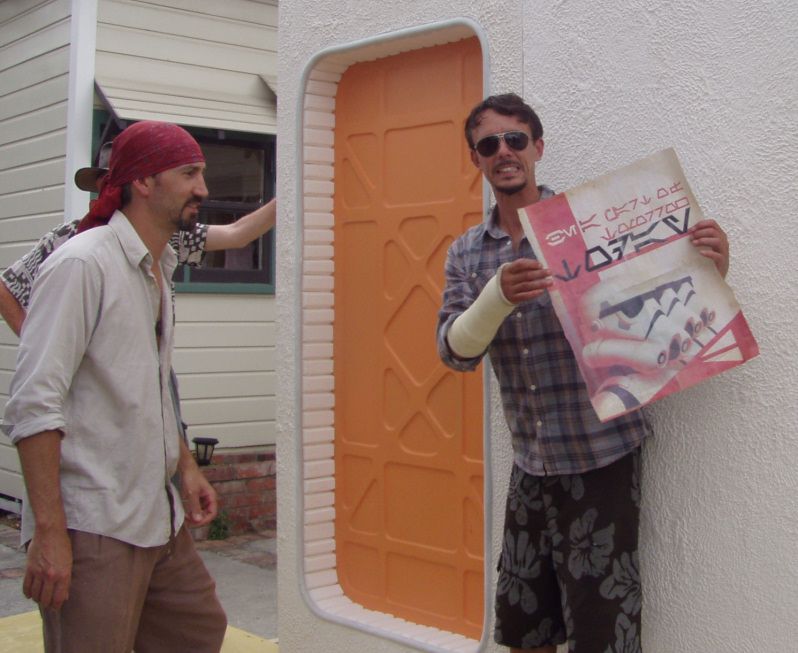
We started the test-assembly today so we could do the final painting and weathering. I found a cool Imperial recruitment poster on-line and printed it up and weathered it to paste to one of the walls:
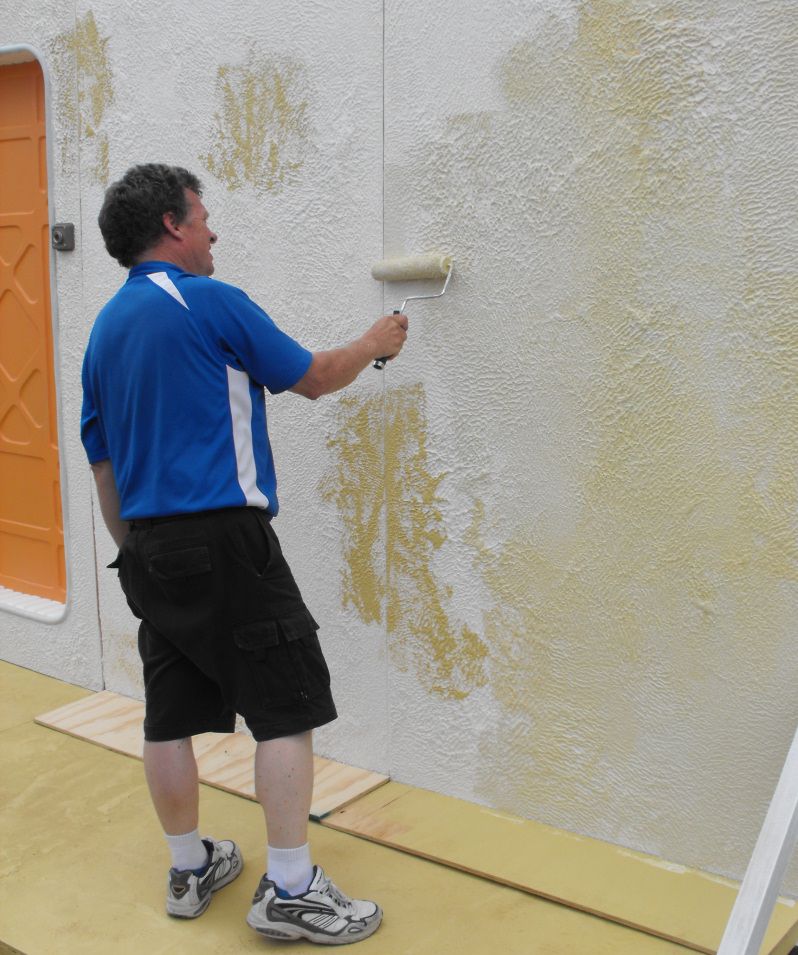
Many layers of paint (and coffee) to get the coloring we wanted:
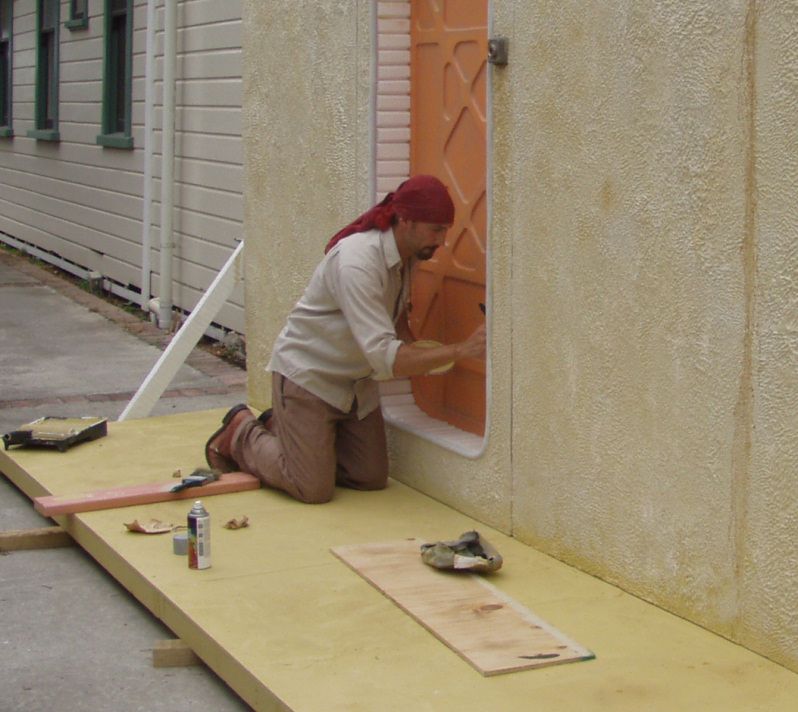
Carefully weathering the door:
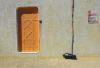
Here's the finished door:
One week from now we will do the final assembly...
Many layers of paint (and coffee) to get the coloring we wanted:
Carefully weathering the door:
Here's the finished door:
One week from now we will do the final assembly...
Blaxmyth
Sr Member
Got the IG-88 / flame tube pepped last night - two coats of resin today and fibreglassed inside, then poured in some rondo for the bits that were too hard to reach properly with the fibreglass. There's a few bubbles in the card from where the resin cooked too hot in the curing cabinet, but they'll sand out OK. If not, it'll just be covered with weathering.


jkno
Legendary Member
Very cool door! The pics in the following link might help you if needing more reference regarding the SW door: Tunisia Star Wars - March 2008 Photos - Photobucket
Blaxmyth
Sr Member
Drilled the holes just now. Indy - they're 2 1/8" and 1" diameter, just so's you don't have to convert...
Next up is some black paint inner and outer, if there's some in the shed, followed by weathering. Might brush on some aluminium powder, then a bit of sooty wash.


I know it's missing details, but the next one will be better prepared. I might reshape the top of the mesh just under the angled top - there's a slight curve that's missing on this one. Plus I'll add a heap more rondo inside before glassing.
Next up is some black paint inner and outer, if there's some in the shed, followed by weathering. Might brush on some aluminium powder, then a bit of sooty wash.
I know it's missing details, but the next one will be better prepared. I might reshape the top of the mesh just under the angled top - there's a slight curve that's missing on this one. Plus I'll add a heap more rondo inside before glassing.
Looks great! It's going to look great sitting there in the sand.


scoutrooper
New Member
Turned out great!
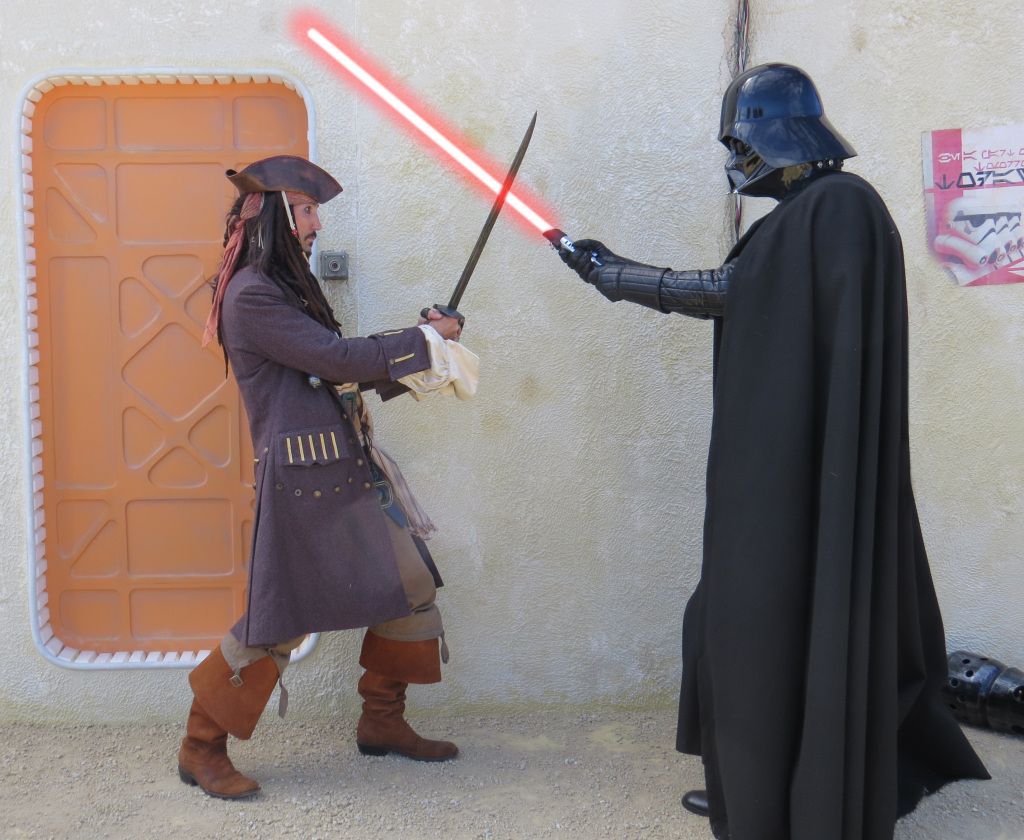
Well... it's done! Here's are some of my favorite shots from this weekend:
The "Beauty Shot":

(Yes, I photoshopped the seams... I couldn't resist)
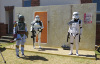
Local policeman under arrest:

Walking the beat:

Local pirate under arrest:

The Dark Lord enjoying a break:

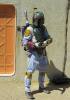
Boba Fett costume shot:

This shot shows the set piece in its entirety:

A lot a work and a lot of fun! A HUGE thanks to both Blaxmyth and Nick K!!
Kind regards,
Magnoli
The "Beauty Shot":
(Yes, I photoshopped the seams... I couldn't resist)
Local policeman under arrest:
Walking the beat:
Local pirate under arrest:
The Dark Lord enjoying a break:
Boba Fett costume shot:
This shot shows the set piece in its entirety:
A lot a work and a lot of fun! A HUGE thanks to both Blaxmyth and Nick K!!
Kind regards,
Magnoli
Attachments
-
 sw-set-final_zpsa516b573.jpg451.9 KB · Views: 123
 -
 sw-set-fin1_zpsaca86f1b.jpg269 KB · Views: 118
 -
 sw-set-fin3_zpsc4c7c8bf.jpg285.5 KB · Views: 115
 -
 sw-set-fin2_zps9e75d27e.jpg285.5 KB · Views: 125
 -
 sw-set-fin4_zps3f7a9f5f.jpg360.9 KB · Views: 118
 -
 sw-set-fin5_zps626aacc6.jpg147.8 KB · Views: 113
 -
 sw-set-fin-full_zps4eddc622.jpg351.1 KB · Views: 123
Last edited by a moderator:
Amazing DJ
Well-Known Member
That turned out really great! :thumbsup
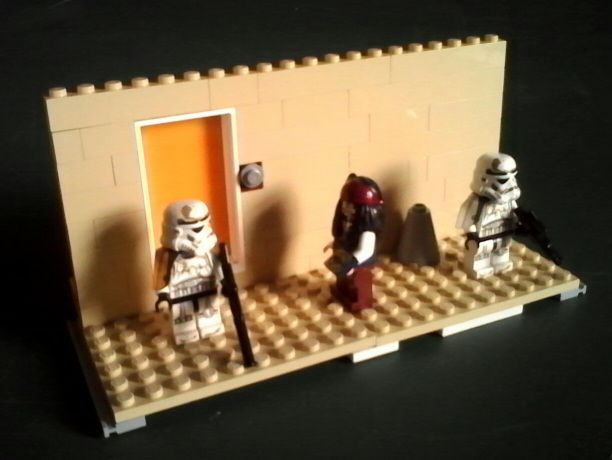
The kids and I were playing around with Lego today and whipped this up:
Similar threads
- Replies
- 16
- Views
- 3,750
- Replies
- 12
- Views
- 4,737
- Replies
- 12
- Views
- 4,903
- Replies
- 2
- Views
- 2,948