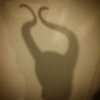
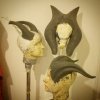
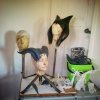
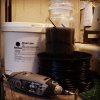
[WIP] Maleficent- cheek prosthetics page 5, molds of all the things in progress!

Just a reminder this is a WIP Thread :) I put in a general reference for other people a while back :) But thanks for the feedback :)
http://www.therpf.com/f24/maleficent-references-general-all-purpose-thread-225201/

I've since made the velvet gown but as usual, conventions really suck for getting good photos. Also I need to redo parts of the bodysuit as it is too long in the torso. But I love my collars :)

View attachment 430594
View attachment 430595 View attachment 430596 View attachment 430597
The fur is a long pile faux fur I soaked in Resolene and swirled to shape. The pleated collar is pigskin wet and stitched to shape. I over Resolened this and had to sand back. I also want to cut it down a bit and press to flare more, but I also had to make it transportable. The spine, wing stumps, and hip pieces are cast in a flexible urethane.

View attachment 430598
I did start building the boot heels, but ran out of time to finesse them. But I made shaped leather uppers to zip over, because again, I need to make this transportable :)

View attachment 430599 View attachment 430600 View attachment 430602

View attachment 430601 View attachment 430604View attachment 430603View attachment 430605

Some shots of the real deal. It explains the mystery hip pieces, they do not exist but were built in the models to hide the rigging. That is some serious strapping. The velvet surcoat thing has a built in train, luckily I have enough velvet to redo the back. I should also have enough lining. Again, CGed to fit the scene.

576x816xwpid-dsc_4177-1.jpg.pagespeed.ic.RynraKUGW9.jpg

I took my strappy helmet off the horn base and then cut a wig apart to put back around the base! I'm still debating whether to go robes, dress, or Coronation dress for this. All I know is I wander around the house like a faery in these things and can't be stopped!

wpid-dsc_4168.jpg
Gah! My latest post to my blog killed my data, so I'll have to try and get a photo later. But I have made the cheeks three times now, this last mold process seemed to go well, and probably work with my face shape better. I am currently working on a Madame Vastra sculpt and took the opportunity to do a super fast set of nose and cheek sculpts while I do the bulk of the Vastra sculpt on the less defined headcast. It is so hot here right now that my platsil sets up in a matter of a few minutes, so I want to practice some smaller runs before I do a full face set and risk it setting up early. I had that happen with my ear molds.

I have a nice set of ears but they have bubbles and a really wide seam, the molds got off set. I may have to drill some escape holes as well....
1440x2560xwpid-dsc_4141.jpg.pagespeed.ic.6pIHGRLGHu.jpg

Sorry, my ability to get the attachments to work in this post is not great, and I can't fix it.

https://www.facebook.com/pages/Michaela-de-Bruce/152637694808851
I've been blogging which gets forwarded to my facebook page and at the fb preview images seem to work (having issues with getting tumblr to recognise them, which means the app may be incompatible with the latest WP build. Pretty likely.
 

Attachments

  • wpid-dsc_4168.jpg.pagespeed.ce.srWOWdEL8M.jpg
    2 MB · Views: 89
Last edited:
Necro! But not really :)

So in this time I have finally, finally, listended to medical advice and I am no longer fibreglassing. In fact I need to take a day to remove all last traces of the stuff from anyway- including any potential splinters from the molds of my horns.

So why? My specialist took one look at my hands and said the word osteomyelitis in regards to what I can expect from any further damage to my fingers. At the time I had a few chilblains that got exposed to resin and WHOOM! But ass nasty immune reaction and I now have actual rheumatoid nodules. So. That's fun. They need cutting out and they sit on the top of my fingers so yes, we are talking about minor surgery but it's incredibly close to bone and I could lose the finger they are on.

So what does that have to do with this project?

Well I am redoing my christening gown, and I am actually building the wings for her battle outfit. The one minor issue. The horns.

For those just reading, I make everything, I do not outsource so this means I need a new way of making horns. I think, I think, i may be able to sculpt and scan them, but I do also know I need to step out of the my comfort zone in 3D modeling and move to organic shapes. But I suspect I'll want a more response tool than a mouse, and I am not doing well in blender!

So I'm looking at sbrush tutorials and the free trial, as well as figuring out if I can get a scan of my head or my head cast :)

Meanwhile I have the dress, train, and sleeves ready for assembly. They have been sitting in my UFOWIP pile for months, and the recent workshop posts shared to Adam Savage has been a big prompt for me to get that restarted. I rebuilt my workshop to use after all :)
sm-DSC_0474.jpg sm-DSC_0475.jpg sm-DSC_0490.jpg

I've also managed to replace the camera in my phone so actual WIP photos can start to happen :) ANd now I am wondering if I need to add my blog back? And done.

That red gown is an historic gown of a style rarely done :)
 
Thanks, good update.

Might I ask, if you only need one copy of the horns, why mold and cast, or sculpt then scan then print? Why not make a one-off?

Lightweight foam, coated with something sturdy (even paper mache), with detailing of hardening clay or Apoxie Sculpt.
 
Because I want highly durable horns that are also lightweight. I don't make costumes just for the look. I put the same effort in to my recreations as I do my historic and that means the most suitable materials for each project.

I'll only be scanning a sculpt not molding and casting, as I wrote I can't really do any of that any more. But blay is something my hands can still work with. And if I can get a good scan it's actually possible to then tweak any imperfections easily.
 
Thank you :) I'm trying to do a vlog for #whyimake and #weekofmaking and it's things like how this gown is constructed a big old statement to Stephan :) The bias is a huge deal in a world where either things are robes and barely held in place (Maleficent's natural looks) or in the world of Stephan where everything is rigid. Bias is a very complicated method of fitting and requires extreme care.
So now gown is a statement of power, and of taking what the court is familiar with (dark with rippled textures- Stephans robes in particular have this pattern) and making it her own. She has lived cut off deliberately, and literally, and so that is incredibly powerful. Wearing the paraphernalia of those who hate and fear you in a way that makes you incredibly intimidating.
I know the designer knew all this, bias is kept for Maleficent, even if we get some flow and softness in Aurora's garments.

Anyway, i finally worked out how to make the resculpt much faster! I have my rigid horns and I have friendly plastic. I think I can take a partial cast of my horns, if I make a frame over the top, I can use that as a guide for sculpting.
I'm working on a set of Draenei horns now and the clay is staying nice and self supportive in this cold (winter here in NZ.) so I can use my second head cast to sculpt on. And then as I'm helping Auckland Libraries with a series of workshops I should be able to get them scanned and then I can print them off :)

I am not kidding that ABS is incredible and will be the perfect option for this. If I need to cut the model up for ease of printing I can. It just takes an acetone wash to reassemble parts. Also the acetone wash makes everything glossy which is also going to be ideal :) And I can make a skin thick enough to be able to self support but infill at say 25% so that the print is also stable and so I don't have to back fill later :)

I may be able to use the friendly plastic as the actual sculpt, with a skin of clay too. I have but one crockpot. But I do have a perspex jug and a heatgun....
 
27950154922_53e22d0746_o.jpg 27998052936_aa22359f81_o.jpg 27749069240_b65d22d48a_o.jpg

I did use the Polymorph pellets :) I really like them for prototyping but because the surface melts, it doesn't just soften, I really am not likely to use it for any end product. But I managed to make a really nice thin and light frame to build my new set of horns on!

Long story short- I was doing well in Sketchup, but I think I'm going to have even better luck with sculpting in clay and casting. I'm not sure what I'm going to cast in as I really can't use any resins!

So I'm hoping I can do some sort of trade with scanning- there are many 3D printers here but very very few scanners. In fact for anything close to what I need in terms of detail I'll have to go to a pro, or travel! Travel with clay... hmm....
 
27482744714_a152571a7b.jpg

It's not been totally easy but this is working :)

I've also been given a head's up about an app that coverts multiple photos into a 3D model, sooo, I should be able to do this :)
 
Still working on these! In fact I transferred the horns to my better headcast today and evened them out. They are technically too long, I keep being influenced by the dolls.

I just updated the reference thread created to share what I have been used: http://www.therpf.com/showthread.php?t=225201

30077806791_d1569812ae.jpg
29533516483_c79c66de14.jpg
29533514483_a51ca885d6.jpg


So they are slightly longer, but I also need to even out the back a bit.

I found a perfect zip to install in the back of the dress too, and the dress is hanging in my costume wardrobe as I will have to get used to the weight of the gown hanging up!

The 3D software is still sitting unextracted, but my camera is charging and it may be possible to get some decent shots. It requires a static measure in each shot which just doesn't seem possible in something I want full globe views of. But we shall see! If I'm lucky I may be able to get to the lab at a local university and they should have a hnad held scanner. I can possibly get my hands scanned as well as I desperately need new wrist splints that can be worn and sweated in and allow me to wash my hands without having to take them off.

Yes. I may just try and see if I can get info for this weekend.
 
malhornsmodel.png

malhornsmodel2.png


!!! So I was not sure this would work, I had major fail getting any of the apps to install and convert but.

My wish to print them as lightweight as possible is going to be a reality!
 
I have been using @Autodesk @AutodeskReMake for a while. Just the free version while I practice how to photograph my models. I think I finally cracked it, and it’s almost certainly going to offer great results once I pay for the subscription and can send 250 photos not just 50


So my very first test.

I can’t find my photos but basically I started with the head cast a little way from my far workroom corner and took photos with it stationary.


Looking at the model put out through different angles:

Screenshot 2017-04-02 07.06.51.pngScreenshot 2017-04-02 07.07.04.pngScreenshot 2017-04-02 07.07.10.pngScreenshot 2017-04-02 07.07.30.png

So here you can see the rest of the room was partially captured but the sculpt is well defined.

Screenshot 2017-04-02 07.08.09.pngScreenshot 2017-04-02 07.08.24.png

Isolating the sculpt and it’s even captured all the clay shavings! Just a few lumps in the horns but otherwise I’m impressed.

However I was not really able to get close enough in all angles around my sculpt to get decent shots of the underside of the horns.


So I watched a few more tutorials and a few suggested rotating the object rather than standing up and lying down to get angles otherwise difficult.

Screenshot 2017-04-02 07.23.15.pngScreenshot 2017-04-02 07.23.22.png

This was in the same place as before. The doorhandle looks mildly terrifying…

Screenshot 2017-04-02 07.26.25.pngScreenshot 2017-04-02 07.26.33.png

Still on the same stand and this time against a wall in better light. Well I have bricks!

Screenshot 2017-04-02 07.24.41.pngScreenshot 2017-04-02 07.24.28.png

So I painted the horns pink! And put them on a tall stand to really isolate them. Again the horns disappear and there is a great view of the wall.


Okay so obviously this sculpt needs to be static not moved around. I realised the back deck is often protected from harsh sunlight but offers good light bouncing from many surfaces. So to the deck with my pink horns on a spike and finally got this:

Screenshot 2017-04-02 07.08.48.pngScreenshot 2017-04-02 07.09.10.png

Lots of background but the horns are easy to isolate.

Screenshot 2017-04-02 07.10.20.pngScreenshot 2017-04-02 07.10.15.pngScreenshot 2017-04-02 07.11.14.png

So finally some of the ridge detail is captured! But still quite lumpy.


Each model used the 50 photo limit. I do think with 250 photos I’ll be able to get all the detail needed.


So for a sculpt like this, of complexity of line:

Do make sure the model is static. Do not rotate it for different angles, move yourself around instead.

Get it at a height where you can get images from underneath as well as on top and all around (for me this is about knee to waist high)

Get some photos with the full area around you as that will help isolate the model and put it in context.

Get some mid distance images.
 

Attachments

  • Screenshot 2017-04-02 07.24.55.png
    Screenshot 2017-04-02 07.24.55.png
    195.4 KB · Views: 98
I managed to get a one month subscription to Autodesk Remake (not easy with geo-locking and my country not being specified, and then I wasn’t sure where in the app to put my code (hint- cog-> welcome screen.) but so worth it! I’ll do this again later in the year as I have so much clay and now have a good idea of what the scan will capture.

With 186 photos:

malhires3.JPG malhires2.JPG malhires.JPG

But this still is a bit of a learning curve so I decided to grab some acetone and ABS filament now that it is widely available here and much cheaper!

1491804762.jpg 1491863201.jpg 1491874868.jpg
https://www.instagram.com/p/BSuLee6Dzsl/ (video of painting)
Latex from #barnes, abs filament from Jaycar, and acetone from Mitre10. Dremel used to chop abs into short easily dissolved pieces. I’ve done this with plain styrene but this is a little different. Also the 3mm abs is the same size as for the 3doodler, now to try and straighten the filament to work with it !
This starts off really punky fealing but overnight it settles into a nice clean smooth thin surface. I just tuned the sculpt over and painted the underside today :) I will have to dremel along the ridge and directly under to be able to peel them off.
Oh yes, I have a 3Doodler. It is very simple to use and is easy to maintain. But it is for freehand and does of course deposit heavily into curves. But I think the ribbon nozzle will get me the texture I want and I know my way around a dremel. And acetone.

I thought I'd have to use blender to tidy my digitised horns but I did find the shortcuts to delete selections (and inverted selections) in ReMake and then also got the onj into Sculptris. Okay not bad for a couple of hours. But I can't get brushes to play nicely so I'll have to add the horn details as a mix of brush, crevice, pinch. Luckily I can to most of it in symmetry then turn it off and do a few tweaks to make each side individual.
sculptris2.JPGsculptis4.JPGscullptris1.JPGsculptris3.JPG
I may wind up cutting these off and scanning my head cast then popping them on that. But for right now I just need to use something that matches what I am already familiar with on my mouse and keyboard :)

I am also watching a few printers with an eye to actually buying something reasonably priced. So far I have really had drummed in:
Don't buy a DIY kit with acrylic rods, get metal also these are going to take ages to set up and also require wiring.
Levelling is going to be a nightmare no matter what I get as it is to get the nozzles and plate leveled not to geography.
They are noisy and smelly and will still take a long time to print.

I can work around print area, plates, but these are the points that need primary attention.
 
This thread is more than 7 years old.

Your message may be considered spam for the following reasons:

  1. This thread hasn't been active in some time. A new post in this thread might not contribute constructively to this discussion after so long.
If you wish to reply despite these issues, check the box below before replying.
Be aware that malicious compliance may result in more severe penalties.
Back
Top