Arvey Models 1/350th scale EDF (Space Battleship Yamato) warships

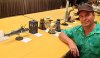
After highlighting the model's panel lines, I went ahead and clear-coated the beasty with Testor's flat lacquer. I plan to add some more detail to it, however, this is a good stopping point for the Arvey model's website. It looks somewhat like the version seen in 'The Comet Empire. Here's some of the pictures that I sent to Arvey.
arvey1.jpg arvey2.jpg arvey3.jpg arvey16.jpg
EDF Lexington
 
Last edited:
Great builds!

I think part of the reason folks aren't going "OH WOW CRAZY AWESOME!!" may be the lack of anything in most of the pictures to convey a sense of scale? Not that it matters a whole lot, since tiny builds in high detail are just as impressive as large builds with high detail.

I'm enjoying your thread. Have a small EDF fleet myself that I began in 1986. Haven't added anything recently, but the new Bandai models are tempting.
 
Thanks JediG60racer, I'll agree that I've dropped the ball on the scale issue...something like that was a plotline in an episode of Gerry Andersen's UFO. So here's a couple of shots in it's current parking space with the Bandai model, a 12" Eagle, and a 5" Imperial Dalek. I added a dollar bill in the second shot.
lexsize1.JPG lexsize.jpg
I highly recommend the new Bandai kits, especially since each offering has some added extras. Check with Hobbylink Japan or a stateside retailer that sells new Yamato kits: http://www.gundamplanet.com/model-kits/mechanic-models.html?p=1
Yeah, I know, they are Gundam first...what can I say. Check out the 1/1000 Pormelia Class Astro Assault Carrier.
EDF Lexington
 
Last edited:
I'm afraid not... since it is SOLID resin. However, I'm happy with the way the lighting in the hangar bay worked out. As for the turrets, the original plans have you glue them into place. I can swivel mine... and that works for me. I might think about fancier stuff after I get my 1/350 scale S.B.B. Yamato built. And yes, it is large... but not too wide.
 
Today is Modelpalooza in Orlando. This is an IMPS event and this is my first show for models. As I mentioned on my 'Doctor Who Stuff' thread...I took my Arvey Models Koenigsberg. Transporting this ship was a spooky proposition. A resin kit with photo-etched antennas all over. Sure enough, I broke of an antenna while unpacking the box. Fortunately, I had drilled out the mounts so I was able to stick the broken part into place. We'll see what happens tomorrow.
modelshow.jpeg
 

Attachments

  • exterminators.jpg
    exterminators.jpg
    225.2 KB · Views: 82
Last edited:
Okay, some last words about the Koenigberg's performance at Modelpalooza 2013. Since it seems that a lot of the sci-fi judging sheets were lost in the club's computer, I don't have a judges sheet to go on. However, my chat with the judge did point to the fact that some of the fine cast details of the model needed some work. Mind you, I attended on a whim and pulled six of my models that I thought would be different. My ship did made the Orlando IPMS forum...here's the address: Modelpalooza 2013 Photos by drackstein | Photobucket
Coming soon: EDF Gearing and EDF Airone...They are a lot smaller than EDF Lexington.
 
Well folks, after making a nuisance of myself, Jon at AMP got the Lexington photos on his site. Not being a mindreader, I was completely unaware that this is the busy time of the year for them (and boy is he busy) so, I really appreciate him posting the pics. Here's the page: Space Carrier Lexington Kit #3-019
Thanks Jon.
 
Okay, I'm back. Since we last talked, I've started both EDF Gearing and EDF Airone. Both when finished are 12.5" long and after closer examination the corrections that I'll have to do to the Gearing will be almost exactly the same one I had to do to the Koenigsberg... hope you enjoy the builds.
First, some examinations of the Gearing. Though the detail is very nice the "timing" of some parts of the body should be addressed. There are also some casting issue with what looks like spillage or resin bubbles that may have manifested from early demolding.
Gearing.jpg Gearing1.jpg Gearing2.jpg Gearing3.jpg Gearing4.jpg
 
Referring to the box above...the first picture is the Arvey Gearing kit with the Yamato mini-kit (for color scheme) The second picture shows the bad timing of the rear fins (see the top one). The third shows the resin 'ballons' that are in the command section grills. The forth (blurry) shows excess resin in the tachyon scoop. And finally, the turbine section (in front of the rear unit) has some casting issues and will be converted to be like the Bandai models (see following photo).
edfred2.JPG
 
Last edited:
Now for the heavy work... with my trusty bandsaw , I cut the rear and the turbine apart. I would then cut the center section from the front of the body. On the Koenignberg, it was just in front of the body ring.
Gearing5.JPG Gearing6.jpg
I then set off with the task of facing true the cut areas and putting in a center bore, which is for an aluminum mandrill.
Gearing7.JPG Gearing8.jpg
 
Last edited:
I'm afraid I'm having issues with the site again...I did contact the front office this time. The castings are not that bad (except for the grill flaws). The Gearing kit seems to have had little pellets mixed in giving it a spotted look. Keep watching this space, Cosmic_x and I'll get this bad-boy to look good.
 
Facing rear parts is easy...just use a lathe, however, the rear of the front section is a little more difficult. The long taper and getting around the remaining superstructure is problematic. Time to break out the company's spacer chuck for the mill. To get the part to set in straight, I turned a line-up ring for the front of the nose. Once chucked up, I used an insert facing tool. I marked the face with a Sharpee to mark the face to be machined (make all of the black disappear and your done).
Gearing9.jpgGeraing14.jpg Gearing10.jpg Gearing11.jpg Gearing12.jpg
 
Last edited:
Gearing14.jpg Gearing15.jpg Gearing16.jpg Gearing18.jpg
Okay, time for catching up...I had made the aluminum mandrel and fitted it into the center section. I then turned a replacement for the tubine out of grey pvc. Using a dividing head, I recut the turret mount on the center section and recut the surface details on the tail cone.
 
The tail cone required some truing up in the lathe (It was egg shaped). Now I can go the other way by replacing the fins and the properly timed surface details. Here's a plug for my man Chi who runs the local Anime shop.
Gearing20.jpg Gearing19.jpg
 
Last edited:
I cut the front section in two about 5" back. I could then cut off and rework the surface details ( including having to relocate the chin turret mount).
I cut out the turret mount with an end mill, then filled the hole with a styrene plug. After shaping with a file, I recut the new mount and replaced the mount pad with a proper plastic plug.
gearing25.JPG
Gearing21.jpg Gearing22.jpg Gearing23.jpg Gearing24.jpg
 
Last edited:

Your message may be considered spam for the following reasons:

If you wish to reply despite these issues, check the box below before replying.
Be aware that malicious compliance may result in more severe penalties.
Back
Top