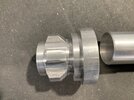
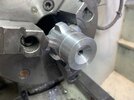
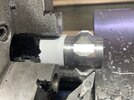
Luke ROTJ V2 lightsaber

Monday – back in the workshop. :cry:

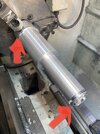
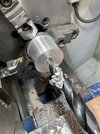
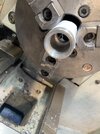
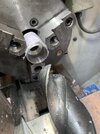
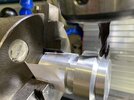
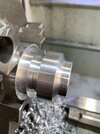
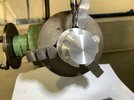
006_Emitter_9mm_through_hole.JPG Starting with the 9mm through hole.
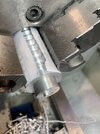
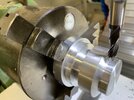
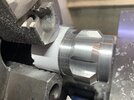
007_Emitter_21mm_hole_for_M24x1.5mm_screw_thread.JPG 21mm hole for a M24x1.5 screw thread.
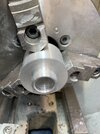
008_deburring.JPG Countersink for the thread.
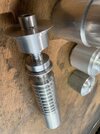
009_Emitter_half_way.JPG Thread done.
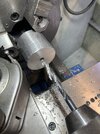
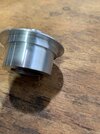
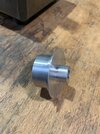
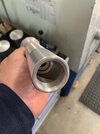
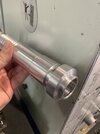
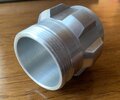
011_Emitter_done.JPG012_Emitter_done..JPG Emitter done.

Some time left until the end of the workday.

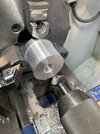
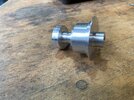
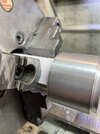
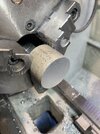
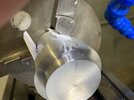
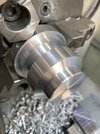
013_beginning_bronze_part_but_made_from_aluminum.JPG Beginning the "bronze" part, but in aluminum for now. This recess is for later clamping from the other end.In the last step, I'm going to shorten the recess, then thread it with the counterpart for the thread of the emitter.
015_bronze_part_alu.JPG This is how I left it for today.
 
Tuesday in the workshop

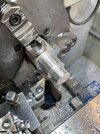
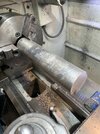
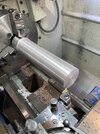
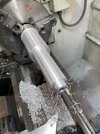
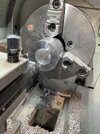
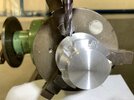
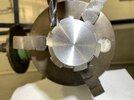
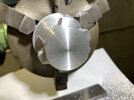
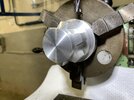
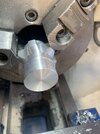
Look; is that a lightsaber sticking out my lathe chuck? :D

Beware, noisy but useless audio!


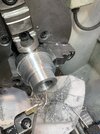
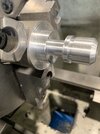
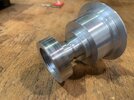
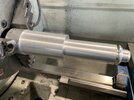
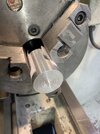
017_finished_part_two.JPG Finished part two, with another thread for part three.
018_finished_part_two.JPG019_finished_part_two.JPG

I could have saved sooo much time! :lol:
020_I_could_have_saved_so_much_time.JPG


With one hour left, I started with the making of part three. This is becoming the second recessed part plus the grooved grip, ending at the bigger diameter part where the Graflex clamp is.
021_beginning_part_three.JPG022_plained_surfaces_and_another_center_bore.JPG023_the_ongoing_9mm_bore_and_a_recess_for_the_next_M24_thread.JPG024_calling_it_a_day.JPG


I know my progress is rather slow, but my excuse is that I'm a beginner. :p
 
Wednesday

Wednesday, I messed up a bit, and I didn't feel very much like posting on the forum afterwards.
But I do now. :)

025_messed_up.jpg I made a mistake while cutting the thread, and the lathe is powerful and unyielding. So I had to sacrifice some length of the alu rod, and started over again. Fortunately, the diameter of the clamped bit was still way bigger than I needed it, so I was able to smooth it, and use it for clamping again.
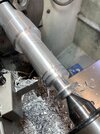
026_beginning the grooves.JPG This time, the threading went well, and I made the disc and the thin bit, and then I began cutting the grooves. Since I didn't have a cutter with the right angle, I had to cut one half of each groove, then turn the tool sled to cut the other half of each groove.
Then, I realized that something about my calculated measurements for the groove depths wasn't right. They didn't turn out neither deep enough, nor wide enough. The distance from ridge to ridge was looking good, though.
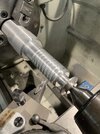
027_one_angle_per_groove_cut.JPG


Thursday

This morning, felt confident again, after the mess-up and the miscalculated grooves from yesterday. Right after waking up, the topic was back in my head, and I decided to mark all the ridges by scratching on both sides of each of them, and to then cut the angles to meet the marks.
Luckily, this time my plan worked.
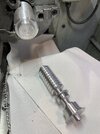
028_groovy.JPG

029_reclamped_for_bore_and_thread.JPG Then, I had to turn the part around, and reclamp it, wich was a bit nerve-racking, because the clamps have grooves, too.
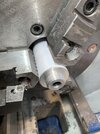
030_bore_and_thread_done.JPG But it went well, and I was able to drill the bore, and to cut the thread.
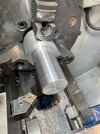
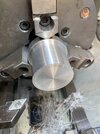
031_diameter_and_center_bore_for_Graflex_part.JPG Next was the Graflex area of the hilt. I cut it down to a diameter a bit larger than the diameter of the grooved part, planed the front and drilled a center bore.
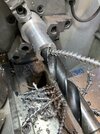
032_bore_for_inner_thread.JPG Then I drilled the big bore for another inner thread.
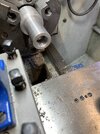
033_inner_thread_done.JPG.JPG The last inner thread, I had drilled using a threat cutting drill, but today I cut my first inner thread using a lathe thread tool.
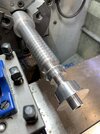
034_thread_functioning.JPG It worked, and I was treated another awesome moment when I assembled the saber as far as never before.:love:

I'm quite happy with the result so far. Hopefully, the rest of the material will be long enough for the last two parts (remember, I need a bit more length for clamping, and for threads).
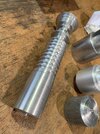
035_this_was_my_Thursday.JPG036_so_far_so_good.JPG
 
Last edited:
Friday

Fridays are shorter in our workshop, but I stayed a little bit longer anyway, to get the second last part far enough to clamp it out and screw it onto the rest of the saber.
037_the_Graflex_piece_that_I_made_yesterday,_reclamped.JPG The Graflex part from yesterday. I had to plane the end face, then center drill, pre-drill, drill, smoothen the inside and turn a thread.

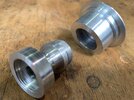
038_drilled,_and_turned_smooth_inside,_and_another_thread.JPG039_put_onto_the_saber.JPG Now it's a tube with two inner threads, hopefully with enough room for whatever I'm going to but inside there.

040_leftover_from_yesterday,_drilled_and_threaded.JPG The rest of the material from yesterday. I turned a recess, drilled a bore, and turned a thread...
041_screwed_to_the_clamped_Graflex_part.JPG ... so that I could screw it onto the Graflex tube, wich I then clamped into the lathe. I strongly hoped that the forces applied while turning were not going to be too strong for the aluminum thread, and I turned the diameter down slower than usually, to minimize those forces.
After turning the chamfer, the thread was so tight that I needed a rubber coated glove to loosen it, but it held up after all.
I reclamped the new piece by itself, and chamfered the other end.

042_this_weeks_work.jpg
This week's work!
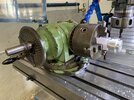
Next week, I'm going for the pommel. That will be my first time using the dividing head on the mill, and it will be an opportunity to mill an exactly centered opening into the Graflex tube.
After that, I'll look into how to manufacture the clamp. And not to forget the D ring. :)
 
It's never too late. :)
I've learnt multimedia, but now I'm doing something completely different by becoming a machinist. I never thought that a vocational training could be so satisfying. (y)
I appreciate that...I've been in Retail management for 25 years. I would love to learn machining but i literally have no tools, no skills but what i do have is something a guy asked me to do for him at my church...sell a Jacobs Spindle Lathe Chuck with a bunch of Collets..lol, talk about a sign!!!
 
Monday

Finally, the weekend is over, and I can go on working on the saber. :D

043_hollowing_the_last_tube.JPG At first, I drilled the back wall of the last tube part away.

044_beginning_the_pommel.JPG045_thread_for_the_pommel.JPG Then, I clamped another aluminum piece into the lathe chuck, and I started with the hollow inside of the pommel.

046_thread_for_the_pommel.JPG Since it was Monday, and I seemed to be a bit overexcited, I made the hollow of the last tube a bit bigger than needed. Good for more space inside the saber, bad for a thread. There is a M30 thread, or a M36. My bore was too big for a M30, but the pommel would be too small in diameter for M36, so I made a thread with fantasy measurements, and luckily, it worked. xD

047_ring_for_pommel_prongs.JPG The thick ring is supposed to become the six prong thingies. I accidentally went wrong somewhere and made the last diameter too small.....

Tuesday

......so I decided to turn it even smaller, thread it, and then make a threaded end cap with the right diameter.
048_new_piece_for_end_cap.JPG050_pommel_piece_with_end_cap_on_deviding_head_on_the_mill.JPG New piece for the end cap, last tube with pommel and end cap on the dividing head.

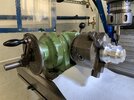
051_first_mill_cut_on_deviding_head.JPG First cut on the mill, using the dividing head to get six evenly distributed prongs.

052_grmpf.JPG ... aaaand messed up again. This could probably be repaired, but since the pommel was sitting to loose on the thread inside the last tube piece in order to be milled properly, I decided to just mark the six positions, using the dividing head and the mill, and to proceed with hand filing.

053_using_a_file_instead.jpg I also damaged the last tube on the mill.
I'm thinking about making an all new pommel, with a longer leftover piece for clamping into the dividing head.

I still had to clean the lathe and the mill, and so the working time was already over for today. Tuesday leaves me with an unsatisfyingly unfinished piece at the end of my saber. But tomorrow, there'll be another day.
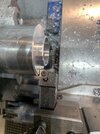
054_saber_so_far.jpg
 
Wednesday

After yesterday's mess with the pommel, I decided to start over, instead of filing it all (with uncertain outcome).

055_starting_over_with_pommel.JPG056_saber_end_recess.JPG057_prongs_ring.JPG I clamped the last of my aluminum pieces, planed the front face, and turned the recess for the saber's bottom end and the ring for the prongs. I left the ring with a greater diameter and steep slopes, to see how it looks after cutting. It's easier to later cut more material than to add some. ;)

058_dividing_head.JPG059_prongs_first_cut.JPG Then, I clamped the piece into the dividing head on the mill. This time, there was no thread that might loosen, so the first cut went well.

060_six_cuts_done.JPG After six slots, it looked quite strange, but I knew I had to taper all the slots in order to determine if the look of the widths and angles seems alright.

Cutting the taper (the second pass on one taper).


061_saw_teeth.JPG063_six_slopes.JPG Looking like a circular saw now. :D

065_tapering_done.JPG066_tapering_done.JPG After cutting the second slope of each prong, the overall impression was quite good already.


Reclamping the piece into the lathe. I had to make sure that it was clamped as straight as possible, so I used the dial gauge that is usually used for aligning the vice on the mill.

You may agree with me that the front and back slopes of the prongs are too steep, and that the top faces are too long (mutually depending).

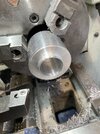
068_Wednesday_is_over.jpg So I turned the front slopes to a flatter angle... and then time was over for today. :)
 
Last edited:
Thursday

069_reclamped_and_turned_smaller.JPG070_predrilled.JPG First thing in the morning, I wanted to taper the back facing slopes of the prongs more. I couldn't reach those slopes with the machining tool, because the chuck got in the way. So I turned the diameter of the clamped end much smaller (to thread size), the chuck closed narrower, and then it worked.
071_both_slopes_flatter_now.JPG Reclamped again, this time, I could reach the slope with the tooltip. The prongs are looking funny again. ^^

072_prong-height_reduced.JPG I turned their diameter down until their proportions looked right to me.

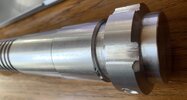
073_turned_inside_and_threaded.jpg Finished pommel.

This is it for now.
074_saber_body_finished.jpg


Tomorrow, there will be no workshop time, because we have theory lessons. Next week, my colleague and me, we are going to train some more milling. I don't know when I'll be able to make the remaining details and a paint job, so this is it from me for now.

I hope you found it interesting. :)
 
The piece will always hold a special place in your heart no matter if you’re able to go back in and tweak it or not. As long as you had fun and feel accomplished. (You should!)
Thank you! It does! I’m running around showing the piece to everyone now – plus, I’ve learnt more than I might have if I had done only the normal training lessons. I’m the only apprentice in the shop now who can turn threads on the lathe. :D
 
I know that changing gears is possible on our lathes here, but I haven’t done it yet.
There are three different tables for normal feed, metric and imperial threads. We only have bits for 1.5mm thread pitch. You turn the lever that synchronises the feed with the gearbox, choose the feed for the 1.5 pitch from the metric table, lowest rpm (~60 on our machines), look up the measurements for metric threads in the table book, and you can cut any metric thread size that you want.

Is it harder on older lathes, or only for special thread sizes?
 
Is it harder on older lathes, or only for special thread sizes?

I envy lathes with in-built options for threading. I have a bench lathe and to thread on that means hot-swapping different gears to get the thread pitch you want. Considering most of them are plastic, and I've replaced mine with steel, having to replace every gear and changing it back to thread and then cut is such a pain in the ass that I've never bothered learning to thread like that. I'd much rather have a machine with presets that I can cut any thread I want by just setting the machine. It's gonna have to be long wait so, until then, I thread using dies.
 
I envy lathes with in-built options for threading. I have a bench lathe and to thread on that means hot-swapping different gears to get the thread pitch you want. Considering most of them are plastic, and I've replaced mine with steel, having to replace every gear and changing it back to thread and then cut is such a pain in the ass that I've never bothered learning to thread like that. I'd much rather have a machine with presets that I can cut any thread I want by just setting the machine. It's gonna have to be long wait so, until then, I thread using dies.
I have a bench top LMS and I want a larger lathe and that’s one of my main reasons.
Geri I’m curious what lathe have you been using?
 
I’ll be back in the workshop in a few hours, then I can look what its designation is. I’m pretty sure that it’s a German model, though. :)
 
Geri I’m curious what lathe have you been using?
I've taken some photos for you. :)
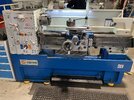
Drehmaschine.JPG The Knuth V-Turn 410/1000
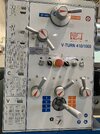
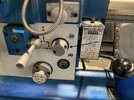
Drehmaschine_Tabellen.JPG Feed tables. I used "LCS6Y" all the time, for threads with a thread pitch of 1.5 mm.
Drehmaschine_Gewindeschneiden.JPG This lever is detached, so that nobody is engaging it accidentally. You tether the feed thread shaft to the drive shaft with it, for thread cutting.
Edit: I just realized that I didn't photograph the display panel on top of the power unit, but you can see everything here:
Machine on Knuth.com
 
Last edited:
I've taken some photos for you. :)
View attachment 1728796 The Knuth V-Turn 410/1000
View attachment 1728797 Feed tables. I used "LCS6Y" all the time, for threads with a thread pitch of 1.5 mm.
View attachment 1728798 This lever is detached, so that nobody is engaging it accidentally. You tether the feed thread shaft to the drive shaft with it, for thread cutting.

Edit: I just realized that I didn't photograph the display panel on top of the power unit, but you can see everything here:
Machine on Knuth.com
Thanks for sharing, sweet setup.
 

Your message may be considered spam for the following reasons:

If you wish to reply despite these issues, check the box below before replying.
Be aware that malicious compliance may result in more severe penalties.
Back
Top