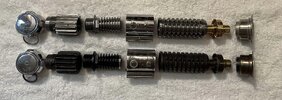
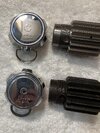
Limited Run DaveP's Obi Static Parts Run 2022/23 (Sign-Up Closed)

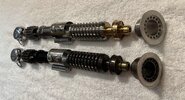
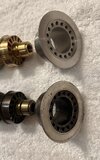
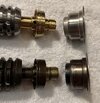
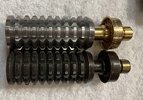
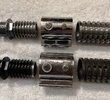
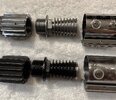
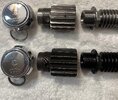
Just got my pommel/booster/spacer assembly in the mail today and got right to work on "seasoning" it. It looks, feels, and smells incredible. Just got it in after some rusting-n-dusting for these pics:

20230724_171101.jpg
20230724_171003.jpg
20230724_170923.jpg
20230724_170843.jpg


The top half of my Hero Kenobi is all Russrep; steel and brass. They're not as accurate as Roman's current batches or DaveP's, but they hold great sentimental value to me. This hilt was the first that got me into more "serious" collecting when I started making enough disposable income and, at the time, I had to scrounge and hunt these parts down. Russ was fading out of making these pieces, Roman was semi-retired, and all that was left were disparate, older parts on the second hand market. Parts like the clamp here (which I bought from another board member who weathered directly onto the surface) is the older, slightly smaller sized version Roman offered years ago based on the clamp he had at the time.

I've been updating some pieces on this over time with more accurate pieces, and my own mods, but my aim is not to get super-accurate replication with this hilt; it carries a great deal more meaning to me. DaveP's parts scratched the itch that I've had for a while, wanting to replace my aluminium booster and a chromed-steel pommel (looked and felt great but the details weren't there), but as this was the inaugural replica of my more "serious" steps into this hobby, I want to keep it as a reminder of where I started out and where I am now.

Russrep's grenades had a fat bottom ring, something when I first started I figured I could never remedy. Well, today I did. Fixed the bottom so it's more accurate to size and would accept Dave's booster spacer. I also remedied the washer to sit flush to the clamp on the bottom transistor (inaccurate Motorola part, but I keep it for the reasons I've laid out), and finally built the whole thing to sit on a 5/16 threaded rod rather than relying on the strengths of glue alone (though I did use a few drops of CA and epoxy) to help secure everything. A carriage bolt seats in the pommel, runs up through the booster and spacer, where a joiner connects that and a threaded rod seated in the grenade.

Like my PKD build; it's not accurate, but it's mine. It is a catalog of my growth throughout the years. It doesn't get any clearer when it's laid next to my stunt hilts that the original piece spawned.

20230724_165154.jpg


Thank you, Dave, for these parts.
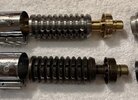
 
Good morning! My hilt arrived yesterday while I was at work, so I opened it up quickly last night.
20230724_232826.jpg

Amazing! This is a fantastic piece of workmanship. Dave, your design and attention to detail is second to none.
I'm not an expert on Obi Wan sabers, however, so I do have an important question. How do I take it apart?
Thanks again, Dave, and have a great holiday.
 
Last edited:
Good morning! My hilt arrived yesterday while I was at work, so I opened it up quickly last night.
View attachment 1722626
Amazing! This is a fantastic piece of workmanship. Dave, your design and attention to detail is second to none.
I'm not an expert on Obi Wan sabers, however, so I do have an important question. How do I take it apart?
Thanks again, Dave.
unscrew the emitter and it'll fall apart.
 
**UPDATE**

Hi everyone. As promised, here’s another update before weekend, focussing on the progress I’ve made with weathering commissions.

ALL orders which did not include Weathering commissions are now finished and on their way to their new homes! (y)

I took this image of one of the few fully machine finished orders as I don’t think I’ve posted one previously and not sure I’ll see another one any time soon:

View attachment 1721418

It’s a huge relief to finally be shipping complete orders out to people! (If a little nerve racking too!)

It’s been an incredibly long and difficult run, so I can’t thank you enough for the patience and understanding that’s been shown by everyone who has taken part.

Thanks so much to everyone commenting for their kind words too. I really do appreciate it! :)

It seemed as though the universe was against this one at times, throwing up hurdle after hurdle. But every problem had a solution in the end, and to have finally gotten to the stage where we’ve gone from reference, to drawing board, to the complete physical replica is a real source of pride (and relief!).

I could not have done it without your support! So thank you all!

This particular project was more than just a single replica. It was more like working on five/six replicas simultaneously, with more than twenty individual components. All with their own unique problems to find solutions to.

As you’ll know, I strive for absolute perfection! As frustrating as it is though, “there is always room for improvement”. Please do keep this in mind, and try to judge the success of this project as a whole.

I really do agonise over EVERY single detail, but I am beholden to the manufacturers to a certain extent, and during the course of production, problems can arise that require solutions/compromises.

There are some things which I would request to be done a little differently next time around. Nothing that is actually visible on the final product. There are certain processes though that I feel could have been done differently.

That said, I am incredibly proud of the overall final result. I always set out to make these replicas out of a desire to own one for myself and I can safely say that this is now my prise possession:

View attachment 1721415

I hope that everyone receiving them is happy with the final product too and that they enjoy them as much as I’ve enjoyed working on them. As challenging as it has been at times, It’s been an honour and a pleasure to work on!

Batch One Commissions are well underway, and now that the un-weathered orders are complete, this first batch of commissions should be finished very soon.

The Process for rusting the steel is working well, and all grenades are finished and ready for install:

View attachment 1721419

View attachment 1721420

Emitters are all done and ready for installing too. These are particularly time consuming so it’s good to have these finished and ready to go. (y)

View attachment 1721421
View attachment 1721422
View attachment 1721423

Other elements are very much in progress but not at the “sharing stage”:

  • Boosters are rusted but awaiting their final blacking.
  • Clamps are drilled and ready to receive their damage/foil.
  • Clamp foil is cut and weeded ready for application.
  • Transistors have had decals applied.

Up until now, I’ve been working on un-weathered orders along side Batch one commission work. Now that un-weathered hilts have shipped, the remaining work on batch one should progress quickly.

I’ll then work on Batch two and Three simultaneously to a certain extent (where it makes sense to do so). For example, I’ll plan for chemical days, where steel needs to be blacked, and try to get things like this done together.

Suffice to say, I will do my upmost to get all remaining orders out to everyone as soon as I can (but as discussed previously, without rushing).

Please don’t worry about me rushing any of this through. I really do agonise over calling anything “done”, so this is certainly nothing to worry about!

Just a small and slightly inconvenient announcement regarding next week... The School summer holidays have crept up on me (Starting Monday), and I have a family trip booked for next week. So unfortunately, work will have to pause until next Friday, when I will pick things back up where they’ve been left off and will be back at full steam ahead!

I would NOT choose to take a break at this particular moment, with this amount of work outstanding. I don’t plan these things though (the wife does!), and this has been booked for some time now.

This run has been all-consuming this past year, and has been particularly intense this past few weeks.

Stepping back and taking a breath will actually be a good opportunity to recharge the batteries! I hope that this is ok with everyone. I’m looking forward to coming back, fully refreshed and in full weathering mode!

If you do have any questions or concerns, I'll try to respond to them as soon as I can.

Thanks again everyone!

All the best and MTFBWY,

Dave
These look amazing! I can’t wait to receive mine in the mail when that day comes!
Enjoy your vacation with the family, it’s much deserved!
 
**UPDATE**

Hi Everyone. please excuse this text only update... I would usually have taken the time to photograph where things are up to, but this week has been particularly busy! I just didn't have the time (or the thought) to break off from the task at hand to take the usual beauty shots.

Most of the finished parts are boxed up on shelves, as I only have the space to work on one part at a time. That, and the weather/lighting has been ghastly this week too. By this time next week though, ALL remaining tasks for Batch One of the fully weathered commissions will be complete, and I'll be sure to get some photos of everything when the time comes to begin assembling and packing everything. (y) The clamps are particularly time consuming, but Should all be finished by end of play Tuesday.

I've spent some time this morning amending my action plan for the rest of the run and have allocated all remaining tasks to very specific dates going forward. By doing this I have arrived at expected shipping dates for each batch! I hope that these are ok for everyone. Obviously everything is MUCH later than originally expected when this run was announced. Hopefully having an actual date will at least give you something to look forward to in the not too distant future! :)

Based on the work done so far for Batch one, these dates are very much achievable (without rushing!). Please rest assured that I give each and every part the attention it deserves, and would not send a completed hilt out unless I would be happy to swap it for my own personal example.

Batch One will be finished and ready to ship by this Friday (August 11th)

Batch Two will be finished and ready to ship by Friday (September 8th)

Batch Three will be finished and ready to ship by Friday (September 15th)


You might be wondering how/why there is only one week between batch two and three? This is because I will be working on the parts for both Batch Two and Batch Three simultaneously to a certain extent. The final week of of Batch Three will be mostly assembly and finishing touches.

I will try to make more of an effort to document what I'm doing from now on. This week has just been so full on that I was more focused on getting as far as I could before weekend. I'll drop some images of the finished clamps when they're done early next week. (y)

This update is really just to make you all aware of the above shipping dates.

I'm REALLY excited to start assembling all the fully weathered parts. It's going to be quite a sight having so many completed commissions lined up and ready to send out to their new homes!

Thanks again for all your support everyone!

All the best and MTFBWY,

Dave
 
**UPDATE**

Hello everyone.

As you might have gathered, I’m running slightly behind schedule unfortunately. :(

As I mentioned in my previous update, I had a set number of tasks which were allocated to specific days last week in order to get to a position where I could assemble the finished commissions and book batch one in for collection yesterday.

Unfortunately, I encountered a problem with the clamps early in the week which needed some extra attention.... This has pushed some of those tasks in to next week now unfortunately.

I had already applied the damage to the clamps and gone through the very long, laborious process of building up the rust. I was pretty happy with how they were looking, and Monday/Tuesday was allocated to cleaning up any loose rust or any water marks from the chrome, applying the foil, and then assembling…

PXL_20230808_124959199~2 copy.jpg


Well, when the time came to clean up the clamps ready for the next step, I found that in some (but not all) places, the rust was just sitting on the surface and rubbed off far too easily. Because we’ve sped up the process to such an extent, the bare metal that is underneath is still shiny and new.

I obviously couldn’t send them out like this, so I needed to think of a way to either keep the rust in place, or think of a better way to quickly and artificially age the steel.

I am not a fan of using clear coats. I certainly didn’t like the idea of clear coating the chrome, as I wouldn’t want it to lose its metallic sheen. I’m not sure that clear coating over rust would be advisable in any case.

After some thought, I did a couple of tests using the same chemicals that are being used to darken the grenades/boosters. This darkens the exposed steel, but has no affect on the chrome. So it’s ideal.

It has sufficiently darkened the steel to contrast it against the chrome (as seen in the reference images). It has retained some of the rust too in the areas where it had fully taken to the surface.


I’m now happy with the results and have worked my way through the rest of the batch.

PXL_20230811_153353736~2 copy.jpg


The same process was required for the levers obviously:

PXL_20230811_171450921~2 copy.jpg

PXL_20230811_130446305~2 copy.jpg


So… It’s with my sincere apologies that the dates I mentioned in my previous update will need to move slightly.

I did consider the possibility of booking in batch one to generate tracking numbers yesterday, and then dropping them off at a collection point when ready. I don’t want to get in to the habit of doing this though. I’d much rather get them finished, and then book them in if that’s ok. That way, when you receive your tracking, you’ll know that it is finished, packed, and actually on it’s way.

On the one hand it was a bad idea to set dates. I hate that I’ve built your hopes up and let you down. :( On the other hand though, it really has pushed me to get through a LOT of work this past week. (just not enough to keep to the dates I gave unfortunately!). Each day that the above-mentioned problem encroached in to another task, I found myself adjusting my plan to give myself more to do towards the end of the week. Eventually though, it became apparent that some things would have to be pushed in to the following week. There is only so much work that can fit in to a finite number of hours.

I just really wanted to give you all an idea of when you could expect your finished commissions. The dates that I gave were ambitious but at the time of setting them, they did appear to be achievable had I not encountered this issue with the clamps.

All of the clamps for batch one now have their foil applied and I’m just in the process of assembling them.

PXL_20230811_180133717~2 copy.jpg

PXL_20230811_182627110~2 copy.jpg


Transistors have had their decals applied and are ready to install too along with brass screws and bubble strips.

PXL_20230808_095254491~2 copy.jpg

PXL_20230811_153312222~2 copy.jpg


It’s my aim to have the clamps 100% finished over the weekend with transistors, brass screws and bubble strips in place.

So… Next week I’ll get on with the remaining items that should have been worked on this past week (Brass parts/Boosters/Assembly).

As tempting as it is to give you an adjusted completion date, I’ll just say that I’m working as fast as I can and will have things wrapped up as soon as possible!

Each individual task is taking longer than anticipated though on account of the numbers. This has been made apparent this week with the clamps.

Assembling the finished clamp parts has really brought home just how big of a task the assembly side of things is going to be once all of the parts are finished. I certainly don’t want to get in to the habit of repeatedly putting out dates, and then missing them!

For now, I’ll just do my best to catch up and will keep you all updated with my progress. (y)

Sorry again for any disappointment! It’s VERY important to me that after all this time and effort, these go out to you as perfect as I can possibly make them.

On that note, I’ll sign off for now and get on with the task at hand!

Please give me a shout if you have any questions or concerns and I'll do my best to get back to you as soon as I can.

All the best and MTFBWY!

Dave
 
**UPDATE**

Hello everyone.

As you might have gathered, I’m running slightly behind schedule unfortunately. :(

As I mentioned in my previous update, I had a set number of tasks which were allocated to specific days last week in order to get to a position where I could assemble the finished commissions and book batch one in for collection yesterday.

Unfortunately, I encountered a problem with the clamps early in the week which needed some extra attention.... This has pushed some of those tasks in to next week now unfortunately.

I had already applied the damage to the clamps and gone through the very long, laborious process of building up the rust. I was pretty happy with how they were looking, and Monday/Tuesday was allocated to cleaning up any loose rust or any water marks from the chrome, applying the foil, and then assembling…

View attachment 1728071

Well, when the time came to clean up the clamps ready for the next step, I found that in some (but not all) places, the rust was just sitting on the surface and rubbed off far too easily. Because we’ve sped up the process to such an extent, the bare metal that is underneath is still shiny and new.

I obviously couldn’t send them out like this, so I needed to think of a way to either keep the rust in place, or think of a better way to quickly and artificially age the steel.

I am not a fan of using clear coats. I certainly didn’t like the idea of clear coating the chrome, as I wouldn’t want it to lose its metallic sheen. I’m not sure that clear coating over rust would be advisable in any case.

After some thought, I did a couple of tests using the same chemicals that are being used to darken the grenades/boosters. This darkens the exposed steel, but has no affect on the chrome. So it’s ideal.

It has sufficiently darkened the steel to contrast it against the chrome (as seen in the reference images). It has retained some of the rust too in the areas where it had fully taken to the surface.


I’m now happy with the results and have worked my way through the rest of the batch.

View attachment 1728074

The same process was required for the levers obviously:

View attachment 1728075
View attachment 1728072


So… It’s with my sincere apologies that the dates I mentioned in my previous update will need to move slightly.

I did consider the possibility of booking in batch one to generate tracking numbers yesterday, and then dropping them off at a collection point when ready. I don’t want to get in to the habit of doing this though. I’d much rather get them finished, and then book them in if that’s ok. That way, when you receive your tracking, you’ll know that it is finished, packed, and actually on it’s way.

On the one hand it was a bad idea to set dates. I hate that I’ve built your hopes up and let you down. :( On the other hand though, it really has pushed me to get through a LOT of work this past week. (just not enough to keep to the dates I gave unfortunately!). Each day that the above-mentioned problem encroached in to another task, I found myself adjusting my plan to give myself more to do towards the end of the week. Eventually though, it became apparent that some things would have to be pushed in to the following week. There is only so much work that can fit in to a finite number of hours.

I just really wanted to give you all an idea of when you could expect your finished commissions. The dates that I gave were ambitious but at the time of setting them, they did appear to be achievable had I not encountered this issue with the clamps.

All of the clamps for batch one now have their foil applied and I’m just in the process of assembling them.

View attachment 1728076
View attachment 1728078

Transistors have had their decals applied and are ready to install too along with brass screws and bubble strips.

View attachment 1728070
View attachment 1728073

It’s my aim to have the clamps 100% finished over the weekend with transistors, brass screws and bubble strips in place.

So… Next week I’ll get on with the remaining items that should have been worked on this past week (Brass parts/Boosters/Assembly).

As tempting as it is to give you an adjusted completion date, I’ll just say that I’m working as fast as I can and will have things wrapped up as soon as possible!

Each individual task is taking longer than anticipated though on account of the numbers. This has been made apparent this week with the clamps.

Assembling the finished clamp parts has really brought home just how big of a task the assembly side of things is going to be once all of the parts are finished. I certainly don’t want to get in to the habit of repeatedly putting out dates, and then missing them!

For now, I’ll just do my best to catch up and will keep you all updated with my progress. (y)

Sorry again for any disappointment! It’s VERY important to me that after all this time and effort, these go out to you as perfect as I can possibly make them.

On that note, I’ll sign off for now and get on with the task at hand!

Please give me a shout if you have any questions or concerns and I'll do my best to get back to you as soon as I can.

All the best and MTFBWY!

Dave
After looking at the recolored pics on the first post, I think the method you arrived at for the clamps looks better. Your picture with red fragile rust looked a bit glaring to me, seems like the clamp on both the flash handle or the lightsaber itself would get worn from handling, similarly like the vintage grenades that have rust and pitting, but still tend to be black on the parts that have contact with hands.
 
WOW! You really knocked this one out of the park. Your attention to detail in design and your finishing skills are second to none. Especially on this scale, I'm amazed!
Anakin Starkiller you said it.
Dave is a tour-de-force
Incredible work Dave. The effort and detail go above and beyond in all aspects. You are a true artist and asset to the hobby.
Don’t sweat it Dave! You’re doing too much of a good job to apologize for missing a date by a small margin.

Most important = communication and you communicate every single step of progression and it is much appreciated.
Honestly dude, those clamps and levers look amazing this way too! I think it’s safe to say we all trust you to deliver a product that you are satisfied with, and we definitely understand how things beyond human control can pop up.
As already said. Don't be sorry. You are doing so a great job ensuring top quality. Take all the time you need. The finishing looks fantastic.
After looking at the recolored pics on the first post, I think the method you arrived at for the clamps looks better. Your picture with red fragile rust looked a bit glaring to me, seems like the clamp on both the flash handle or the lightsaber itself would get worn from handling, similarly like the vintage grenades that have rust and pitting, but still tend to be black on the parts that have contact with hands.
Thanks so much for your kind words everyone! I really appreciate your understanding and support! :love:

LUKE.gif
 
**UPDATE**

Hi everyone. Just wanted to get this update in before weekend this week as I'll be away for my daughter's birthday. Otherwise, I would have worked through.

It's been a very busy and productive week though.

Clamps are now 100% finished, with all greeblies/screws fixed in place.

CLAMPS.jpg


For the screws, the heads have been removed and they've been epoxied in place. This is to avoid the need to drill in to the grenade and allows for swapping out of replica/vintage parts.
GREEBS.jpg


I've done my best to make the clamps as identical as possible. Due to the nature of the process, there is obviously some degree of variation in the final results.

Here are some images of one of the completed clamps:

PXL_20230816_085941706 copy.jpg

PXL_20230816_090016687 copy.jpg

PXL_20230816_090029568 copy.jpg

PXL_20230816_085809908 copy.jpg


Work on the brass is very much underway.

Necks have been prepped and have had their stopper pins installed. These are cut by me, tapped in, and then filed down to the desired length:

BRASS.jpg


This is just one of many relatively small jobs, which at this scale, add up to quite a big chunk of time.

Necks are all ready for blacking. (Wednesday)

By then I'll be finished stamping the rings.

These have all been stenciled up and I'm now in the process of stamping them:

STENCILS.jpg

RINGS.jpg


I'm very nearly done with the remaining tasks for batch one now. In hindsight, the dates I gave previously didn't fully appreciate the extent to which a large number of very small tasks can add up to a surprisingly significant chunk of time.

They're now VERY near to completion. I'm still hesitant to put another date on things though based on recent experience.

I'll continue to keep everyone fully updated with progress and get through these as fast as possible!

I'm away this weekend though like I said, but will be back Sunday evening, so will pick things back up first thing Monday morning. (y)

In the meantime, if you have any questions, please do get in touch and I'll get back to you as soon as I can.

Thanks again everyone!

"Almost there....."

HANG ON.gif


All the best and MTFBWY,

Dave
 

Your message may be considered spam for the following reasons:

If you wish to reply despite these issues, check the box below before replying.
Be aware that malicious compliance may result in more severe penalties.
Back
Top