**UPDATE**
Hello everyone.
Just a very brief update if it’s ok...
Just to confirm that the new rails for the V1 Heroes arrived yesterday via FedEx! The correct size this time!
I now have everything needed to get the last remaining orders from February out to everyone, as well as all orders from this month too.
If you could just bear with me whilst I get the rails installed on to February’s commissions, I’ll get these on their way as soon as possible.
")
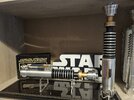
I had a chance yesterday to get an example put together and I’m very happy with the proportions this time. It’s a very subtle difference between the previous example, but hopefully you’ll agree that it was worth the additional wait for the correct size, and now that I have one made up there’s just no doubt that the profiles I ordered originally were definitely a size too big. Apologies again for the delay that this caused.
Here’s a finished (on-set) control box with the new rails:
View attachment 1799199
View attachment 1799201
View attachment 1799200
View attachment 1799202
View attachment 1799203
As well as the above example, I’ve cut all the rails I need to length (roughly):
View attachment 1799204
I have also now added the new rails to any outstanding DIY kits from February.
I’ll be packaging these up this evening and sending them on their way tomorrow. Expect to receive tracking details for these later today!
I have also been busy working on March’s orders too and I’m happy to say that
ALL small (non-hilt) orders are now ready to leave tomorrow too. This includes any DIY control box kits and Reveal boards.
For those who have asked, I have FINALLY put together a tutorial for the reveal boards! I’m so very sorry for the delay in getting this published. With everything that’s been happening, and all of the physical work, it’s been difficult to break away and spend time at the computer.
View attachment 1799205
Here it is though for those who need it:
V1 Reveal Board Tutorial
It’s maybe a little brief and expects you to refer to the images for positioning of each individual piece, but if you have any questions or would like me to expand on anything, please do get in touch.
I’ll be posting a similar tutorial for my DIY hilt kits soon!
For now though, I’m going to crack on with getting orders completed and on their way to their new homes.
I must prioritise February’s orders if that’s ok, but as I said, DIY kits are done and ready to be packaged up and sent out.
Based on the example control box I have already put together, I don’t foresee that it will be long before finished commissions are on their way too. Hopefully by the end of this week.
This will then leave two weeks of March remaining in which to focus on the small number of fully finished commissions I took on for this month. I have already made a start on preparing the parts for these by the way and expect to get all painting done early next week (week three) leaving week four for assembly and weathering.
Regarding fully finished commissions; I have had a couple of people drop out after placing orders this month unfortunately. As they had already been accounted for in my schedule, and have already been started, I added these back on to the store earlier today for anyone wishing to jump on to March’s commissions. These will be finished by the end of the month as planned.
I’m going to drop off the radar for now whilst I work my way through what needs to be done!
Please do get in touch though, if you have any questions regarding anything I’ve mentioned.
Thanks again for your support (and patience!) everyone!
All the best and
MTFBWY,
Dave